background image

PL

77

jest.możliwe.w.autoryzowanym.punkcie.

serwisowym.z.naszej.listy,.co.znacznie.

przyspiesza.procedury.gwarancyjne..

Naprawy.nie.objęte.gwarancją.można.zlecać.

odpłatnie.serwisom.z.naszej.listy...

Przyjmujemy.tylko.urządzenia.nadesłane.w.

odpowiednim.opakowaniu.z.opłaceniem.

pełnego.kosztu.przesyłki..

Uwaga: 

uszkodzonych urządzeń 

nie należy nigdy wysyłać z pełnym 

zbiornikiem paliwa i/lub oleju. Koniecznie 

opróżnij  wszystkie zbiorniki. Ewentual-

ne szkody materialne (olej i/lub benzyna 

wypływa, gdy urządzenie leży na boku 

lub “do góry nogami”) i szkody pożarowe 

podczas transportu obciążają nadawcę. 

W przypadku reklamacji gwarancyjnej 

lub zlecenia naprawy należy dostarczyć 

oczyszczone urządzenie wraz z 

informacją o usterce do któregokolwiek 

autoryzowanego serwisu z naszej 

listy. Przesyłki nadane bez uiszczenia 

wystarczającej opłaty pocztowej, w 

charakterze przesyłki o nietypowych 

wymiarach, ekspresem czy inną przesyłką 

specjalną nie będą przyjmowane. 

Utylizację przesłanych nam uszkodzonych 

urządzeń przeprowadzamy bezpłatnie.

Serwis naprawczy

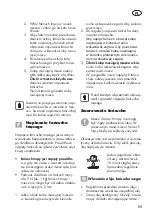
•. Naprawy.nie.objęte.gwarancją.można.

zlecać.odpłatnie.naszemu.centrum.ser-

wisowemu..Nasze.Centrum.Serwisowe.

chętnie.sporządzi.kosztorys.naprawy.

.

Przyjmujemy.tylko.urządzenia,.które.

zostały.nam.przysłane.w.odpowied-

nim.opakowaniu.z.opłaceniem.pełne-

go.kosztu.przesyłki.

•. Uwaga:.

W.przypadku.reklamacji.

gwarancyjnej.lub.zlecenia.naprawy.

użytkownik.powinien.dostarczyć.

oczyszczone.urządzenie.wraz.z.infor-

macją.o.usterce.pod.adres.naszego.

punktu.serwisowego..

.

Przesyłki.nadane.bez.uiszczenia.

wystarczającej.opłaty.poczto-

wej,.w.charakterze.przesyłki.o.

nietypowych.wymiarach,.eks-

presem.lub.inną.przesyłką.spe-

cjalną.nie.będą.przyjmowane.

•. Utylizację.Twoich.urządzeń.przepro-

wadzimy.bezpłatnie.

Summary of Contents for BKS 25 L

Page 1: ...s dlhou rukoväťou Benzininis ilgakotis grandininis pjūklas Originalbetriebsanleitung Traduction de la notice d utilisation originale Vertaling van de originele gebruiksaanwijzing Traduzione delle istruzioni per l uso in originale Translation of the original instructions for use Tłumaczenie oryginalnej instrukcji obsługi Překlad originálního návodu k obsluze Preklad originálneho návodu na obsluhu V...

Page 2: ... apparecchio Translation of the original instructions for use 99 Before initial start up please read through these operating instructions ca refully prior to using the machine Keep the instructions safe and pass them on to any subsequent user so that the information is always available Tłumaczenie oryginalnej instrukcji obsługi 62 Przed pierwszym uruchomieniem urządzenia uważnie przeczytaj tę inst...

Page 3: ...2 1 3 4 5 6 7 8 9 10 11 12 13 14 15 16 20 21 22 23 24 25 26 27 19 17 18 29 28 ...

Page 4: ...13 14 26 14 34 33 35 36 C D E F 40 38 39 23 ...

Page 5: ...21 41 G H J K L 17 16 18 20 13 11 19 19 37 37 12 ...

Page 6: ...und Entsorgung Machen Sie sich vor der Benutzung des Produkts mit allen Bedien und Sicherheitshinweisen vertraut Benutzen Sie das Produkt nur wie beschrieben und für die angegebenen Einsatzbereiche Bewahren Sie die Betriebsanleitung gut auf und händigen Sie alle Unterlagen bei Weitergabe des Produkts an Dritte mit aus Inbetriebnahme 13 Teleskopstiel verstellen 14 Griffverstellung 14 Sicheres Arbei...

Page 7: ... vorderen und hinteren Aus klappseite Lieferumfang Packen Sie das Gerät aus und kontrollieren Sie ob es vollständig ist Hochentaster Schwert Sägekette Schwertschutzhülle Schultergurt Rundgriff Zündkerzenschlüssel Betriebsanleitung Übersicht 1 Motorgehäuse 2 Zündkerzenstecker 3 Kraftstoffpumpe 4 Luftfilterdeckel 5 Chokehebel 6 Kraftstofftank 7 Anwerfgriff mit Starterseil 8 Gashebelsperre 9 Gashebel...

Page 8: ...ränderungen kön nen im Zuge der Weiterentwicklung ohne Ankündigung vorgenommen werden Alle Maße Hinweise und Angaben dieser Betriebsanleitung sind deshalb ohne Ge währ Rechtsansprüche die aufgrund der Betriebsanleitung gestellt werden können daher nicht geltend gemacht werden Sicherheitshinweise Dieser Abschnitt behandelt die grundlegen den Sicherheitsvorschriften bei der Arbeit mit dem Hochentast...

Page 9: ...mit der Motorsäge ar beiten machen Sie sich mit allen Bedienteilen gut vertraut Üben Sie den Umgang mit der Säge und las sen Sie sich Funktion Wirkungs weise und Sägetechniken von einem erfahrenen Anwender oder Fachmann erklären Achtung Lesen Sie folgende Sicher heitshinweise um Personen und Sachschäden zu vermeiden Dieses Gerät ist nicht dafür bestimmt durch Personen einschließlich Kinder mit ein...

Page 10: ...ig die Wartungs Kontroll und Serviceanweisungen in dieser Bedienungsanleitung Starten Sie die Motorsäge nie bevor Schwert Sägekette und Kupplungsde ckel korrekt montiert sind Sämtliche Wartungsarbeiten die nicht in dieser Anleitung angegeben werden dürfen nur vom Kundendienst für Ket tensägen ausgeführt werden Verwenden Sie nur Zubehörteile die in dieser Anleitung empfohlen werden Starten Sie die ...

Page 11: ...e des Schwertes der Rück schlagbereich B Bild 1 einen Gegen stand berührt oder das Holz die Kettensä ge im Schnitt einklemmt Halten Sie die Motorsäge immer mit beiden Händen gut fest mit der rech ten Hand am hinteren und mit der lin ken Hand am vorderen Handgriff Dau men und Finger müssen die Handgriffe fest umschließen Vermeiden Sie es mit der Schwertspit ze A Bild 1 oder über Schulterhöhe zu säg...

Page 12: ...eiten Sie niemals einhändig Achten Sie beim Sägen auf einen siche ren Stand Arbeiten Sie nicht auf einer Leiter im Baum oder unstabilen Stand orten Benutzen Sie den mitgelieferten Tragegurt Seien Sie beim Arbeiten im Gefälle sehr vorsichtig Sie könnten das Gleichge wicht verlieren Achten Sie beim Standortwechsel dar auf dass das Gerät ausgeschaltet ist Tragen Sie das Gerät mit nach hinten gerichte...

Page 13: ...ungs schraube gegen den Uhrzeigersinn um das Schwert leicht zu lösen Zum Spannen der Säge drehen sie die Kettenspannschraube im Uhrzeiger sinn Zum Lockern der Spannung drehen Sie die Kettenspannschraube gegen den Uhrzeigersinn Drehen Sie die Schwertbefestigungs schraube im Uhrzeigersinn um das Schwert wieder zu befestigen Bei neu gespannten Sägeketten ist die Kettenspannung nochmals nach kurzer Be...

Page 14: ...ungen ein Ziehen Sie die Schrauben fest Inbetriebnahme Lesen Sie vor der Inbetriebnahme die Sicherheitshinweise Tragen Sie beim Arbeiten mit dem Gerät geeignete Kleidung Arbeitshand schuhe sowie Kopf Augen und Gehörschutz Vergewissern Sie sich vor jeder Benutzung dass das Gerät funktionstüchtig ist Verwenden Sie nur Originalteile Überprüfen Sie die Funktionsfähigkeit und füllen Sie Kraftstoff ein ...

Page 15: ... mischung in den Benzintank Wischen Sie um den Tankde ckel Benzinreste ab und schlie ßen Sie den Tankdeckel wieder Prüfungen vor dem Starten des Gerätes Überprüfen Sie den sicheren Sitz des Zündkerzensteckers Bei losem Stecker können Funken entstehen und so aus tretendes Kraftstoff Luftgemisch entzün den Prüfen Sie die Leichtgängigkeit aller Schalter und die Funktionsfähigkeit der Schutzeinrichtun...

Page 16: ...ken Sie die Treibstoff pumpe Primer 20 6 x bis Kraftstoff austritt 5 Halten Sie das Gerät mit einer Hand am oberen Schaftrohr fest Mit der anderen Hand zie hen Sie mehrmals schnell das Starterseil am Anwerfgriff bis der Motor startet Achtung Starterseil nicht zu weit herausziehen Bruchge fahr 6 Lassen Sie den Motor ca 10 Se kunden aufwärmen 7 Falls das Gerät nicht startet wie derholen Sie Schritt ...

Page 17: ...Entlastungs schnitt s Abb a Dieser wird von unten ausgeführt Sägen Sie im unteren Drittel des Astes ei nen Einschnitt ein Der eigentliche Ablängungsschnitt s Abb b erfolgt wieder von oben in möglichst ei ner Linie mit dem ersten Schnitt um diesen zu treffen Absägen in Teilstücken Für große bzw lange Äste ist ein Absägen in Teilstücken zu empfehlen Nur so können Sie die Einschlagstelle des Schnittg...

Page 18: ...rhalb des Rundgriffs am Holm dort wo das Gewicht in Balance ist Das Gerät darf nur waagerecht transportiert werden Tragen Sie es so dass der Sicherheitsmesserbal ken nach hinten zeigt Achtung Verbrennungsge fahr Sorgen Sie dafür dass der heiße Auspuff weder Sie noch andere Personen oder brenn bare Gegenstände berühren kann Nach Beendigung der Arbeiten oder zum Transport über größere Strecken ist d...

Page 19: ... Betreiben Sie das Gerät nie ohne Kraftstofffilter Wechseln Sie regel mäßig den Kraftstofffilter K 1 Entleeren Sie den Kraftstofftank in ein geeignetes Gefäß 2 Ziehen Sie den Kraftstoff Saug kopf 41 mit einem Haken aus dem Tank heraus und ziehen Sie ihn durch Drehbewegung ab 3 Ersetzen Sie den Kraftstofffil ter und legen Sie den aufge steckten Saugkopf wieder in den Tank zurück Getriebegehäuse abs...

Page 20: ...erze wieder ein Ersatzteile Ersatzteile können Sie direkt über unser Service Center bestellen Geben Sie bei der Bestellung den Maschinentyp und die Positi onsnummer in der Explosionszeichnung an Entsorgung Umweltschutz Entsorgen Sie Ihr Gerät umweltgerecht Maschinen gehören nicht in den Hausmüll Entleeren Sie den Kraftstofftank sorgfäl tig und geben Sie Ihr Gerät an einer Verwertungsstelle ab Die ...

Page 21: ...nen Kostenvoranschlag Wir können Geräte nur bearbeiten die aus reichend verpackt und frankiert eingesandt wurden Achtung Bitte senden Sie defekte Geräte auf keinen Fall mit gefülltem Kraftstoff oder Öltank ein Entleeren Sie die Tanks unbe dingt Eventuelle Sachschäden Öl Benzin läuft aus wenn Gerät seitlich oder über Kopf gelegt wird bzw Brandschäden während des Transportes gehen zu Lasten des Ab s...

Page 22: ...sarbeiten regelmäßig durch Durch regelmäßige Wartung wird die Lebensdauer verlängert Sie erreichen zu dem optimale Schnittleistungen und vermeiden Unfälle Fehlersuche Problem Mögliche Ursache Fehlerbehebung Schlechte Schneid leistung Sägekette falsch montiert Sägekette richtig montieren Sägekette stumpf Schneidzähne schärfen oder neue Kette aufziehen Kettenspannung ungenügend Kettenspannung überpr...

Page 23: ...stopfter Kraftstofffilter Kraftstofffilter ersetzen oder rei nigen Motor läuft im Leerlauf zu schnell Motor kalt Langsam warm fahren Motor gibt keine Höchstleistung Verrußte Zündkerzen falscher Zündabstand Zündkerzen reinigen einstellen oder ersetzen Vergaser düsen verschmutzt falsch eingestellte Vergasermi schung Vergaser durch eine Fachwerk statt reinigen und einstellen lassen Falsches Kraftstof...

Page 24: ...sécurité générales pour outils électriques 7 Autres consignes de sécurité 10 Mesures de précaution contre le choc en arrière 11 Montage 11 Montage de la poignée ronde 11 Fixation de la bande d épaule 12 Montage de la lame 12 Montage de la chaîne 12 Tension de la chaîne 12 Lubrification de la chaîne 13 Mise en service 13 Réglage du manche télescopique 14 Réglage de la poignée 14 Travailler en sécur...

Page 25: ...ument sur la couverture Etendue de la livraison Déballez l appareil et vérifiez qu il est complet Elagueur à long manche Lame Chaîne de scie Gaine de protection de lame Sangle d épaule Poignée ronde Clé de bougie d allumage Notice d utilisation Vue d ensemble 1 Boîtier de moteur 2 Prise de bougie d allumage 3 Pompe à essence 4 Couvercle de filtre à air 5 Levier de starter 6 Réservoir de carburant ...

Page 26: ...Champion RC j6Y Des modifications techniques et optiques en vue d un perfectionnement sont pos sibles sans notification préalable C est pourquoi toutes les dimensions informa tions remarques et déclarations mention nées dans ce manuel sont sans engage ment de notre part Par conséquent des prétentions à des revendications juridiques qui se basent sur le manuel d instructions d emploi seront sans ef...

Page 27: ...nsignes de sécu rité ci après afin d éviter tout dom mage corporel ou matériels Cet appareil n est pas prévu pour être utilisé par des personnes y compris les enfants dont les capacités phy siques sensorielles ou mentales sont réduites ou des personnes dénuées d expérience ou de connaissance sauf si elles ont pu bénéficier par l inter Symboles sur la scie Attention Danger Lire le mode d emploi Por...

Page 28: ...e tout obstacle et si vous avez calculé une distance de repli devant l arbre s abattant Avant toute mise en marche assurez vous que l appareil n est en contact avec aucun objet Lors du sciage veillez à vous trouver dans une position stable Ne travaillez pas sur une échelle dans un arbre ou à un endroit instable Soyez très prudent si vous travaillez sur une déclivité Ne travaillez par avec une tron...

Page 29: ...tez videz le réservoir de carbu rant et d huile à chaîne Faites éliminer les carburants usagés en respectant les prescriptions Mesures préventives contre le choc en arrière En cas de choc en arrière l utilisateur reçoit un coup violent de la tronçon neuse à motor essence et du guide Il peut s ensuivre un perte de contrôle de la tronçonneuse à motor essence et des blessures graves Vous pouvez évite...

Page 30: ...élagueur à long manche en particulier la lame et la chaîne Ne démarrez jamais l appareil avant que la lame la chaîne de la scie et le couvercle du carter de chaîne ne soient montés correctement Assurez vous que lors de la mise en marche et pendant les travaux l appareil ne vienne pas au contact avec de la terre des pierres du fil ou d autres corps étrangers Arrêtez l élagueur à long manche avant d...

Page 31: ...e en tournant le tendeur de chaîne avant de mettre en place le couvercle du carter de chaîne jusqu à la butée dans la direction la vis de fixation de la lame 4 Remettez en place le carter de protection de la chaîne et vissez la fixation de la lame 5 La vis de fixation de la lame doit être vissée uniquement à la main sans forcer Le trou dans la lame est destiné à recevoir la goupille de serrage de ...

Page 32: ...ervoir une fois rempli suffit pour une exploita tion en continu d environ 10 minutes Contrôlez le niveau d huile suffisam ment à temps Remplissage du réservoir d huile de chaîne Vérifiez régulièrement le niveau d huile et remettez de l huile à temps Employez de l huile biologique Grizzly qui contient des éléments additifs rédui sant le frottement et l usure Vous pou vez commander l huile auprès de...

Page 33: ...b et d huile pour moteur à deux temps qualité API TC dans la proportion 40 1 Tableau pour le mélange carbu rant Essence Huile moteur 2 temps Grizzly 3 00 litres 75 ml 4 00 litres 100 ml 5 00 litres 125 ml Mélange 40 parts ess 1 part huile N utilisez jamais du carburant pur Utili sez exclusivement de l huile pour moteur à deux temps pas d huile pour moteur à quatre temps ou d huile pour moteurs ref...

Page 34: ...mission de l appareil La bretelle est équipée d une ferme ture rapide Vous pouvez desserrer le mousqueton en retirant ou en faisant glisser la courroie rouge du verrou métallique ou fixer celui ci directement sur l appareil Accrochez l appareil avant de démarrer le moteur et fixez le à la sangle de portage avec le moteur en marche Lancement du moteur Lancez le moteur à au moins 3 mètres de distanc...

Page 35: ...nes Prenez toute mesure utile pour être sûr que les enfants ne jouent pas avec cet appareil Changer régulièrement de position de travail Une utilisation plus longue de l appareil peut mener à de mauvaises irrigations sanguines conditionnées par la vibration des mains Cepen dant vous pouvez prolonger la durée d utilisation en portant des gants ap propriés ou en faisant régulièrement des pauses Fait...

Page 36: ...ez votre coupe du haut vers le bas comme représenté sur la figure ci contre Faites attention à une rupture anticipée de la branche au cas où vous vous auriez mal évalué les dimensions et le poids de celle ci D une manière générale faites attention voir fig a la chute de la branche une fois coupée Sciage de plus grosses branches Si vous décidez de scier de plus grosses branches vérifiez d abord que...

Page 37: ...s L affûtage d une chaîne de scie requiert de l habi tude En cas de doute il est préférable de remplacer la chaîne Changement réglage de la bougie L usure des bougies ou un intervalle d allumage trop important amoin drissent la performance du moteur 1 Eteignez l appareil 2 Retirez le fil de bougie de la bougie 3 Dévissez la bougie dans le sens inverse des aiguilles d une montre avec une clé de mai...

Page 38: ... Pour des pauses d utilisation de plus de 3 mois 4 Dévissez la bougie à l aide d une clé à bougie voir chapitre Changement réglage de la bougie 5 Versez une cuillerée à café d huile à deux temps pure dans la chambre de combustion puis tirez lentement et plu sieurs fois le câble de démarrage afin de répartir l huile dans l intérieur du moteur 6 Remettez la bougie en place Pièces de rechange Vous po...

Page 39: ...llant Vous pouvez faire exécuter les réparations qui ne sont pas soumises à la garantie par notre Centre de services contre facturation Nous vous établissons volontiers un devis Nous ne pouvons traiter que les appareils qui sont correctement emballés et suffisam ment affranchis Attention n envoyez en aucun cas des appareils défectueux avec un réservoir à huile ou à essence plein Videz impérati vem...

Page 40: ...e SAV La coupe est mauvaise Chaîne 1 mal montée Monter la chaîne correctement Chaîne 1 émoussée Aiguiser la denture ou monter une nouvelle chaîne Tension de chaîne insuf fisante Vérifier la tension La scie marche mal la chaîne 1 saute Tension de chaîne insuf fisante Vérifier la tension La chaîne 1 chauffe dégagement de fumée en sciant coloration de la lame Huile insuffisante Vérifier le niveau d h...

Page 41: ...Remplacer ou nettoyer le filtre à carburant Moteur tourne trop vite à vide Moteur froid Laisser chauffer en faisant touner au ralenti Moteur n atteint pas puissance maximale Bougies encrassées mauvais intervalle d allumage Nettoyer régler ou remplacer les bougies Carburateur et buses du carburateur encrassés mélange carburateur mal réglé Faire nettoyer et régler le carburateur par un atelier spéci...

Page 42: ...te Demandez conseil sur ce point à votre revendeur Grizzly Ne jetez pas les végétaux coupés à la poubelle mais compostez les Pièce Action Avant chaque usage Après chaque utilisation Machine complète Contrôler l état En cas de besoin échanger les pièces endommagées Vis et écrous ac cessibles Les resserrer Roue de chaîne 18 Contrôler remplacer le cas échéant Chaîne 1 Contrôler aiguiser le cas échéan...

Page 43: ...zaag 23 Algemene veiligheidsinstructies voor elektrisch gereedschap 24 Verdergaande veiligheidsinstructies 27 Veiligheidsmaatregelen tegen terugslag 28 Montagehandleiding 28 Ronde handgreep monteren 28 Schouderriem bevestigen 29 Zwaard monteren 29 Zaagketting monteren 29 Ketting aanspannen 29 Kettingsmering 30 Ingebruikname 30 Telescopische steel verstellen 31 Verstelling van de handgreep 31 Veili...

Page 44: ... achterste uitklapbare bladzijde Omvang van de levering Pak het apparaat uit en controleer of het volledig is Motorstokzaag Zwaard Ketting Zwaardbeschermende hoes Schouderriem Ronde handgreep Bougiesleutel Gebruiksaanwijzing Overzicht 1 Motorhuis 2 Bougiestekker 3 Brandstofpomp 4 Luchtfilterdeksel 5 Chokehendel 6 Brandstoftank 7 Starthandgreep met startkabel 8 Gashendelblokkering 9 Gashendel 10 Aa...

Page 45: ...ng onaangekondigd worden aange bracht Alle afmetingen aanwijzingen en gegevens in deze bedieningshandleiding zijn daarom onder voorbehoud Op basis van deze bedieningshandleiding kunnen daarom geen wettige aanspraken worden gemaakt Veiligheidsvoorschriften Dit gedeelte behandelt de fundamentele veiligheidsrichtlijnen bij het werken met de hoogsnoeier Een hoogsnoeier is een gevaarlijke machine die b...

Page 46: ... de motorzaag gaat werken moet u zich met alle bedie ningsonderdelen vertrouwd maken Oefen de omgang met de zaag en vraag een ervaren gebruiker of een vakman om u de functie de werking en de zaagtechnieken uit te leggen Lees bovendien volgende veilig heidsvoorschriften om lichamelijke letsels en materiële schade te ver mijden Dit apparaat dient niet om door perso nen kinderen inbegrepen met beperk...

Page 47: ...d ketting en koppelingsdeksel juist gemonteerd zijn Alle onderhoudswerkzaamheden die niet in deze gebruiksaanwijzing ver meld worden mogen uitsluitend wor den uitgevoerd door de servicedienst voor kettingzagen Gebruik uitsluitend onderdelen die in deze gebruiksaanwijzing worden aan bevolen De motorzaag nooit starten in gesloten of slecht geventileerde ruimtes omdat het gevaar bestaat dat de uitlaa...

Page 48: ...Duim en vinger moe ten de handvatten goed omsluiten Vermijd zagen met de punt van het zwaard of boven schouderhoogte Bij het zagen niet te ver voorover buigen U heeft een betere controle als u met de onderkant van het zwaard en niet met de bovenkant van het zwaard zaagt Wees bijzonder voorzichtig bij snoei werkzaamheden Zorg dat er geen voorwerpen op de grond liggen waar u over kunt struikelen Zaa...

Page 49: ...n pas dan te zagen Wees bij het zagen van kleine struiken en takken uiterst voorzichtig De dunne takken kunnen in de zaag verstrikt raken en uw richting uit slaan of u uit uw even wicht brengen Snoei geen op de grond liggend hout Let bij het zagen van een onder span ning staande tak op een mogelijke terug slag wanneer de spanning van het hout plots afneemt Er bestaat gevaar voor verwondingen Monta...

Page 50: ...erug te bevestigen Bij nieuw gespannen zaagkettingen 1 dient de kettingspanning nogmaals na een korte inschakelduur bijgeregeld te worden Kijk telkens vóór gebruik van de hoogsnoeier de kettingspanning na Kettingsmering Zwaard en zaagketting mogen nooit zonder olie zijn Bij veronacht zaming ontstaat er een verhoogde slijtage aan zwaard en zaagket ting De hoogsnoeier is met een automatische olie be...

Page 51: ...n niet in Ge vaar voor de gezondheid Montage 1 Pak het apparaat uit en contro leer of het volledig is 2 Monteer de dwarsarm aan de buisschacht als volgt Verwijder de afdekkap aan de dwarsarm Ontgrendel de beveiligingsknop en schuif de dwarsarm van de heggenschaar met lange steel op de buisschacht met een lichte draaiende beweging De beveili gingsknop klikt daarbij in de bo ring vast Draai de vleug...

Page 52: ... de tank met de mengsme ring Veeg benzineresten rond de dop van de tank op en draai de dop weer op de tank Controles voor het starten van het apparaat Controleer of de bougiestekker stevig vastzit Als de stekker loszit kunnen vonken ontstaan waardoor brand stofresten vlam kunnen vatten Controleer of alle schakelaars soepel gaan en of alle veiligheidsvoorzienin gen functioneren Controleer of er zic...

Page 53: ...rekt u meermaals snel aan de startkabel aan de starthand greep totdat de motor start Opgelet Startkabel niet te ver uittrekken gevaar voor een breuk 6 Laat de motor ca 10 seconden warmdraaien 7 Indien het apparaat niet start herhaalt u stap 3 tot 5 8 Houd de gashendel cold start warm start blokkering ingedrukt en bedien de gashendel Zet de chokehendel in positie Warme start 9 Bevestig het apparaat...

Page 54: ...rote c q lange takken is het afza gen in gedeelten aan te bevelen Enkel op deze manier kunt u de plaats van inslag van het te snoeien goed veilig beïnvloeden Ontruim de reeds pas gezaagde gedeelten uit de zone waar u zich bevindt Afzagen van grotere takken Kies bij grotere takken om ze gecontro leerd af te zagen eerst een ontlastings snede zie afb a Deze wordt langs onder uitgevoerd Zaag in het on...

Page 55: ...standen dient de motor uitgeschakeld te worden Schuif de mesbescherming over de veiligheidsmesbalk Onderhoud en reiniging Laat werkzaamheden die niet in deze bedieningshandleiding worden beschreven uitvoeren op een door ons geautoriseerd servicepunt Gebruik uitslui tend originele onderdelen Controleer regelmatig of de messen versleten zijn en laat ze regelmatig slijpen Door stompe messen te ge bru...

Page 56: ...araat uit 2 Trek de bougiekabel van de bougie 3 Draai de bougie tegen de wij zers van de klok in los met de bougiesleutel 4 Controleer de elektrodeafstand met een voelermaat verkrijg baar in de vakhandel De elektrodeafstand moet 0 6 0 7 mm bedragen zie kleine afbeelding 5 Stel de afstand eventueel opni euw in door de massa elektro de van de bougie voorzichtig bij te buigen 6 Reinig de bougie met e...

Page 57: ...evolgd kunnen brandstofresten in de carburateur startproblemen of permanente schade veroorzaken 1 Leeg de brandstoftank op een goed geventileerde plek 2 Start de motor en laat hem stationair draaien tot de motor niet meer loopt en er zich geen brandstof meer in de carburateur bevindt 3 Laat de motor afkoelen ca 5 minu ten Bij pauzes van langer dan 3 maan den 4 Draai de bougie los met een bougie sl...

Page 58: ...ntie is bovendien dat men zich gehouden heeft aan de onder houdsintervallen en dat men de voorschriften voor reiniging onderhoud en reparatie heeft gevolgd Schade ontstaan door materiaal of productiefouten wordt kosteloos door nieuwe onderdelen of reparatie verholpen Voor waarde is wel dat het apparaat in complete staat en met aankoop en garantiebewijs aan de handelaar terug wordt gegeven Garantie...

Page 59: ...troleren oliën indien nodig slij pen of vervangen Ketting Reinigen bij langer niet gebruik ook oliën Zwaard Controleren Zwaard Reinigen bij langer niet gebruik ook oliën Olietank Controleren indien nodig kettingolie bijvullen Tabel onderhoudsintervallen Voer de in onderstaande tabel opgesomde onderhoudswerkzaamheden regelmatig uit Door regelmatig onderhoud van uw zaag wordt haar levensduur verleng...

Page 60: ... Ketting loopt niet Kettingrem geblokkeerd ketting Kettingrem kontroleren eventueel rem ont grendelen Slechte snijpres tatie Ketting fout gemonteerd Ketting juist monteren Ketting stomp Zaagtanden scherpen of nieuwe ketting spannen Ontoereikende spanning Spanning kontroleren Zaag loopt moei zaam ketting springt los Onvoldoende spanning Spanning kontroleren Ketting wordt heet rookontwik keling bij ...

Page 61: ...rstopt Brandstoffilter vervangen of reinigen Motor loopt stationair te snel Motor koud Langzaam warm laten draaien Motor levert geen maximaal vermogen Roetaanslag op de bougies verkeerde elektrodeafstand Bougies reinigen instellen of vervangen Carburateur sproeiers verontreinigd verkeerd ingestelde menging Carburateur door een deskundige op een gespecialiseerde werkplaats laten reinigen en instell...

Page 62: ... bezpieczeństwa eksploatacji i utylizacji Przed rozpoczęciem użyt kowania produktu należy się zapoznać ze wszystkimi wskazówkami dotyczący mi obsługi i bezpieczeństwa Produkt należy użytkować tylko zgodnie z opisem i podanym przeznaczeniem Instrukcję należy przechowywać starannie a w przypadku przekazania produktu osobom trzecim należy dostarczyć nabywcy kompletną dokumentację Bezpieczna praca 30 ...

Page 63: ...akować i sprawdzić kompletność piła miecz łańcuch osłona miecza pas ramieniowy uchwyt okrągły klucz do świecy zapłonowej Instrukcja eksploatacji Przegląd 1 Obudowa silnika 2 Końcówka przewodu zapłono wego 3 Pompa paliwowa 4 Pokrywa filtru powietrza 5 Dźwignia ssania 6 Zbiornik paliwa 7 Linka rozruchowa z uchwytem 8 Blokada dźwigni gazu 9 Dźwignia gazu 10 Wyłącznik 11 Ucho pasa 12 Górna rura trzonu...

Page 64: ...związku z tym wszelkie podane w niniejszej instrukcji obsłu gi wymiary wskazówki i dane nie posiadają gwarancji bezwzględnej prawidłowości W związku z powyższym wyklucza się wszelkie roszczenia prawne zgłaszana na podstawie danych instrukcji obsługi Zasady bezpieczeństwa Ten rozdział zawiera podstawowe przepisy bezpieczeństwa dotyczące pracy z okrzesy warką Okrzesywarka jest niebezpiecznym urządze...

Page 65: ... START Dźwignia z pozycji pracy warm start Ogólne zasady bezpieczeństwa Przed rozpoczęciem pracy z pilarką łańcuchową zapoznaj się dokładnie z wszystkimi jej ele mentami Przećwicz sposób pracy pilarką i poproś doświadczonego użytkownika lub specjalistę o wyjaśnienie funkcji i sposobu działania pilarki oraz technik piłowania drewna Ostrożnie W ten sposób unikniesz wypadków i zranień To urządzenie n...

Page 66: ...yciem pilarki sprawdź jej stan techniczny a w szczególności stan prowadnicy i łańcucha Starannie przestrzegaj zawartych w niniejszej instrukcji obsługi wskazówek dotyczących konserwacji kontroli i serwisowania pilarki Nigdy nie uruchamiaj pilarki łańcuchowej przed prawidłowym zamontowaniem prowadnicy łańcucha i osłony sprzęgła Wszelkie prace konserwacyjne które nie są zawarte w niniejszej instrukc...

Page 67: ...ie prawidłowej techniki piłowania Podrzut to niespodziewany i błyskawiczny odskok pilarki i prowadnicy od przedmiotu Podrzuty występują gdy końcówka prowadnicy czyli strefa odbojowa zetknie się z jakimś przedmiotem lub gdy drewno spowoduje zacięcie się piły łańcuchowej w trakcie cięcia Zawsze mocno trzymaj pilarkę obiema dłońmi prawą ręką za tylny i lewą ręką za przedni uchwyt Kciuk i palce muszą ...

Page 68: ... się podczas uruchamiania i pracy z ziemią kamieniami drutem ani innymi ciałami obcymi Przed odło żeniem wyłączyć urządzenie Urządzenie zaprojektowano do pracy oburącz Nigdy nie pracować jedną ręką Podczas piłowania zwracać uwagę na bezpieczną pozycję Nie praco wać na drabinie na drzewie ani w miejscach niestabilnych Używać stale dostarczonego w komplecie pasa do noszenia Zachować dużą ostrożność ...

Page 69: ... nie mogą być od siebie oddalo ne o więcej niż 2 mm 1 Lekko obróć śrubę mocującą miecza w kierunku przeciwnym do kierunku ruchu wskazówek zegara aby poluzo wać miecz 2 Do regulacji napięcia łańcucha służy napinacz łańcucha Aby napiąć łańcuch obracaj śrubę napinającą w kierunku ruchu wskazówek zegara Aby poluzować łańcuch obracaj śrubę napinającą w kierunku przeciwnym do kierunku ruchu wskazówek ze...

Page 70: ... montażowych Dokręcić mocno śruby Uruchamianie Przed uruchomieniem urządzenia uważnie przeczytaj zasady bezpie czeństwa Podczas pracy z urzą dzeniem noś odpowiednią odzież rękawice robocze oraz osłonę gło wy oczu i nauszniki Przed każdym użyciem upewniaj się że urządzenie jest sprawne Stosuj tylko oryginalne części Sprawdź sprawność urządzenia i wlej paliwo Wlewanie paliwa Przy obchodzeniu się z p...

Page 71: ...szcze raz potrząśnij pojemnikiem D 3 Odkręć pokrywę zbiornika i wlej mieszankę paliwową do zbiornika paliwa Wytrzyj po krywę zbiornika paliwa z resz tek mieszanki i zamknij zbiornik paliwa Czynności kontrolne przed włączeniem urządzenia Sprawdź osadzenie wtyczki świec za płonowych w gniazdku Luźna wtycz ka może powodować iskrzenie i za płon mieszanki powietrzno paliwowej Sprawdź czy wszystkie prze...

Page 72: ... silnik obracaj zasysacz w pozycji cold start 4 Naciśnij 6 x pompę paliwową dopóki nie zacznie wyciekać paliwo 5 Chwyć urządzenie jedną ręką za górną rurkę Drugą ręką po ciągaj szybko linkę na rękojeści rozrusznika aż silnik zacznie pracować Uwaga Nie wyciągaj linki roz rusznika za daleko może się zerwać 6 Pozwól silnikowi pracować przez ok 10 sekund aby się rozgrzał 7 Jeżeli urządzenie nie zaskak...

Page 73: ...ie wstęp ne patrz rys a Należy je wykonać od dołu Zrób wcięcie w dolnej jednej trzeciej ga łęzi Właściwe przecięcie patrz rys b należy wykonać od góry możliwie w jednej linii z nacięciem wstępnym tak aby oba cię cia się połączyły Odcinanie w kawałkach W przypadku dużych wzgl długich gałęzi zaleca się odcinanie w kawałkach Tylko w ten sposób można pewnie kontro lować miejsce w którym upadnie odcięt...

Page 74: ... tyłu Uwaga Niebezpieczeństwo opa rzenia Upewnić się że gorący układ wy dechowy nie dotyka użytkownika osób trzecich ani przedmiotów palnych Po zakończeniu pracy lub do transportu na większe odległości silnik należy wyłączyć Nasunąć osłonę noży na belkę za bezpieczającą noże Oczyszczanie filtra powietrza Nigdy nie używaj urządze nia bez filtra powietrza W innym razie dojdzie do przeniknięcia pyłu ...

Page 75: ...pracy a nie przed każdym użyciem W tym celu wcisnąć ok 3 5 g smaru towotnicą Regulacja gaźnika Gaźnik jest wyregulowany fabrycznie na optymalną wydajność Jeżeli konieczna jest dodatkowa regulacja gaźnika zleć jej przeprowadzenie warsztatowi specjali stycznemu Ostrzenie zębów tnących Ostrzenie miecza pozostaw specjaliście względnie wykonuj je zgodnie z instruk cją obsługi posiadanego przyrządu do o...

Page 76: ...ć się po poradę do punktu sprze daży urządzeń Grizzly Nie wyrzucaj odciętych gałązek ich do śmieci domowych lecz przekaż je do kompostowania Gwarancja Na niniejsze urządzenie udzielamy 24 miesiącznej gwarancji To urządzenie nie jest przeznaczone do zastosowania komercyjnego W przypadku użytkowania ko mercyjnego wygasają prawa z tytułu gwarancji Szkody wywołane naturalnym zużyciem przeciążeniem lub...

Page 77: ...z naszej listy Przesyłki nadane bez uiszczenia wystarczającej opłaty pocztowej w charakterze przesyłki o nietypowych wymiarach ekspresem czy inną przesyłką specjalną nie będą przyjmowane Utylizację przesłanych nam uszkodzonych urządzeń przeprowadzamy bezpłatnie Serwis naprawczy Naprawy nie objęte gwarancją można zlecać odpłatnie naszemu centrum ser wisowemu Nasze Centrum Serwisowe chętnie sporządz...

Page 78: ...przez autoryzowany serwis Zła jakość cięcia Nieprawidłowo zamon towany łańcuch tnący Prawidłowo zamontuj łańcuch tnący Stępiony łańcuch tnący Naostrz zęby tnące lub załóż nowy łańcuch Niewystarczające napię cie łańcucha Sprawdź napięcie łańcucha Łańcuch ciężko chodzi łańcuch od skakuje Niewystarczające napię cie łańcucha Sprawdź napięcie łańcucha Łańcuch nagrzewa się przy piłowa niu powstaje dym m...

Page 79: ...ność Przed każdym użyciem Po każ dym użyciu Kompletna ma szyna Sprawdzić stan w razie potrzeby wymie nić uszkodzone części Dostępne śruby i nakrętki Dokręcić Koło łańcuchowe 18 Sprawdzić w razie potrzeby wymienić Łańcuch tnący 1 Sprawdzić w razie potrzeby naostrzyć lub wymienić Łańcuch tnący 1 Wyczyścić po dłuższym nieużywaniu także naoliwić Miecz 2 Sprawdzić Miecz 2 Wyczyścić po dłuższym nieużywa...

Page 80: ...ni di sicurezza generali per utensili elettrici 41 Ulteriori informazioni di sicurezza 43 Misure di sicurezza contro con traccolpo 44 Montaggio 45 Montaggio impugnatura circolare 45 Fissaggio tracolla 45 Montaggio lama 45 Montaggio della catena della sega 45 Tensione della catena trinciante 46 Lubrificazione della catena 46 Messa in esercizio 47 Regolare il manico telescopico 47 Regolazione impugn...

Page 81: ...gnatura circolare 60 ml l olio biologico Grizzly Chiave inbus Smaltire il materiale di imballaggio secon do le disposizioni Illustrazione 1 Alloggiamento motore 2 Spina candela di accensione 3 Pompa carburante 4 Coperchio filtro dell aria 5 Leva dello starter 6 Serbatoio carburante 7 Maniglia di avviamento con fune di avviamento 8 Blocco leva dell acceleratore 9 Leva dell acceleratore 10 Interrutt...

Page 82: ...nza preavviso Tutte le misure i dati e le indicazioni del presente manuale d uso sono riportati senza garanzia di alcun tipo Nessuna rivendicazione potrà essere avanzata in relazione alle presenti istruzioni per l uso Avvertimenti di sicurezza Questo capoverso tratta delle disposizioni di sicurezza fondamentali nel lavoro con la motosega elettrica La sega elettrica è un apparecchia tura pericolosa...

Page 83: ... start Simbolo presso la leva della valvola dell aria Leva in posizione di avvia mento a freddo Choke Leva in posizione di funzionamento Funzionamento Indicazioni generali di sicurezza Prima di iniziare a lavorare con la motosega familiarizzare con tutte le parti dell apparecchio Eserci tatevi sull uso della motosega e fatevi spiegare le funzionalità il modo d azione e le tecniche di taglio da per...

Page 84: ...on specificati nel presente manuale dovranno essere effettuati solo dal ser vizio assistenza motoseghe Utilizzare solo accessori raccomandati nel presente manuale Non avviare mai la motosega in am bienti chiusi o non ben ventilati in quanto si potrebbero respirare gas ve lenosi di scarico Assicurarsi che non ci siano persone o animali nelle vicinanze della zona di lavoro Fare attenzione che le imp...

Page 85: ...e con entrambe le mani con la mano destra sull impugnatura posterio re e quella sinistra sull anteriore I pol lici e le dita devono essere ben chiusi intorno alle impugnature Evitare di tagliare con la punta della lama A figura 1 o ad un altezza supe riore alle spalle Durante l operazione di taglio non inchinarsi troppo in avanti È più facile mantenere il controllo se si lavora con la parte inferi...

Page 86: ...indietro Per il trasporto applicare la custodia della lama Ad ogni taglio bloccare la battuta d arresto e iniziare solo allora a sega re Durante il taglio di piccole siepi e ra metti prestare particolare attenzione I rami sottili potrebbero impigliarsi nella sega e sbattere nella vostra direzione oppure farvi perdere l equilibrio Non tagliare legname adagiato al suo lo Durante il taglio di un ramo...

Page 87: ...re la tensione della catena girare la vite di tensionamento della catena in senso antiorario 3 Girare la vite di fissaggio della lama in senso orario per fissare nuovamente la lama Per le catene delle seghe serrate ex novo la tensione della catena deve essere regolata dopo un breve periodo d esercizio Prima di ogni uso del deramifica tore controllare la tensione della catena Lubrificazione della c...

Page 88: ...ite di arresto Stringere le viti Messa in esercizio Leggere le indicazioni di sicurezza prima della messa in esercizio Durante il lavoro con l apparecchio indossare un abbigliamento adatto guanti da lavoro come anche una protezione per la testa gli occhi e l udito Assicurarsi prima di ogni uso che l apparecchio sia funzionante Usa re solo ricambi originali Controllare il funzionamento e riempire c...

Page 89: ...ità di olio e agitare il contenitore Infine aggiungere il resto di benzina e agitare nuovamente D 3 Svitare il coperchio del ser batoio e versare la miscela di carburante nel serbatoio di ben zina Ora rimuovere i residui di benzina intorno al coperchio e richiuderlo Controlli prima dell avvio dell apparecchio Controllare la corretta sede della spina della candela di accensione Se la spina è allent...

Page 90: ...no a quan do fuoriesce carburante 5 Tenere saldamente l apparecchio con una mano sull asta tubolare superiore Con l altra mano tirare più volte rapidamente la corda di av viamento dalla maniglia di messa in moto fino all avviamento del motore Attenzione Non tirare ecces sivamente verso l esterno la corda di avviamento Pericolo di rottura 6 Lasciare riscaldare il motore per circa 10 secondi 7 Qualo...

Page 91: ...rantire un lavoro controllato vedere immagine a Questo taglio viene eseguito dal basso Praticare nel terzo inferiore del ramo un incisione Il taglio vero e proprio vedere immagine b avviene nuovamente dall alto possibilmen te in linea con il primo taglio per pareg giarlo Taglio in pezzetti Per rami grandi o lunghi si consiglia un taglio in pezzetti Solo in questo modo potete influenzare in modo si...

Page 92: ...la fine dei lavori o per il trasporto a lunghe distanze è necessario spegnere il motore Inserire la protezione lame sopra la barra portalama di sicurezza Pulizia del filtro dell aria Non azionare mai l appa recchio senza filtro dell aria Altrimenti polvere e sporcizia penetrano nel motore e cau sano danni alla macchina Tenere pulito il filtro dell aria J 1 Spegnere l apparecchio 2 Staccare la cope...

Page 93: ...La lubrificazione della trasmissione deve avvenire ogni 15 20 ore d esercizio non prima di ogni uso A tale proposito applicare ca 3 5 g di grasso medi ante un ingrassatore a siringa Impostazione del carburato re Il carburatore è stato preinstallato in fa bbrica su una prestazione ottimale Se si rendono necessari impostazioni successive si consiglia di farli eseguire da un officina specializzata Af...

Page 94: ... cana lizzazione o nello scolo Smaltire olio vecchio e residui di benzi na in modo ecologico consegnarli a un centro di smaltimento A tale proposito consultare il rivenditore Grizzly Non gettare i rami tagliati nel secchio della spazzatura ma introdurli nel com post Garanzia Per questo apparecchio forniamo 24 mesi di garanzia Questo apparecchio non è adatto per l uso industriale In caso di un impi...

Page 95: ... sono a carico del mittente Si prega di consegnare l apparecchiatura in caso di reclamo o di riparazione pulita e con l indicazione del difetto all indirizzo del nostro Servizio Assistenza Le apparec chiature inviate non affrancate come mer ce voluminosa per espresso o con altra spedizione speciale non potranno essere accettate Lo smaltimento degli apparec chio difettosi consegnati viene effettuat...

Page 96: ...trinciante 1 scorret tamente montata Montare catena trinciante corret tamente Catena trinciante 1 consu mata Affilare denti da taglio o mettere nuova catena Tensione insufficiente della catena Controllare tensione della catena Sega scorre con difficoltà catena 1 salta via Tensione insufficiente della catena Controllare tensione della catena Catena 1 si sur riscal da sviluppo di fumo durante il seg...

Page 97: ...lire in caso di un periodo di non utilizzo prolungato lubrificare Spranga di guida 2 Controllare Spranga di guida 2 Pulire in caso di un periodo di non utilizzo prolungato lubrificare Serbatoio dell olio Controllare nel caso necessario lubrificare Tabella degli intervalli di manutenzione Effettuare il lavori di manutenzione riportati nella seguente tabella ad intervalli regolari Con una manutenzio...

Page 98: ...o Sostituire o pulire il filtro carbu rante Il motore gira trop po velocemente nel funzionamento al minimo Motore freddo Fare riscaldare lentamente Il motore non ga rantisce la poten za massima Candele di accensione sporche distanza di accensione errata Pulire impostare o sostituire le candele di accensione Ugelli carburatore intasati mis cela carburatore errata Fare riparare e impostare il carbur...

Page 99: ...ral Safety Directions for Power Tools 41 Further safety directions 43 Precautions against spring back 44 Fitting 44 Assembling the Round Handle 45 Attaching the Shoulder Strap 45 Installing the Blade 45 Fitting the saw chain 45 Tensioning the saw chain 45 Chain lubrication 46 Operation startup 46 Adjusting the Telescopic Handle 47 Handle Adjustment 47 Working Safely 47 Sawing techniques 48 Sawing ...

Page 100: ...re complete Pole pruner Guide bar Saw chain Guide bar sheath Shoulder strap Round handle Spark plug wrench Instructions for use Overview 1 Motor casing 2 Spark plug connector 3 Fuel pump 4 Air filter lid 5 Choke lever 6 Fuel tank 7 Starter handle with starter cord 8 Throttle lock 9 Throttle 10 On Off switch 11 Eyelet for strap 12 Upper shaft tube 13 Antivibration handle 14 Spacer bow 15 Safety cat...

Page 101: ...ion of this instruction manual are therefore without guarantee Legal claims which are made on the basis of the instruction manual cannot thus be considered as valid Notes on safety This section deals with the basic safety regu lations while working with the high pruning saw An high pruning saw is a danger ous device which can cause serious or even fatal injuries with incorrect or careless use Thus...

Page 102: ...wing safety instructions This appliance is not intended for op eration by persons including children with reduced physical sensory or men tal capabilities or lacking experience and or knowledge unless they are under the supervision of or have been instructed on how to use the appliance by a person responsible for their safety Children should be supervised to pre vent them from playing with the app...

Page 103: ...shes and branches Small twigs and branches may get caught in the saw and be hurled in your direction or unbalance you When sawing a branch under tension beware of a possible rebound when the tension in the wood is suddenly re lieved Risk of injury Turn off the motor before putting down the chainsaw When moving to another place check that the chain brake is applied to the saw chain and that the mot...

Page 104: ... is not intended for use by persons including children with reduced physical sensory or mental capabilities or lack of experience and knowledge unless they have been given supervision or instruction concern ing use of the appliance by a person responsible for their safety Children must be supervised in order to ensure that they do not play with the equipment Damaged cables coupling and plugs or co...

Page 105: ...in wheel cover 6 4 Replace chain wheel cover 6 and screw on blade fixing 4 5 Blade fixing screw 4 is simply to be tightened lightly by hand Hole 20 on the blade is the holder for chain tensioning pin 21 Thread 19 is the holder for blade fixing screw 4 Ensure that chain tensioning pin 21 is positioned in hole 20 on the blade The pin must be com pletely inserted into the hole Tensioning the saw chai...

Page 106: ...n the package and check if its contents are complete 2 Proceed as follows to mount the arm 7 on the tube shaft Remove the cap from the arm 7 Unlock the securing pin 8 and give the arm 7 of the long reach hedge trimmer a slight turn to slide it onto the tube shaft This will make the securing pin 8 snap into the bore 27 Tighten the wing nut 9 3 There are 3 mounting points for the handle along the al...

Page 107: ... the petrol then all of the oil then shake the canister Fill in the rest of the petrol and shake the canister again D 3 Remove the filler cap and fill the fuel mixture into the petrol tank Wipe spilled fuel from around the filler opening and replace the filler cap Tests before starting the appliance Verify that the spark plug connector is attached properly A lose connector may produce sparks that ...

Page 108: ...el starts coming out 5 Hold the equipment firmly with one hand on the top shaft tube 37 With the other hand pull the starter cable several times on the starter handle 19 until the engine starts Caution Do not pull the starter cable out too far risk of breaking 6 Let the engine warm up for about 10 seconds 7 If the equipment does not start repeat stages 3 to 5 8 Hold the throttle lever cold start w...

Page 109: ...ade from below Saw a notch in the lower third of the branch The actual length cut s ill b is again made from the top as far as possible in line with the first cut so that the two cuts meet Sawing Off Parts For large long branches sawing off in parts is recommended This is the only way to safely ensure the point of impact of the cut material Clear away from the area in which you are standing any pa...

Page 110: ... that the hot exhaust can come into contact neither with you nor with other peop le or combustible objects Switch off the motor after finishing work or to transport over larger distances Push the blade guard over the safe ty cutting blade Cleaning the air filter Do not operate the appliance without the air filter Dust and dirt will otherwise get into the engine and cause damage to the machine Keep...

Page 111: ...readjust ments that may become necessary should be made by an expert Resharpening of the saw chain Leave the resharpening of a saw chain to an expert or proceed according to the instructions of your saw chain sharpener Resharpening a saw chain takes some prac tice If in doubt replacing the saw chain is preferable Storage General storage instructions Carefully clean the appliance and its accessorie...

Page 112: ...ude saw chain bar sprocket wheel fuel filter air filter starter cord and spark plugs unless the complaint is attributable to material defects Other damages excluded from the warranty are motor damages caused by using the wrong fuel or a wrongly mixed fuel as well as all damage to the machine saw chain and guide bar caused by insufficient lubri cation To qualify for any warranty claims you must als...

Page 113: ...rthermore you get optimum cutting performance and avoid accidents We will not accept units handed in with postage not paid be it as bulk goods ex press or other special delivery Defective units returned to us will be dis posed of for free Repair Service Contact our Service Centre for repairs not subject to this warranty Repairs can be made at normal charges Our Service Centre will send you a cost ...

Page 114: ...rior cutting performance Incorrectly mounted saw chain 1 Mount saw chain correctly Saw chain 1 blunt Sharpen cutting teeth or place on new chain Chain tension insufficient Check chain tension Saw runs with difficulty chain 1 comes off Chain tension insufficient Check chain tension Chain 1 becomes hot smoke develop ment during sawing discol oration of the rail Too little chain oil Check oil level a...

Page 115: ...y řezání 63 Odříznutí malé větve 63 Odříznutí větších větví 63 Odříznutí po částech 63 Přeprava 64 Čištění 64 Uložení 64 Naostření řezacích zubů 64 Likvidace ochrana životního pro středí 64 Přiložené příslušenství 64 Náhradní díly 64 Intervaly údržby 65 Hledání chyb 66 Záruka 67 Opravna 68 Service Center 68 Autorizované servisy 68 Překlad originálního prohlášení o shodě CE 103 Výkres rozloženého p...

Page 116: ...vý řetěz ochranný kryt pro řezací lištu ramenní pás kruhové držadlo klíč na zapalovací svíčky návod k obsluze Přehled 1 Skříň motoru 2 Konektor zapalovací svíčky 3 Palivové čerpadlo 4 Víko vzduchového filtru 5 Páčka sytiče 6 Palivová nádrž 7 Roztáčecí rukojeť se startovacím lankem 8 Jištění páčky plynu 9 Páčka plynu 10 Vypínač 11 Závěsné oko pro nosný pás 12 Horní trubka s dříkem 13 Antivibrační r...

Page 117: ... změny mohou být během dalšího vývoje změněny bez oznáme ní předem Všechny rozměry pokyny a úda je této příručky jsou proto bez záruky Právní nároky které mohou být vzneseny na zákla dě této příručky nemohou být uplatněny Bezpečnostní pokyny V tomto odstavci jsou uvedeny základní bezpečnostní předpisy při práci s vyvětvo vací pilou Vyvětvovací pila je nebezpečný pří stroj který může při chybném ne...

Page 118: ...eznamte se všemi obslužnými prvky Vyzkoušejte si manipulaci s pilou a nechejte si zkušeným uživatelem nebo odborníkem vysvětlit funkci činnost a tech niky řezání Pozor Přečtěte si následující bezpečnostní pokyny abyste zabránili poranění osob a věcným škodám Tento přístroj není určen k tomu aby jej používaly osoby včetně dětí s omezenými fyzickými senzorickými nebo duševními schopnostmi nebo s ned...

Page 119: ...apínejte v uzavře ných nebo špatně větraných prosto rech protože hrozí nebezpečí vdecho vání výfukových plynů motoru Dbejte na to aby se v blízkosti pra covního úseku nezdržovali žádní lidé nebo zvířata Dbejte na to aby byly rukojeti při prá ci suché a čisté Při řezání malých keřů a větví buďte velmi opatrní Tenké větve se mohou do pily zaplést švihnout směrem k vám nebo vás mohou vyvést z rovnová...

Page 120: ...ně naostřený pilový řetěz špatná výbava pro řezání nebo nevhodná kombi nace lišty a pilového řetězu zvyšují nebez pečí zpětného rázu Hrozí nebezpečí poranění Další bezpečnostní pokyny Tento nástroj není určen na to aby byl používaný osobami včetně dětí s omezenými fyzickými smyslovými anebo duševními schopnostmi anebo osobami s nedostatkem zkušeností a anebo znalostí ledaže jsou pod dohle dem aneb...

Page 121: ...ím Umístěte pilový řetěz 1 do drážky řezací lišty 2 a na řetězové kolo K upnutí otáčejte šroubem k upnutí řetězu 21 ve směru hodinových ručiček K uvolnění upnutí otáčejte šroubem k upnutí řetězu 21 proti směru hodinových ručiček Opět umístěte kryt řetězového kola 6 a přišroubujte připevnění řezací lišty 4 Šroub pro připevnění řezací lišty 4 utahuj te pouze lehkou silou ruky Otvor 20 v řezací liště...

Page 122: ... adresa na straně 68 Pokud nemáte Grizzly Bio olej k dis pozici použijte olej na mazání řetězů s nízkým podílem přilnavých přísad 1 Odšroubujte víko olejové nádrže 23 a naplňte řetězový olej do nádrže 2 Otřete olej který jste případně rozlili a opět zavřete víko olejové nádrže 23 Nezapomeňte že se pila může dodatečně namazat olejem Montáž 1 Přístroj vybalte a zkontrolujte zda je kompletní 2 Tyč 7 ...

Page 123: ...měru 40 1 Tabulka palivové směsi Benzin Grizzly Olej pro dvou taktní motoryl 3 00 litry 75 ml 4 00 litry 100 ml 5 00 litry 125 ml Míchání 40 dílů benzínu 1 díl olejel Nikdy nepoužívejte neředěné palivo Používejte pouze olej pro dvoutaktní motory ne olej pro čtyřtaktní motory ani olej pro motory chlazené vodou Při nerespektování se může poškodit motor a Vy ztratíte nárok na záruku 1 Benzín a olej m...

Page 124: ... metry od místa plnění pohonných hmot G 1 Přístroj položte na pevný rovný podklad Ujistěte se že řezací nástroj se nedotýká předmětů ani země 2 K zapnutí zapalování nastavte vypínač 11 do polohy I 3 Při studeném startu cold start warm start otáčejte sytičem 18 na polohu cold start 4 6x stiskněte palivové čerpadlo Primer 20 dokud nezačne vytékat palivo 5 Přístroj jednou rukou držte za horní trubku ...

Page 125: ...přetržitého pro vozu není z bezpečnostních důvodů možná 5 Po skončení provozu může z přístroje uni kat nízké zbývající množství řetězového oleje Nastavení teleskopické tyče Teleskopickou tyč lze nastavovat plynule pomocí rychlouzávěru 15 1 Překlopte páku podle obrázku dopředu a můžete délku tyče měnit posunováním a taháním 2 Páku opět překlopte zpět a zafi xujte tak požadovanou pracovní délku tele...

Page 126: ...ez viz obr a Tento řez označený na vedlejším obrázku písmenem a se provádí zespodu Vyřízněte ve spodní třetině větve zářez Vlastní zkracovací řez viz obr b se opět provádí shora pokud možno v jedné linii s prvním řezem aby se s ním potkal Odříznutí po částech Pro velké popř dlouhé větve doporučuje me řezání po částech Jen tak můžete bezpečně ovlivnit místo dopadu řeziva Odstraňte již zkrácené část...

Page 127: ...lem a vodou Nikdy nepoužívejte ben zín 5 Nechte filtr na vzduchu uschnout 6 Filtr v obráceném pořadí opět vložte Vzduchový filtr vyměňte za nový je li opotřebovaný poškozený nebo silně zašpiněný Vyměnit seřídit zapalovací svíčku Opotřebované zapalovací svíčky nebo příliš velká vzdálenost elektrod vedou ke snížení výkonu motoru K 1 Přístroj vypněte 2 Zapalovací kabel 16 stáhněte ze zapalovací svíčk...

Page 128: ...edešli tvorbě plísně viz Údržba a čištění Přístroj uchovávejte na suchém a před prachem chráněném místě mimo dosah dětí Přístroj nebalte do umělohmotných pyt lů protože by se mohla tvořit vlhkost a plíseň Uložení během přestávek v provozu Nerespektování těchto pokynů pro uložení může vzhledem ke zbytkům paliva v karburátoru vést k problémům při startování nebo k trvalému poškození 1 Palivovou nádr...

Page 129: ...použití nesprávného paliva nebo nespráv ného poměru množství oleje v benzinu a všechna poškození stroje pilového řetězu a lišty které lze odvodit z nedostatečného mazání Předpokladem poskytnutí záručních výkonů je aby byly dodrženy intervaly údržby uvedené v návodu k obsluze a uživatel se řídil pokyny k čištění údržbě a opravám Škody vzniklé na základě chyb materiálu nebo výrobních chyb budou odst...

Page 130: ...cílíte optimálních řezných výkonů a zamezite nehody Část přístroje Akce Před každým použitím Po každém použití Kompletní stroj Zkontrolujte stav poškozené díly v přípa dě potřeby vyměňte Přístupné šrouby a matice dotáhněte Řetězové kolo 18 Zkontrolujte v případě potřeby vyměňte Pilový řetěz 1 Zkontrolujte v případě potřeby dobruste nebo vyměňte Pilový řetěz 1 Vyčistěte v případě že přístroj nebude...

Page 131: ...vede zákaznický servis Špatný řezací výkon Pilový řetěz 1 je špatně namontovaný Správně namontujte pilový řetěz Pilový řetěz 1 je tupý Řezací zuby naostřete nebo natáhněte nový řetěz Napětí řetězu je nedostatečné Zkontrolujte napětí řetězu Pila běží těžce řetěz 1 odskakuje Napětí řetězu je nedostatečné Zkontrolujte napětí řetězu Řetěz se zahřívá při řezání 1 se vytváří kouř zbarvení řezací lišty P...

Page 132: ... odborné dílně vyčistit a seřídit Ucpaný palivový filtr Vyměnit nebo vyčistit palivový filtr Motor běží naprázdno příliš rychle Motor je studený Pomalu zahřívat motor Motor nedává plný výkon Zapalovací svíčky zanesené sazemi chybná vzdálenost elektrod Zapalovací svíčky očistit seřídit nebo vyměnit Karburátor trysky karburátoru jsou zašpiněné chybně nastavená směs pro karburátor Karburátor nechat v...

Page 133: ...oduktu Obsahuje dôležité upozornenia ohľadom bezpečnosti obsluhy a likvidácie Pred používaním produktu sa obo známte so všetkými pokynmi pre obsluhu a bezpečnosť Používajte produkt len predpísaným spôsobom a len v uvedených oblastiach použitia Návod na obsluhu uschovajte a v prípade odovzdania produktu tretím osobám odovzdajte aj všetky podklady Bezpečná práca 78 Techniky rezania 79 Odrezanie male...

Page 134: ...dvetvovač Nôž Pílová reťaz Ochranné puzdro noža Ramenný popruh Okrúhle držadlo Kľúč na sviečky Návod na obsluhu Prehľad 1 Kryt motora 2 Konektor sviečky 3 Palivové čerpadlo 4 Kryt vzduchového filtra 5 Páka sýtiča 6 Palivová nádrž 7 Štartovacia úchytka s lankom štartéra 8 Poistka plynovej páky 9 Plynová páka 10 Zapínač vypínač 11 Závesné oko pre nosný popruh 12 Horná tyč 13 Antivibračná úchytka 14 ...

Page 135: ...e jedného elektrického prístroja s druhým Uvedená emisná hodnota vibrácií môže byť použitá aj na úvodné posúdenie vysa denia prístroja Bezpečnostné pokyny Tento odsek sa týka základných bezpečnos tných predpisov pri práci s odvetvovačom Odvetvovač na vysúvateľnej tyči je nebezpečným prístrojom ktorý pri nesprávnom alebo nedbanlivom používaní môže spôsobiť vážne alebo dokonca smrteľné zranenia Pret...

Page 136: ...zanie s pílou a nechajte si od skúseného používateľa alebo odborníka vysvetliť funkciu spôsob činnosti a tech niky pílenia Pozor Prečítajte si nasledujúce bezpeč nostné pokyny aby ste sa vyhli porane niam a vecným škodám Tento prístroj nemôžu používať osoby vrátane detí s obmedzenými fyzic kými senzorickými alebo duševnými schopnosťami alebo s nedostatkom skúseností a alebo nedostatkom vedo mostí ...

Page 137: ...o nedostatočne vetraných priestoroch nakoľko hrozí nebezpečen stvo vdýchnutia motorových spalín Dbajte na to aby sa v blízkosti pracov ného priestoru nenachádzali žiadne osoby alebo zvieratá Dbajte na to aby boli rukoväte pri prá ci suché a čisté Pri pílení malých kríkov a konárov buďte obzvlášť opatrní Tenké vetvy sa môžu v píle zachytiť a udrieť vašim sme rom alebo vás vyviesť z rovnováhy Pri pí...

Page 138: ...obcom Nesprávne náhradné nože a pílové reťaze môžu spôsobiť roztrhnutie reťaze a alebo spätný náraz Nesprávne naostrená pílová reťaz nespráv na rezná výstroj alebo nevhodná kombi nácia noža a pílovej reťaze zvyšujú riziko spätného nárazu Hrozí nebezpečenstvo poranenia Pokračujúce bezpečnostné pokyny Tento prístroj nie je určený na to aby ho používali osoby vrátane detí s obmedzenými fyzickými senz...

Page 139: ...kosené rezné hrany člán kov reťaze boli vyrovnané v sme re hodinových ručičiek Porovnajte si to s detailným ob rázkom 2 Pílovú reťaz 1 nasaďte do dráž ky lišty 2 a na reťazové koleso 18 3 Pre uľahčenie montáže umiestnite napínací kolík reťaze 21 oto čením napínača reťaze 5 pred nasadením krytu reťazového kolesa 6 až na doraz smerom k skrutke na upevnenie noža 4 4 Opäť nasaďte späť kryt reťazové ho...

Page 140: ...ujte stav oleja a včas olej doplňte Používajte bio olej od firmy Grizzly ktorý obsahuje prísady na zníženie trenia a opotrebovania Môžete si ho objednať prostredníctvom nášho servis ného strediska pozri adresu na strane 84 Ak nemáte k dispozícii bio olej od firmy Grizzly tak používajte olej na mazanie reťaze s nízkym podielom prímesí ktoré sa usadzujú na stenách Odskrutkujte veko nádrže na olej 23...

Page 141: ...rúčanú v návode Nesmie byť staršia ako 3 mesiace Pri nedodržaní sa môže motor poškodiť a stratíte nárok na záruku Zabráňte priamemu kontaktu kože s benzínom a vdýchnu tiu benzínových výparov Hro zí nebezpečenstvo ohrozenia zdravia Prístroj je poháňaný zmesou z bezolovnatého benzínu a mo torovým olejom pre dvojtaktný motor kvality API TC v pome re 40 1 Tabuľka pre palivovú zmes Benzin Grizzly olej ...

Page 142: ...pruh je opatrený rých louzáverom Háčik karabíny 34 môžete uvoľniť vytiahnutím resp zatlačením kovovej spony 36 na chádzajúcej sa na červenom páse 35 alebo upevniť bez toho aby ste ho zavesili na prístroj Odveste prístroj predtým ako spus títe motor a pripevnite ho s bežiacim motorom na nosný popruh Štartovanie motora Spustite motor minimálne tri metre od miesta plnenia G 1 Položte prístroj na pevn...

Page 143: ...rukavíc alebo pravidelnými prestávkami Dbajte nato že osobné dispozície k horšiemu prekrveniu nízke vonkajšie teploty alebo veľká sila uchopenia pri práci znižujú dobu používania Preprava Pri preprave používajte ochranné pu zdro na lištu 24 Pri prenášaní uchopte prístroj pod okrúhlym držadlom na žrdi tam kde je hmotnosť v rovnováhe Prístroj sa môže prenášať len vodorovne Neste ho tak aby bez pečno...

Page 144: ...čovací rez pozri obr a Tento sa uskutoční zdola na vedľajšom ob rázku je označený písmenom a Vykonajte zárez do spodnej tretiny vetvy Samotný odrezanie po dĺžke pozri obr b sa uskutoční opäť zhora podľa možnosti v jednej línii s prvým rezom aby ste sa týmto stretli Rozrezanie na časti Pre veľké príp dlhé konáre sa odporúča rozrezanie na časti Len takto si môžete bezpečne pôsobiť v mieste rezania o...

Page 145: ...vého filtra Palivový filter pra videlne vymieňajte L 1 Palivovú nádrž 21 vyprázdnite jej obsah vylejte do vhodnej ná doby 2 Saciu hlavu 41 vytiahnite po mocou háka z nádrže a otáča vým pohybom ju odmontujte 3 Palivový filter vymeňte a nasa denú saciu hlavu vráťte do pali vovej nádrže Mastenie krytu prevodovky M Kryt prevodovky 2 má dve tlako vé maznice 3a a 3b Dodatočné mazanie prevodovky by sa ma...

Page 146: ...ky Stroje nepatria do domáceho odpadu Palivovú nádrž starostlivo vyprázdnite a odovzdajte váš prístroj do zberného miesta Použité plastové a kovové diely sa môžu podľa druhu rozdeliť a odovzdať do zberného miesta Nevylievajte starý olej a zvyšky ben zínu do kanalizácie alebo do odtoku Zlikvidujte starý olej a zvyšky benzínu ekologicky odovzdajte ich do zberného miesta Informujte sa u predajcu Griz...

Page 147: ...ak sa prístroj položí nabok alebo na hlavu resp škody po požiari počas transportu prechádzajú na ťarchu odosielateľa V prípade reklamácie alebo opravy odo vzdajte váš prístroj vyčistený a s informáci ou o chybe Neprevezmeme prístroje odoslané na náklady príjemcu neskladný tovar ex presné alebo odoslané s iným špeciálnym nákladom Likvidáciu vašich poškodených doručených prístrojov vykonáme bezplatn...

Page 148: ...ým použitím Po kaž dom použití Kompletný stroj Preveriť stav poškodené časti v prípade potreby vymeniť Prístupné skrutky a matice Dotiahnuť Reťazové koleso 18 Prekontrolovať v prípade potreby vymeniť Reťaz píly 1 Prekontrolovať v prípade potreby dobrúsiť alebo vymeniť Reťaz píly 1 Vyčistiť pri dlhšom nepoužívaní aj naolejovať Lišta 2 prekontrolovať Lišta 2 Vyčistiť pri dlhšom nepoužívaní aj naolej...

Page 149: ...rostredníctvom zákaz níckeho servisu Zlý výkon pri rezaní Pílová reťaz 1 je namonto vaná zle Pílovú reťaz namontujte správne Pílová reťaz 1 je tupá Nabrúste rezné zuby alebo na tiahnite novú reťaz Nedostatočné napnutie reťaze Preverte napnutie reťaze Píla beží ťažko reťaz 1 odskakuje Nedostatočné napnutie reťaze Preverte napnutie reťaze Reťaz 1 sa prehrie va pri rezaní sa vytvára dym zmena farby l...

Page 150: ...om ser vise Upchatý palivový filter Vymeňte alebo vyčistite palivový filter Motor beží na voľnobeh príliš rýchlo Motor je studený Motor pomaly zahrievajte Motor nepo dáva najvyšší výkon Zanesené zapaľovacie sviečky nesprávny odstup medzi kontakt mi prerušovača Zapaľovacie sviečky vyčistite na stavte alebo vymeňte Karburátor trysky znečistené nesprávne nastavená zmes kar burátora Nechajte karburáto...

Page 151: ...ri etaisu atidžiai perskaitykite eksploatavimo instrukciją ir tinkamai susipažinkite su visais valdymo elementais Jei kiltų klausimų kreipkitės patarimo į specialistą Saugokite šią instrukciją ir prireikus perduokite kitam naudotojui kad būtų galima bet kada pasinau doti instrukcijoje esančia informacija Transportavimas 141 Bendrieji techninės priežiūros ir valymo darbai 142 Oro filtro valymas 142...

Page 152: ...ndinė Pjovimo juostos apsauginis dėklas Pečių srities diržas Apvali rankena Uždegimo žvakės raktas Eksploatavimo instrukcija Apžvalga 1 Variklio korpusas 2 Uždegimo žvakės kištukas 3 Degalų siurblys 4 Oro filtro dangtelis 5 Choke svirtis 6 Degalų bakas 7 Paleidimo rankenėlė su paleidi mo lynu 8 Greičio valdymo svirties blokato rius 9 Greičio valdymo svirtis 10 Įjungimo ir išjungimo jungiklis 11 Ne...

Page 153: ...o ir vibracijos reikšmės buvo apskaičiuotos remiantis atitikties deklaraci joje nurodytais standartais ir nuostatomis Nuolat toliau tobulinant gaminius galimi techniniai ir optiniai pakeitimai apie kuriuos iš anksto neįspėjama Dėl šios priežasties neužtikriname kad atitiks visi šioje eksploatavimo instrukcijoje pateikti matmenys nurodymai ir duomenys Dėl to mes nepriimame teisinių pretenzijų dėl e...

Page 154: ...ymo santykis 40 1 naudokite TIK degalų mišinį Simbolis ant degalų siurblio Prieš paleisdami degalų siurblį paspauskite 6 kartus cold start warm start Simbolis ant Choke svirties Svirtis šaltosios paleisties padėtyje START Svirtis šiltosios paleisties padėtyje RUN Bendrieji saugos reikalavimai Prieš pradėdami dirbti su varikliniu pjūklu tinkamai susipažinkite su visais valdymo elementais Išmokite v...

Page 155: ...rba be gamintojo sutikimo rekonstruotu varikliniu pjūklu Nie kada nenaudokite variklinio pjūklo kai apsauginė įranga pažeista Prieš kiekvieną naudojimą patikrinkite va riklinio pjūklo saugos būklę ypač apžiūrėkite pjovimo juostą ir grandinę Atidžiai laikykitės šioje naudoji mo instrukcijoje pateiktų techninės priežiūros kontrolės ir apžiūros nurodymų Niekada nebandykite užvesti varikli nio pjūklo ...

Page 156: ...daikto Jis atsiranda kai pjovimo juostos viršūnė atgalinio smūgio sritis B 1 paveikslėlis paliečia daiktą arba pjaunant grandininis pjūklas įstringa medienoje Variklinį pjūklą visada laikykite tvirtai abiem rankomis dešine ranka paimkite už apatinės rankenos o kaire už priekinės rankenos Rankenas turite tvirtai apimti nykščiu ir pirštais Stenkitės nepjauti pjovimo juostos viršūne A 1 paveikslėlis ...

Page 157: ...eidami į kitą vietą patikrinkite ar prietaisas išjungtas Prietaisą neškite grandinę ir pjovimo juostą nukreipę atgal Prieš transportuodami uždėkite pjovimo juostos apsauginį dėklą Prieš pjaudami pritvirtinkite dantytąją atramą ir tik tada pradėkite pjauti Pjaudami mažus krūmus ir šakas būkite itin atsargūs Pjūklas gali sugriebti plonas šakeles ir išsviesti link jūsų arba jas pjau dami jūs galite n...

Page 158: ...pjovimo juostą 2 Jei pjovimo grandinės 1 buvo įtemptos neseniai jų įtempimą reikia vėl pakore guoti to tam tikro eksploatavimo laiko Prieš kiekvieną stiebinio variklinio genėtuvo naudojimo patikrinkite grandinės įtempimą Grandinės tepimas Pjovimo juosta 2 ir pjovimo grandinė 1 visada turi būti su teptos alyva Jei nekreipsite į tai dėmesio pjovimo juosta 2 ir pjovimo grandinė 1 greičiau nusidėvės S...

Page 159: ...kių ir klausos organų apsaugas Prieš kiekvieną naudojimą įsitikinkite kad prietai sas veikia tinkamai Naudokite tik originalias dalis Patikrinkite ar funkcijos atliekamos tink amai ir įpilkite degalų Degalų pylimas Dirbdami su degalais visa da pasirūpinkite tinkamu vėdinimu Pildami degalus nerūkykite ir stovėkite atokiai nuo bet kokio šilumos šaltinio Niekada nepilkite degalų veikiant arba esant k...

Page 160: ... mišinį Patikinkite ar visi jungikliai lengvai juda ar tinkamai veikia apsauginiai įrenginiai Patikrinkite ar bake yra pakankamai degalų ir prireikus įpilkite daugiau Pjovimo galvutės pasukimas E 1 Paspauskite pasukamos pjo vimo galvutės 27 fiksavimo svirtį 2 Dabar pjovimo galvutę galite pa sukti į keturias padėtis Naudo kite reikiamas fiksavimo padėtis ir vėl užfiksuokite pasukamos pjovimo galvut...

Page 161: ...abinkite prietaisą prie nešiojimo diržo kuriuo esate apsijuosę žr skyrių Nešiojimo diržo užsidėjimas Jei po antrojo bandymo cold start warm start variklis neužsiveda pabandyki te užvesti Choke svirties nenustatę į padėtį warm start šiltoji paleistis Jei ir tuomet nepavyksta perskaity kite skyriuje Gedimų paieška pa teiktus nurodymus Variklio sustabdymas 1 Atleiskite greičio valdymo svirtį 2 Norėda...

Page 162: ... pradžių atlikite atpalaiduojamąjį pjūvį žr a pav Jis atliekamas iš apačios Apatiniame šakos trečdalyje įpjaukite šaką Šaka iki galo nupjaunama žr b pav vėl pjaunant iš viršaus ir jei įmanoma toje pačioje vietoje kad sutaptų su pirmuoju pjūviu Pjaustymas dalimis Dideles arba ilgas šakas rekomenduojama supjaustyti dalimis Tik tada galėsite žinoti kur tiksliai nukris nupjauta medžiaga Iš stovėjimo v...

Page 163: ...tro korpuso 40 4 Nuplaukite filtrą 39 muilu ir vandeniu Niekada nevalykite benzinu 5 Palikite filtrą ore kad išdžiūtų 6 Filtrą sumontuokite atvirkštine eilės tvarka Pakeiskite oro filtrą kai jis nusidėvi yra pažeistas arba labai užterštas Uždegimo žvakės keitimas nustatymas Nusidėvėjus uždegimo žvakėms arba esant per ilgam intervalui tarp uždegimų sumažėja variklio galin gumas K 1 Išjunkite prieta...

Page 164: ...yrių Techninė priežiūra ir valymas Prietaisą laikykite sausoje vietoje kuri oje nesikaupia dulkės ir kur jo negali pasiekti vaikai Prietaiso nevyniokite į nailoninius maišus nes po jais gali kauptis drėgmė ir atsirasti pelėsis Laikymas kai prietaisas neeksploatuojamas Jei nepaisysite laikymo nurodymų dėl karbiuratoriuje likusių degalų prietaisas gali sunkiai užsivesti arba po tam tikro laiko suges...

Page 165: ...iagos arba gamybos defektai pristatomas kitas prietaisas arba jis sure montuojamas Būtina sąlyga prietaisas prekybininkui pristatomas neišardytas su pirkimo čekiu ir garantijos patvirtinimu Dėl garantinių atvejų prašome kreiptis tik į savo pardavėją Remonto darbus kuriems nesuteikiama garantija už tam tikrą atlygį galite pavesti atlikti mūsų techninės priežiūros centro darbuotojams Mūsų techninės ...

Page 166: ...ildyti Techninės priežiūros intervalai Reguliariai atlikite toliau pateiktoje techninės priežiūros intervalų lentelėje nurody tus techninės priežiūros darbus Reguliariai atliekant techninės priežiūros darbus pailgėja tarnavimo trukmė Be to užtikrinama optimali pjovimo galia ir galima išvengti nelaimingų atsitikimų Dėmesio jei turite pretenzijų dėl prietaiso arba norite jį remontuoti atsiųskite jį ...

Page 167: ...ializuotas dirb tuves Užsikišo degalų filtras Pakeiskite arba išvalykite degalų filtrą Variklis tuščiąja eiga veikia per greitai Variklis šaltas Lėtai įkaitinkite Variklis neveikia didžiausiu ga lingumu Aprūko uždegimo žvakė netinkamas uždegimo intervalas Nuvalykite nustatykite arba pakeiskite uždegimo žvakes Užterštas karbiuratorius purkštukai netinkamai nustatytas karbiuratoriaus mišinys Karbiur...

Page 168: ...akankamai įtempta Patikrinkite grandinės įtempimą Pjūklas sunkiai sukasi grandinė nušoka Grandinė nepakankamai įtempta Patikrinkite grandinės įtempimą Grandinė įkaista pjaunant pasirodo dūmai pasikeičia pjovimo juostos spalva Per mažai grandinių alyvos Patikrinkite alyvos lygį ir prireikus įpilkite grandinių alyvos patik rinkite automatinę alyvos sistemą ir prireikus išvalykite alyvos ištekėjimo k...

Page 169: ...169 ...

Page 170: ...na volgende in overeenstemming gebrachte normen en nationale normen en bepalingen toegepast En vue de garantir la conformité les normes harmonisées ainsi que les normes et décisions nationales suivantes ont été appliquées EN ISO 10517 2009 EN ISO 11680 1 2011 EN ISO 11806 1 2011 Zusätzlich wird entsprechend der Geräuschemissionsricht linie 2000 14 EC bestätigt Schallleistungspegel Garantiert 112 d...

Page 171: ...ate applicate le seguenti norme armonizzate e anche le norme e disposizioni nazionali che seguono In order to guarantee consist ency the following harmo nised standards as well as national standards and stipu lations have been applied EN ISO 10517 2009 EN ISO 11680 1 2011 EN ISO 11806 1 2011 Ponadto potwierdzono zgodnie z dyrektywą w sprawie emisji hałasu 2000 14 poziom mocy akustycznej gwarantowa...

Page 172: ...172 ...

Page 173: ...ch harmonizovaných norem jakož i národních norem a předpisů Aby bola zaručená zhoda boli použité nasledovné harmonizované normy ako i národné normy a predpisy EN ISO 10517 2009 EN ISO 11680 1 2011 EN ISO 11806 1 2011 Remiantis 2000 14 EB dėl valstybių narių įstatymų reglamentuojančių lauko sąlygomis naudojamos įrangos į aplinką skleidžiamą triukšmą suderinimo papildomai patvirtinama Garso galingum...

Page 174: ...atief informační informatívny informatyvus 7 15 7 7 10 1 1 1 2 2 1 2 2 2 3 2 4 1 5 7 9 7 11 7 8 7 12 7 6 7 4 7 3 7 2 7 1 2 10 3 1 7 5 1 3 1 4 1 2 6 2 5 1 5 2 8 2 9 2 7 4 2 4 3 4 3 3 2 6 1 6 2 6 3 6 4 6 5 4 4 4 5 1 16 1 17 6 5 6 5 6 5 5 5 14 13 10 3 10 4 10 2 10 9 4 12 9 6 8 9 8 8 8 7 8 5 8 4 8 2 8 1 8 6 8 12 8 11 8 10 9 2 8 13 8 12 9 1 8 14 9 3 8 3 8 10 1 9 4 9 5 9 7 9 8 11 7 11 6 11 5 11 4 11 3 1...

Page 175: ... Rolna 6 62 081 Baranowo Tel 061 650 75 30 Fax 061 650 75 32 e mail krysiak krysiak pl www krysiak pl DE AT WERCO SK spol s r o Letisková 20 971 01 Prievidza Tel 046 542 0320 klapka 27 Fax 046 542 7207 e mail reklamacie werco sk Homepage www werco sk WERCO spol s r o U Mototechny 131 251 62 Mukařov Tehovec Tel 323 661 347 linka 27 Fax 323 661 348 e mail prijemoprav werco cz Homepage www werco cz D...

Page 176: ......
Reviews: