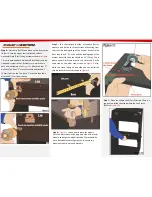
Step 2
–
Take Back Horizontal Plate (Part I) and place it on
the top of the assembly done in Step 1 and screw together
(See
Figure 3
and
4
)
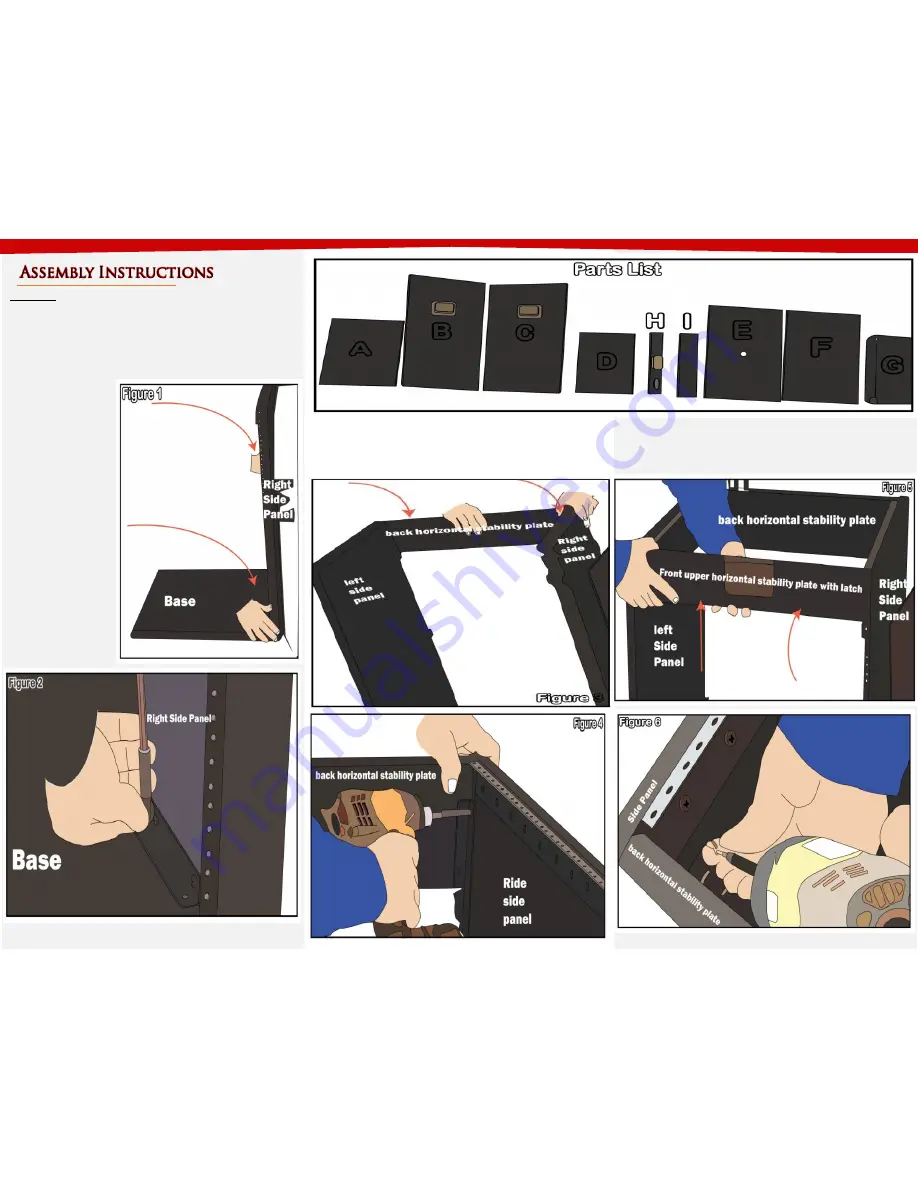
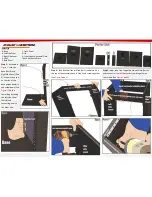
Step 1
–
As shown in
Figure 1
, take the
base (Part A) and
Right Side Panel (Part
C). Connect the panel
on the side of the
base perpendicularly
and screw down (See
Figure 2
) Do the
same thing by taking
the Left side Panel
(Part B) and
connecting over to
the other side.
Parts List
A. Base
F. Front Panel
B. Left Side Panel G. Lid
C. Right Side Panel H. Front Upper Horizontal Plate
D. Shelf
I. Back Horizontal Plate
E. Back Panel
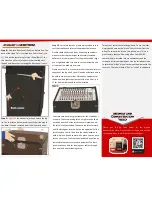
Step 3
–
Now, take Front Upper Horizontal Plate (Part H)
and connect in front of the stand screw in together on
the corners (See
Figure 5
and
6
)


