


24
❏
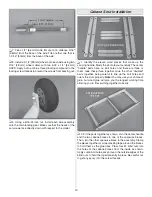
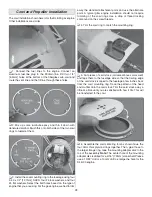
8. Dry fit the wooden pushrod tube standoff to the gray
pushrod tube. With the throttle on the engine closed, set the
servo to the idle cutoff position. Cut the inner pushrod tube
about 1" [25.4mm] from the end of the gray pushrod tube.
Thread a 6" [152mm] pushrod into the end of the inner pushrod
tube so that at least 1/2" [12.7mm] of thread engages. Mark
the pushrod at the servo arm and bend it 90° up. Clip off the
excess pushrod and fit the pushrod to the servo arm. Then,
use a nylon Faslink to secure it. Glue the wooden standoff to
the former and the pushrod tube to the standoff using epoxy.
Test the operation and make any mechanical adjustments
now. Install the servo arm locking screw.
❏
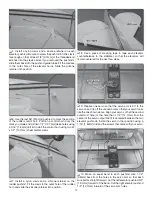
9. You may set up a servo operated choke at this point. If
you are doing this, you will need to purchase nylon pushrod
linkage similar to the pushrod supplied for the throttle. We set
up a manual choke using scrap pushrod and a rubber servo
grommet to guide the pushrod through the cowl.
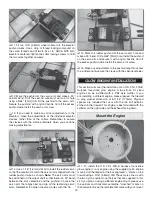
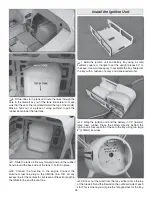
Install the Fuel Tank
In order to use gasoline with the fuel tank supplied, you will
need to purchase a fuel tank conversion kit and gas fuel line.
❏
1. Solder a set of fuel line barbs onto the fuel lines using
silver solder.
❏
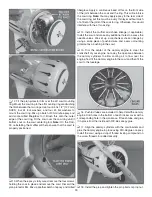
2. Discard the silicone fuel line and stopper supplied with
the fuel tank. Cut two pieces of gasoline compatible fuel line.
Secure the lines and the clunks with four small 4" [102mm]
tie wraps. Build up the fuel tank as shown with the vent line
pointing to the top of the tank. You may want to use a felt tip pen
to mark which direction the vent line is pointed so that you know
where the top of the tank is when you’re installing the tank.
❏
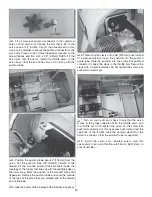
3. Fit fuel lines to the outside of the fuel tank. Secure each
line with a small 4" [102mm] tie wrap.
❏
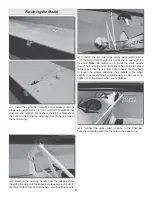
4. Test fit the fuel tank to make sure that the engine bolts
will not touch the front of the tank. If they do, glue plywood
fuel tank spacers to the back of the firewall so they line up
with the hole, using as many spacers as are needed to clear
the bolts.
❏
5. Fit a rubber band to the former behind the firewall as
shown. When you install the fuel tank, route the lines and
then the tank above the rubber band (toward the top of the
model) as you stretch the rubber band under the bottom side
of the tank.
Summary of Contents for Waco YMF-5
Page 40: ......


