10
❏
8. Connect the elevator pushrod to the elevator servo and
slide the pushrod into the guide tube placing the servo in the
fuselage. Position the servo so the arm will be approximately
1-1/2" [40mm] from the end of the guide tube as shown.
❏
9. Once you have your servo where you want it, cut
the other end of the pushrod protruding from the vertical
stabilizer to a length of 1" [25mm].
❏
10. Remove the pushrod/servo assembly from the
fuselage and de burr the end again. Add a thin fi lm of oil to
the pushrod, and then reinstall in the fuselage.
❏
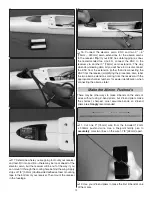
11. With the elevator servo laying fl at on the bottom of
the fuselage, make a sharp, 90° bend to the
left
1/4" [6mm]
from the end.
❏
12. Temporarily connect the elevator horn to the pushrod
and mount the horizontal stabilizer to the top of the fuselage
with the two included M3 x 10 fl at-head Phillips screws. Move
the elevator up and down with your fi ngers. You’ll probably
notice that the elevator is easier to move at the ends of its
throw than it is to move near center. This means the pushrod
needs one more slight bend backward about 1/4" [6mm]
ahead of the 90° bend.
Summary of Contents for Rifle 1M
Page 24: ......


