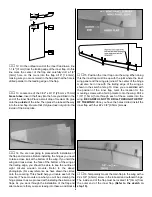
bend upward in the wire. Cut the excess wire off 1/2" [13mm]
above the bend. Insert the wire through the hole in the servo
arm and secure it with a nylon FasLink. Do this for the
throttle and the rudder as well.
❏
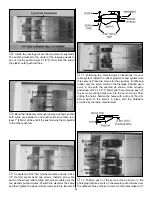
1. Temporarily plug a servo into the aileron port on your
receiver. Turn the receiver and transmitter on and with the
aileron trim centered, allow the servo to center itself. Install
a long servo arm onto your servo in the direction shown in
the photograph. This servo will be used in the right wing panel.
Proceed to step 3 for installation of the servo in the
right wing!
❏ ❏
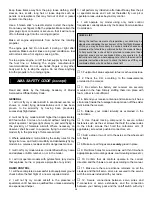
2. Temporarily plug a servo into the aileron port on your
receiver. Turn the receiver and transmitter on and with the
aileron trim centered, allow the servo to center itself. Install
a long servo arm onto your servo in the direction shown in
the photograph. With the servo horn installed as shown, this
servo will be used in the left wing panel.
❏ ❏
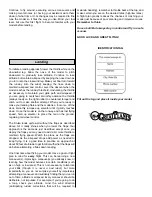
3. The servos for the ailerons are installed with servo
tape. To insure the strongest installation do not skip the
next couple of steps! Clean the side of the servo opposite
the servo arm with rubbing alcohol. Be sure all grease and
oil is removed from the side of the case.
❏ ❏
4. Move the string in the servo bay. Next, saturate the
balsa in the servo bay with thin CA. Apply the thin CA,
allowing it to saturate the wood for a few minutes. If there is
any puddling of the glue after it has soaked in for a couple
of minutes, wipe away the excess and allow it to cure for a
few minutes. You
do not want to apply the glue and then
apply accelerator to it, causing it to cure too fast. If there are
any puddles when you do this the surface will become
uneven, giving a rough surface for mounting the servo.
❏ ❏
5. Set the servo into the servo bay on its side as
shown. With a felt-tip marker draw a line from the servo arm
INSTALL THE FLAP & AILERON
SERVOS
21


