background image

!

3

2

Install the aileron

1

5

4

Main wing

33

Install the aileron servo

Checking the wing

Install the wing

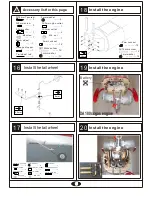
Accessory list for this page.

M4 screw

L

R

2mm Carbon Fiber  stick

2mm Carbon Fiber  stick

The servo line

L

R

M5X25mm     Screw  

M5X25mm     


Screw

Plywood   washer

Plywood   washer

A

,

A

A=

,

A

The servo must be purchase separately

The servo must be purchase separately

8mm nylon Nut

- - - - 4

- - - - 2

- - - - 2

32X942mm tube

32X942mm tube

Horn

Rod adjuster

Connecting rod head

2.5X85mm    rod

4X35mm    screw

3X10mm     Screw  

3X14mm     Screw  

3mm Lock nut

- - - - - - 4

- - - - - - 4

- - - - - - 4

- - - - - - 4

- - - - - - 4

- - - - - - 4

- - - - - - 4

- - - - - - 4

- - - - - - 2

4X30mm    screw

- - - - - - 2

Rod adjuster

- - - - - - 4

- - - - - - 4

- - - - - - 4

Ball bearing

Ball bearing

- - - - - - 4

M3  nut

3X14mm     Screw  

- - - - - - 4

3mm   washer

- - - - - - 4

B

A

Bland nut (4mm)

2

Horn

Rod adjuster

Connecting rod head

2.5X85mm    rod

4X35mm    screw

3X10mm     Screw  

3X14mm     Screw  

3mm Lock nut

- - - - - - 4

- - - - - - 4

- - - - - - 4

- - - - - - 4

- - - - - - 4

- - - - - - 4

- - - - - - 4

- - - - - - 4

- - - - - - 2

4X30mm    screw

- - - - - - 2

Rod adjuster

- - - - - - 4

- - - - - - 4

- - - - - - 4

Ball bearing

Ball bearing

- - - - - - 4

M3  nut

3X14mm     Screw  

- - - - - - 4

3mm   washer

- - - - - - 4

M5X25mm     Screw  

Plywood   washer

8mm nylon Nut

- - - - 4

- - - - 2

- - - - 2

Bland nut (4mm)

2

Summary of Contents for Giant Extra 330L

Page 1: ...d to produce its performance to full extent lAssemble this kit only in places out of child ren s reach lTake enough safety precautions prior to operating this model You are responsible for this models...

Page 2: ...mm 2mm Assemble left and right Sides the same way Apply instant glue CA glue super glue Apply epoxy glue B A Cut off excess Do not overlook this symbol 1 1 A minimum 4 channel radio for airplanes with...

Page 3: ...on Nut 4 2 2 32X942mm tube 32X942mm tube Horn Rod adjuster Connecting rod head 2 5X85mm rod 4X35mm screw 3X10mm Screw 3X14mm Screw 3mm Lock nut 4 4 4 4 4 4 4 4 2 4X30mm screw 2 Rod adjuster 4 4 4 Ball...

Page 4: ...flights You lose control of your airplane which leads to accidents L R 2mm carbon fiber stick 2mm carbon fiber stick M4 screw L L R R Horn Rod adjuster Connecting rod head 2 5X85mm rod 4X35mm screw 3...

Page 5: ...e 2 Rod 2 Rod adjuster M2X8mm Screw 2 2 8 2mm 3mm B A B A 10mm axle 5 2mm collar 2 4 3X3mm screw 4 8mm nut 2 5 2mm nut 2 3X20mm Screw 4 3mm Lock nut 2 3mm 5X40mm screw 4 5mm Lock nut 4 5mm washer 8 Ro...

Page 6: ...ine Battery 3X16mm Tp screw 3X3mm screw 3 2mm collar 3X3mm nylon collar 3X3mm collar Tail wheel rod Linkage stopper 45mm wheel 3 3mm washer 2 1 2 3 1 1 1 1 1 M6 screw 1 M6 nut 3X16mm Tp screw 3X3mm sc...

Page 7: ...3mm washer 3mm rubber band 4 4 4 After confirming the position see front of fuel tank Insert and tighten the screw Fuel tank Fuel tank Plywood 1 Receiver Battery Receiver Battery 3X12mm Screw 3mm was...

Page 8: ...capabilities Readjust according to your needs and flight level 8 8 Adjustment Never fly before checking the Cg s required position In order to obtain the CG specified reposition the receiver and batte...

Reviews: