GB - 25
1. Slowly release the tension on the PTO
mower belt idler until all the tension is
removed from the springs.
2. Remove PTO mower belt from left blade
spindle and remove from deck.
3. Slowly release the tension on the mower
drive belt idler until all the tension is
removed from the springs.
4. Remove mower drive belt from right
blade spindle and from deck. Idler pivot
bolt must be loosened slightly to gain
clearance to remove belt from under
idler pulley (Figure 16).
5. Arrange new mower belt(s) on deck
(mower drive belt first). Retighten short
mower belt idler pivot bolt. Install belts
on sheaves. Put belts onto center
sheave last.
IMPORTANT: Prior to starting the unit,
ensure that there are no twists in the mower
drive belt as any twist in the PTO mower belt
will drastically reduce the belt life.
6. Replace belt covers and return foot
board to closed position.
Replacing the Hydro Pump Belt
1. Properly stop and park unit (See
2. Remove the PTO mower belt from the
PTO clutch sheave (See Replacing
Mower Belts on page 24).
3. Remove clutch anchor.
4. Slowly release the tension on the hydro
pump belt idler until all the tension is
removed from the springs.
5. Remove old hydro pump belt from right
hand hydrostat sheave first (Figure 17).
6. Install new hydro pump belt by
positioning belt on sheaves. Put belt
onto right hand hydrostat sheave last.
7. Replace clutch anchor.
8. Replace PTO mower belt on PTO clutch
sheave. See Replacing Mower Belts on
page 24.
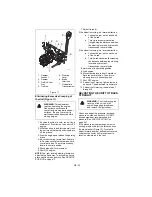
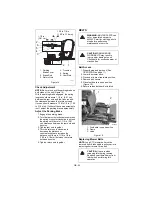
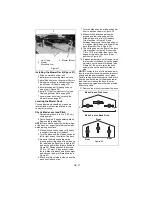
Figure 16
1. PTO Mower Belt
2. Mower Drive Belt
3. Springs
4. Mower Drive Belt Idler
5. PTO Belt Idler
6. PTO Clutch Sheave
7. Center Sheave
CAUTION: Use care when
releasing idler spring tension.
Keep body parts well away from
idlers when performing this
operation.
OF1631
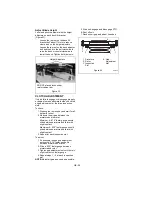
1. Hydro Belt
2. Spring
3. Idler
4. Engine
Sheave
5. Left Hand
Hydrostat
6. Right Hand
Hydrostat
7. Clutch
8. Clutch
Anchor
Figure 17
Summary of Contents for Promaster 144
Page 35: ......


