25
Description of transmitter - screen and keypad
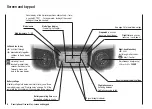
Operating the “Data Terminal”
Input buttons
ESC
and
SET
symbols
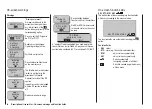
On-screen telemetry symbols
The active model memory has not yet been
“bound” to a HoTT receiver. See page 80 or 88
for more information on the “binding” process.
Not flashing: RF switched off at transmitter
Flashing aerial symbol:
The last receiver bound to the active model is
inactive, or out of range
>
M
x No telemetry signal detected
>
M
Signal strength display
>
P
Display of Pupil signal strength on the Teacher
transmitter’s screen.
Buttons to the left of the screen
ESC
•
button
A brief press on the
ESC
button returns you step by
step within the function select system, taking you
right back to the basic display. If you make a change
in the meantime, the change is retained.
If touched for about three seconds in the base dis-
play,
ESC
opens and closes the Telemetry menu.
Arrow buttons
•
A brief press on one of these buttons allows you
1.
to leaf through lists, such as the Model Select or
Multi-Function list, always moving in the direction
of the arrow; the arrow buttons are also used to
move through menu lines within menus.
A brief simultaneous press of the
2.
buttons
switches from the base transmitter display, and
from almost any menu position, into the “
Servo
display
” menu.
Buttons to the right of the screen
SET
•
button
Starting from the base screen display - as it ap-
1.
pears when you switch the transmitter on - a brief
press of the
SET
button takes you to the multi-
function menus. You can also call up a selected
menu using the
SET
button.
Within the set-up menus you can activate (con-
2.
firm) and disable the corresponding set-up fields
with a brief press of the
SET
button.
Arrow buttons
•
1. “Leafs through” the multi-function menu and the
menu lines within the set-up menus, in the same
manner as the left-hand touch-key’s arrow but-
tons.
2. Selects and adjusts parameters in set-up fields af-
ter you have activated them by briefly pressing
the
SET
button; the buttons
and
are
assigned the same function in each case, i. e. it
makes absolutely no difference which of the two
buttons you use.
3. A brief simultaneous press of the
or
buttons resets an altered parameter value in the
active input field to the default value (
CLEAR
).
Notes:
It is not the contact with the touch-key itself that trig-
•
gers the corresponding action, but the cessation of
the touch.
If you switch the transmitter off and then immediate-
•
ly on again, you may find that the touch-keys have
no effect. This is not a fault! Switch the transmitter off
again, and wait a few seconds before switching it on
once more.
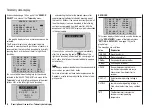
Short-Cuts
You can call up particular menus or options directly us-
ing the following button combinations:
CLEAR
•
A brief simultaneous press of the
or
but-
tons of the right-hand touch-key resets an altered pa-
rameter value in the active input field to the default
value.
“
•
Servo display
”
A brief simultaneous press of the
buttons of the
left-hand touch-key switches from the transmitter’s
base display, and from almost any menu position, to
the “
Servo display
”, menu; see page 133.
“
•
Telemetry
”
Hold the central
ESC
button of the left-hand touch-
key pressed in for about one second in order to call
up the “
Telemetry
” menu from the transmitter’s base
display - see section starting on page 137 - and also
to return to it again.
Graphic display of telemetry data
•
Briefly pressing the
or
button of the left or right-
hand touch-key switches directly from the transmit-
ter’s base display to the graphic telemetry data dis-
play, and also leafs to and fro between the individual
graphic displays.
Press
ESC
to return to the base display.
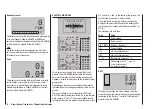
“
•
HIDDEN MODE
”
(language selection and contrast)
Simultaneously press the arrow buttons
of the
left-hand touch-key AND the central
SET
button of
the right-hand touch-key; see next pagees.
Input lock
•
Can be activated and disabled at the transmitter’s ba-
sic display by simultaneously holding the
ESC
and
SET
buttons pressed in for about two seconds.
Summary of Contents for mx-12 Hott
Page 1: ...Programming Manual 33116 mx 16 HoTT 3 en mx 16...
Page 35: ...35 For your notes...
Page 49: ...49 For your notes...
Page 55: ...55 For your notes...
Page 59: ...59 For your notes...
Page 63: ...63 For your notes...
Page 69: ...69 For your notes...
Page 91: ...91 For your notes...
Page 101: ...101 For your notes...
Page 123: ...123 For your notes...
Page 181: ...181 For your notes...
Page 193: ...193 For your notes...


