background image

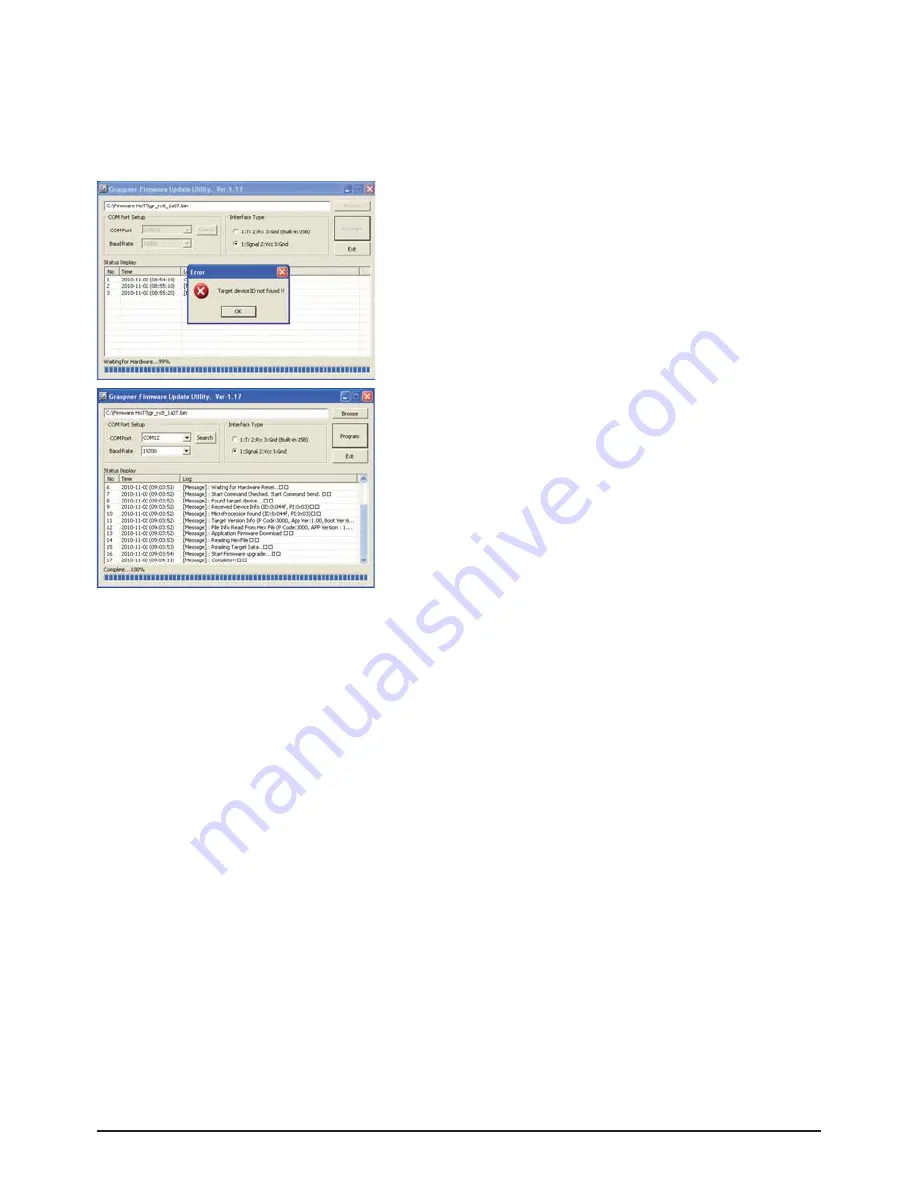
Press the “Program” button in the software. Wait briefl y until you see movement in the progress bar. This 
make take up to fi ve seconds, depending on the computer.

Receiver

: press the SET button, and switch the receiver on while you hold it pressed in.

After a few seconds the Status screen displays the message “Found target device…”; you can now 
release the button, and the fi rmware update process commences.

If the device is not recognised, if the pop-up window “Target de-
vice ID not found” appears, or if the process fails before 100% 
is reached, you must restart the update procedure. Repeat all 
the steps as described above.

The Status display and the Progress bar show the progress of 
the fi rmware update. The update is completed when the mes-
sage “Complete…100%” or “Complete!!” appears.

During the update process both LEDs on the transmitter glow 
constantly. When it is complete, the red LED goes out and you 

will hear a brief confi rmation melody. The green LED on the 
receiver also light up; when the process is complete, the green 
LED starts fl ashing.

Switch your transmitter / receiver off, and disconnect the ad-
apter lead.

Caution: after completing an update process, you must in-
itialise the device before using it, i.e. reset it to the factory 
default values.

Initialisation:

Press and hold the SET button on the receiver and switch it on, the red and green LED‘s are blinking. 
After about three seconds the LED‘s expires, release now the SET button.

Please note:

The initialisation procedure erases ALL the settings you have entered. Where necessary, you will need 
to program your preferred settings again.

When initialisation is complete, the transmitter will be in Fail-Safe set-up mode. You can therefore imme-
diately continue by programming your fail-safe settings.
If you previously set your transmitter’s Country setting to “France” mode, you must also re-enter the 
Country setting.

Please refer to the appropriate section in your RC system instructions for the procedure.

Any settings you have entered using the SMART-BOX are also lost when you initialise the recei-
ver. If you carry out a receiver fi rmware update, you will need to re-enter these settings.

The latest version of these instructions can be found at www.graupner.de

Manual Receiver GR-32 Graupner HoTT 2.4                                                 

04

Summary of Contents for 33516

Page 1: ...unctions 01 2 1 Binding 01 2 2 Binding Multiple Receivers 01 2 3 Fail Safe Function 02 3 Receiver 02 3 1 Connections 02 3 2 Low Voltage Warning 03 3 3 Temperature Warning 03 4 Firmware Update 03 4 1 Receiver 03 4 2 Update Procedure 03 5 Declaration of Conformity 05 6 FCC Information 06 7 Warranty 08 Manual V1 0 Revision September 2011 ...

Page 2: ...e mode If this should occur simply increase the distance between the aerials until the audible warning signal ceases and the red LED on the transmitter lights up again at the same time the green LED on the receiver should glow constantly 2 FUNCTIONS 2 1 Binding When you wish to use the Graupner HoTT 2 4 GHz receiver with a particular transmitter the first step must always be to bind the unit to its...

Page 3: ...dle the throttle channel of an electric powered model to stop and the throttle channel of a model helicopter to Hold If interference should occur these settings will help prevent the model flying out of control possibly causing personal injury or property damage Please refer to the appropriate section in your RC system instructions for the procedure Manual Receiver GR 32 Graupner HoTT 2 4 02 3 RECE...

Page 4: ...o polarised note the small chamfer on one edge Never use force the plug should engage easily and fully 4 1 Receiver Connect the adapter lead to the socket T of the receiver as shown in the illustration This socket is also polarised note the small chamfer on one edge Never use force the plug should engage easily and fully 4 2 Update procedure Ensure that the adapter lead is configured as shown in th...

Page 5: ...flashing Switch your transmitter receiver off and disconnect the ad apter lead Caution after completing an update process you must in itialise the device before using it i e reset it to the factory default values Initialisation Press and hold the SET button on the receiver and switch it on the red and green LED s are blinking After about three seconds the LED s expires release now the SET button Pl...

Page 6: ...and can radiate radio frequency energy and if not installed and used in accordance with the instructions may cause harmful interference to radio communications However there is no guarantee that interference will not occur in a particular installation If this equip ment does cause harmful interference to radio or television reception which can be determined by tur ning the equipment off and on the...

Page 7: ...arkings indicate which materials can be recycled and re used You can make an important contribution to the protection of our common environment by re using the product recyc ling the basic materials or recycling redundant equipment in other ways Remove batteries from your device and dispose of them at your local collection point for batteries In case of R C models you have to remove electronic par...

Page 8: ...raße 94 96 73230 Kirchheim Teck Allemagne accorde sur ce produit une garantie de 24 mois à partir de la date d achat La garantie prend effet uniquement sur les vices de fonc tion nement et de matériel du produit acheté Les dom mages dûs à de l usure à de la surcharge à de mauvais accessoires ou à d une application inadaptée sont ex clus de la garantie Cette garantie ne remet pas en cau se les droi...

Page 9: ...______ ________________________________________________________________________ ________________________________________________________________________ ________________________________________________________________________ ________________________________________________________________________ ________________________________________________________________________ ____________________________...

Page 10: ...______ ________________________________________________________________________ ________________________________________________________________________ ________________________________________________________________________ ________________________________________________________________________ ________________________________________________________________________ ____________________________...

Page 11: ...pplier We accept no liability for printing errors Sous réserve de modifications et de possibilité de livraison Livraison uniquement au travers de maga sins spécialisés en modélisme Nous pourrons vous communiquer l adresse de votre revendeur le plus proche Nous ne sommes pas responsables d éventuelles erreurs d impression Con riserva di variazione delle specifiche e disponibilità del prodotto Fornitu...

Reviews: