(14)
Operation buttons
Operation buttons of P1/P2 channel (clip
view)
(15)
[Clip:]
Indicates the name of the loaded clip.
Tapping the entry area allows to change the
clip name.
(16)
[In:]/[Out:]/[Dur:]
Indicates the timecode of In/Out points and
duration.
Tapping the entry area allows to set the In
and Out points or duration.
(17)
[Format:]
Indicates the video size of the clip and
frame rate.
(18)
1ch view/3ch view/
bin/transfer screen
common area
1ch view/3ch view/bin/transfer screen
common area
¾
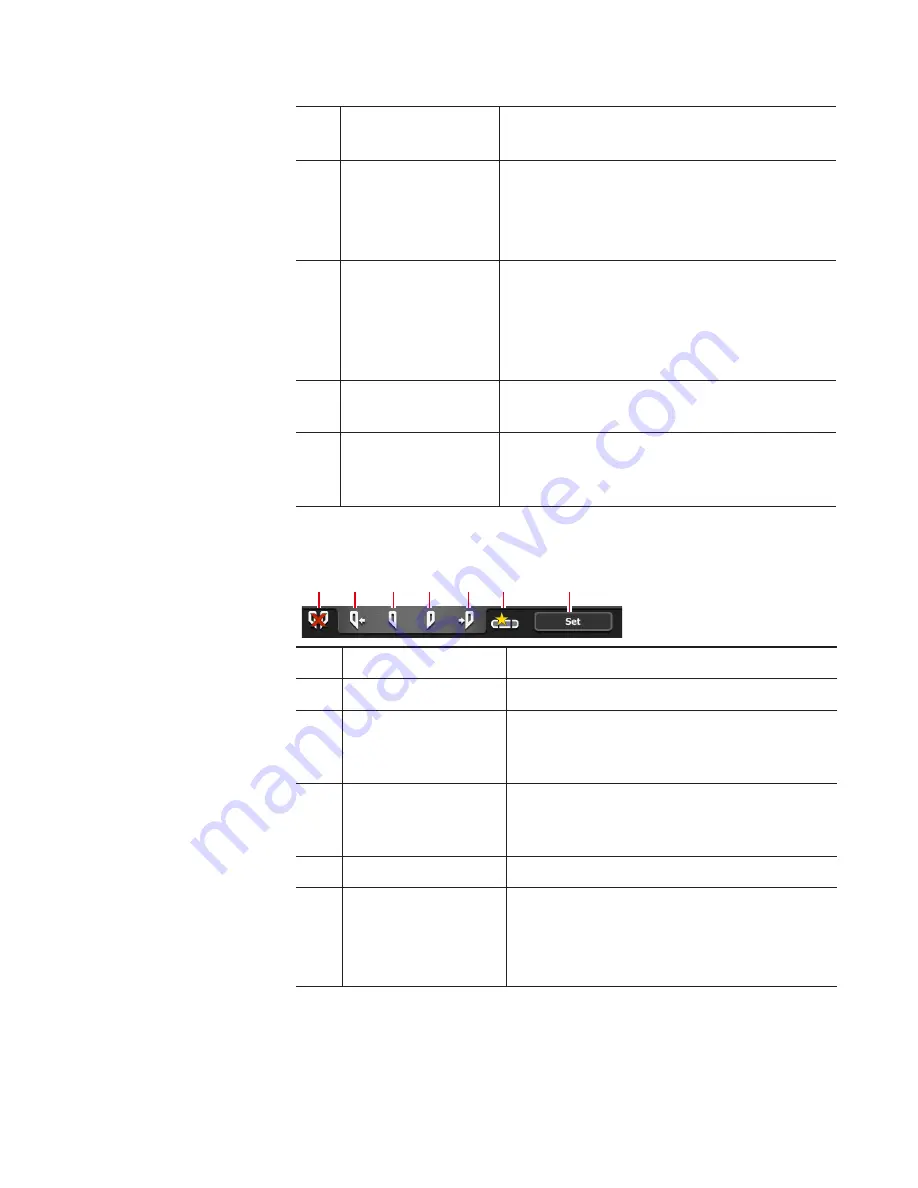
Operation buttons of P1/P2 channel (clip view)
(2)
(4)
(6)
(7)
(3)
(5)
(1)
(1)
[Clear (In/Out)]
Clears In/Out points set on the clip.
(2)
[Cue(In)]
Moves to the In point of the clip.
(3)
[Mark(In)]
Sets In point to the current position. After
In point has been set, the In point icon
appears on the scrubbing bar.
(4)
[Mark(Out)]
Sets Out point to the current position.
After Out point has been set, the Out point
icon appears on the scrubbing bar.
(5)
[Cue(Out)]
Moves to the Out point of the clip.
(6)
[Create Subclip]
Creates a sub clip between the set In-Out
points.
Creating a sub clip between In-Out points
(highlight)
95
May 16, 2016
T2 Elite 2/Pro 2/Express 2/Elite/Pro/Express User Manual
Displaying P1/P2 channel in 1ch view


