background image

12

Explanation of used symbols  

1

2

3

4

7

5

Max.

50°C

6

8

9

10

11

1. 

Read instruction manual, observe warnings and safety 
conditions therein.

2. 

Use protective goggles and hearing protectors.

3. 

Keep the tool away from children. 

4. 

Protect against rain.

5. 

Use indoors, protect from water and moisture.

6. 

Recycling.

7. 

Protection class 2.  

8. 

Segregated waste collection.

9. 

Do not throw cells into fire.

10. 

Hazardous to water environment.

11. 

Do not allow to heat above 50°C.

CONSTRUCTION AND USE

The impact driver is a battery-powered tool. The drive consists 
of DC commutator motor with permanent magnets. The impact 
driver is used for tightening and undoing screws and bolts in 
wood, metal or plastics. High speed allows to use the device 
widely for self drilling screws, and high torque allows to use 
the device for long screws in wood. The device can be well used 
at heights and in hard to reach areas. High torque mechanism 
creates the torque as short, high peaks of circumferential 
impact, and tool reactions towards the operator's hands during 
tightening is low.

Use the power tool in accordance with the manufacturer’s 
instructions only.

DESCRIPTION OF DRAWING PAGES

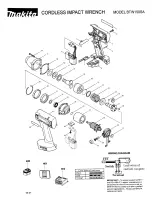
Below enumeration refers to the device elements depicted on 
the drawing pages of this manual.

1. 

Tool chuck

2. 

Fixing sleeve of the tool chuck

3. 

Casing

4. 

Handle

5. 

Direction selector switch

6. 

Holder 

7. 

Battery

8. 

Battery lock button

9. 

Switch

10. 

Lighting

11. 

LED diodes

12. 

Charger

13. 

Button for battery level indication 

14. 

Battery level indicator (LED)

* Differences may appear between the product and drawing.

MEANING OF SYMBOLS

 CAUTION

 WARNING

  ASSEMBLY / SETTINGS

 INFORMATION

PREPARATION FOR OPERATION

REMOVING AND INSERTING THE BATTERY


Set the direction selector switch (

5

) in middle position.


Push the battery lock button (

8

) and slide out the battery (

7

)  

(

fig. A

).


Insert charged battery (

7

) into the handle holder, you should 

hear when the battery lock button (

8

) snaps.

BATTERY CHARGING

The device is supplied with partially charged battery. The battery 

should be charged in ambient temperature between 4°C and 
40°C. New battery, or one that has not been used for a long 
time, will reach full efficiency after approximately 3 to 5 charge/
discharge cycles.


Remove the battery (

7

) from the device (

fig. A

).


Connect the charger to mains socket (230 V AC).


Slide the battery (

7

) into the charger (

12

) (

fig. B

). Ensure the 

battery is properly fitted (pushed to the end).

When the charger is connected to a mains socket (

230 V AC

), the 

green diode (

11

) on the charger turns on to indicate connected 

supply.

When the battery (

7

) is placed in the charger (

12

), the red diode 

(

11

) on the charger turns on to indicate that the charging is in 

progress.

Simultaneously, green diodes (

14

) of the battery level indication 

are flashing in different configurations, see description below.


• All diodes are flashing

 - battery is empty and requires 

charging.


• 2 diodes are flashing

 - the battery is partially discharged.


• 1 diode is flashing

 - the battery level is high.

Once the battery is charged, the diode (

11

) on the charger lights 

green, and all battery level diodes (

14

) light continuously. After 

some time (approx. 15 s) battery level indication diodes (

14

) turn 

off. 

Do not charge the battery for more than 8 hours. Exceeding 
this time limit may cause damage to battery cells. The charger 
will not turn off automatically when the battery is full. Green 
diode on the charger will remain on. Battery level indication 
diodes turn off after some time. Disconnect power supply 
before removing the battery from the charger socket. Avoid 
consecutive short chargings. Do not charge the battery after 
short use of the tool. Significant decrease of the period 
between chargings indicates the battery is used up and should 
be replaced.

Batteries heat up when charging. Do not operate just 
after charging – wait for the battery to cool down to room 
temperature. It will prevent battery damage.

Summary of Contents for 58G012

Page 1: ...R FIR AKUMUL TOROV R ZOV UTAHOV K AKUMUL TOROV R ZOV U AHOV K SL AKUMULATORSKI UDARNI VIJA NIK AKUMULIATORINIS SUKTUVAS SU KALIMU AKUMULATORA TRIECIENSKR VGRIEZIS AKUTOITEL L KKRUVIKEERAJA AKUMULATORS...

Page 2: ...2...

Page 3: ...9 INSTRUCTIUNI DE DESERVIRE 33 INSTRUKCE K OBSLUZE 37 N VOD NA OBSLUHU 41 NAVODILA ZA UPORABO 45 APTARNAVIMO INSTRUKCIJA 49 LIETO ANAS INSTRUKCIJA 53 KASUTUSJUHEND 57 61 UPUTE ZA UPOTREBU 65 UPUTSTVO...

Page 4: ...4 1 2 3 4 10 9 5 6...

Page 5: ...5 A 7 6 8 B 9 12 11 13 7 14 C D 2 1 E 2 1 F 9 5...

Page 6: ...ca si z akumulatora ciecz mo e spowodowa podra nienia lub oparzenia Je li zostanie stwierdzony wyciek nale y post powa w spos b podany ni ej ostro nie wytrze p yn kawa kiem tkaniny Unika kontaktu p y...

Page 7: ...i wilgoci 6 Recykling 7 Druga klasa ochronno ci 8 Selektywne zbieranie 9 Nie wrzuca ogniw do ognia 10 Stwarzaj ce zagro enie dla rodowiska wodnego 11 Nie dopuszcza do nagrzania powy ej 50 C BUDOWA I P...

Page 8: ...wobodnego obracania wrzeciona po wy czeniu PRACA USTAWIENIA W CZANIE WY CZANIE W czanie wcisn przycisk w cznika 9 Wy cznie zwolni nacisk na przycisk w cznika 9 Ka dorazowe wci ni cie przycisku w cznik...

Page 9: ...na go te u y do wst pnej oceny ekspozycji na drgania Podany poziom drga jest reprezentatywny dla podstawowych zastosowa elektronarz dzia Je eli elektronarz dzie u yte zostanie do innych zastosowa lub...

Page 10: ...wie cyfry roku w kt rym umieszczono znak CE 17 Last two figures of CE marking year A CE jelz s felhelyez se v nek utols k t sz mjegye Nazwisko i adres osoby maj cej miejsce zamieszkania lub siedzib w...

Page 11: ...ep the battery away from sources of heat Do not leave the battery for a long time in high temperature in direct sunlight in proximity of heaters and wherever the temperature exceeds 50 C Do not expose...

Page 12: ...ttery 7 into the handle holder you should hear when the battery lock button 8 snaps BATTERY CHARGING The device is supplied with partially charged battery The battery should be charged in ambient temp...

Page 13: ...rotation set the switch 5 to the extreme left position Counter clockwise rotation set the switch 5 to the extreme right position In certain cases position of the switch related to rotation may be diff...

Page 14: ...exposure to vibrations such as power tool and working tool maintenance proper hand temperature conditions good work organisation Sound pressure level LpA 95 1 dB A K 3dB A Sound power level LwA 106 1...

Page 15: ...en extremen Bedingungen kann es zu einer Leckage der Akku Fl ssigkeit kommen Die aus dem Akkumulator austretende Fl ssigkeit kann Reizungen oder Verbrennungen verursachen Falls eine Leckage festgestel...

Page 16: ...rchlesen und die darin enthaltenen Warnhinweise und Sicherheitshinweise beachten 2 Schutzbrille und Geh rschutz tragen 3 Das Ger t von Kindern fernhalten 4 Das Ger t vor Regen sch tzen 5 In R umen bet...

Page 17: ...en Zustand geliefert Die optimalen Umgebungstemperaturen zum Laden des Akkus liegen zwischen 4 40 0 C Ein neuer Akku oder ein Akku der eine l ngere Zeit nicht im Gebrauch war wird seine volle Versorgu...

Page 18: ...hr 2017 L RM UND SCHWINGUNGSANGABEN Informationen ber L rm und Vibrationen Der L rmpegel wie der Schalldruckpegel LpA und Schallleistungspegel LwA und die Messunsicherheit K sind unten in der Anleitun...

Page 19: ...Urheberrechte auf den Inhalt der vorliegenden Betriebsanleitung nachfolgend Betriebsanleitung darunter u a derer Text Bilder Schemata Zeichnungen sowie Anordnung ausschlie lich Grupa Topex angeh ren...

Page 20: ...20 10 50 C 130 130 265 F Li Ion Li Ion...

Page 21: ...21 1 2 3 4 7 5 Max 50 C 6 8 9 10 11 1 2 3 4 5 6 7 II 8 9 10 11 50 C 1 2 3 4 5 6 7 8 9 10 11 12 13 14 5 8 7 A 7 8 40 C 400 C 3 5 7 A 230 AC 7 12 B 230 AC 11 7 12 11 14 2...

Page 22: ...22 1 11 14 15 14 8 3 LED 14 13 C 2 1 9 9 9 9 10 9 2 D 1 2 2 E 5 F 5 5 5 5 3 6...

Page 23: ...50 2017 2017 Graphite Enery 58G002 230 V AC 50 Hz 22 V DC 2300 mA 40 C 400 C 58G001 1 h 58G004 2 h II 0 300 kg 2017 LpA LwA K EN 60745 ah K EN 60745 2 2 EN 60745 LpA 95 1 A K 3 A LwA 106 1 A K 3 A ah...

Page 24: ...24 2 YYG 2 YY G GRUPA TOPEX Sp z o o Sp k ul Pograniczna 2 4 02 285 Warszawa 58G012 0 C...

Page 25: ...25 10 50o C 130 C 130 C 265 F...

Page 26: ...26 1 2 3 4 7 5 Max 50 C 6 8 9 10 11 1 2 3 4 5 6 Recykling 7 II 8 9 10 11 50 C 1 2 3 4 5 6 7 8 9 10 11 LED 12 13 14 LED 5 8 7 A 7 8 4 40o C 3 5 7 A 230 7 12 B 230 11 7 12 11 14 2 1 11 14 15 14...

Page 27: ...27 8 3 LED 14 13 C 9 9 9 9 10 9 2 D 1 2 2 E 5 F 5 5 5 5 3 6...

Page 28: ...017 2017 Graphite Energy 58G002 230 V AC 50 Hz 22 V DC 2300 mA 40 C 400 C 58G001 1 h 58G004 2 h II 0 300 kg 2017 LpA LwA K EN 60745 ah K EN 60745 2 2 EN 60745 LpA 95 1 A K 3 A LwA 106 1 A K 3 A ah 15...

Page 29: ...lje fel a folyad kot Ker lni kell a b rre s a szembe jut s t b rre ker l se eset n a testr szt azonnal b tiszta v zzel mossa le esetlegesen semleges tse a folyad kot enyhe savval p ld ul citromsavval...

Page 30: ...oz s t szolg lja A berendez s sz les k zben haszn latos az nv g csavarok szerel s n l a nagy sebess gre val tekintettel valamint a hosszabb facsavarokhoz a nagy forgat nyomat knak k sz nhet en A beren...

Page 31: ...S A berendez s az ors t forgatva a csavaroz s sor n t seket gener l a ker leten Az t s a megterhel s n veked s vel automatikusan kapcsol be Ilyenkor pillanatnyi magas forgat nyomat k ker l lead sra A...

Page 32: ...ye figyelembe azokat az id szakokat amikor az elektromos szersz m ki van kapcsolva vagy amikor be van kapcsolva de nincs haszn latban Ezzel a m dszerrel az ssz rezg s m rt ke l nyegesen kisebb lehet T...

Page 33: ...urgere a lichidului din acumulatorul Fluidul acumulatorului poate provoca irita ii sau arsuri n cazul n care s a observat o scurgere se procedeaz n felul urm tor terge i cu grij lichidul cu o c rp Evi...

Page 34: ...50 C CONSTRUC IE I UTILIZARE Ma ina de n urubat cu percu ie f r fir este alimentata de la acumulator Unitatea const ntr un motor de curent continuu cu magne i permanen i Aparatul este proiectat pentru...

Page 35: ...Motorul n timpul rotirii mandrinei genereaz percu ii n circuit Percu ii s activeze automat atunci c nd cre te sarcina n momentul potrivit motorul furnizeaz un moment de torsiune mai mare Pentru contr...

Page 36: ...vibra ii poate varia Cauzele prezentatede mai sus pot duce la cre terea expunerii la vibra ii pe parcursul ntregii perioade de munc Pentru a estima cu exactitate expunerea la vibra ii trebuie luate n...

Page 37: ...ihned omyjte posti en m sto dostate n m mno stv m ist vody p padn kapalinu neutralizujte slabou kyselinou nap kyselinou citr novou nebo octem v p pad zasa en o je neprodlen za n te vyplachovat velk m...

Page 38: ...neruje jako okam it obvodov r z a p soben za zen na ruce oper tora je b hem roubov n mal Elektrick za zen je nutn pou vat v souladu s jeho ur en m POPIS STRAN S VYOBRAZEN MI N e uveden slov n se vztah...

Page 39: ...la pro up n n n ad 2 obr D p ekon n m odporu pru iny Vlo te hrot pracovn ho n stroje do skl idla pro up n n n ad 1 a zasu te jej na doraz m e se st t e bude t eba pracovn n stroj pooto it aby se dosta...

Page 40: ...vypnuto nebo kdy je zapnuto ale nepou v no k pr ci T mto zp sobem celkov expozice vibrac m m e b t mnohem ni Je t eba zav st dodate n bezpe nostn opat en pro ochranu u ivatele proti n sledk m vibrac j...

Page 41: ...sa kontaktu kvapaliny s poko kou alebo o ami ak d jde ku kontaktu kvapaliny s poko kou pr slu n miesto na tele okam ite opl chnite v datn m mno stvom istej vody pr padne kvapalinu zneutralizujte pomo...

Page 42: ...kach a a ko pr stupn ch miestach Mechanizmus zodpovedn za vysok kr tiaci moment ho generuje ako okam it obvodov r z a p sobenie zariadenia na ruky oper tora po as skrutkovania je minim lne Elektrick n...

Page 43: ...ROJOV Upev ovacie puzdro sk u ovadla na n radie 2 obr D odtiahnite proti odporu pru iny Kol k pracovn ho n stroja vlo te do sk u ovadla na n radie 1 a zas vajte ho na doraz mo no bude potrebn oto i pr...

Page 44: ...lebo ke je zapnut ale nepracuje sa s n m Takto m e by celkov expoz cia vibr ci m v razne ni ia Treba zavies dodato n bezpe nostn opatrenia na ochranu obsluhuj cej osoby pred n sledkami vibr ci ako dr...

Page 45: ...npr z limoninim sokom ali kisom e teko ina pride v o i jo je treba takoj sprati z veliko koli ino iste vode najmanj 10 minut in poiskati pomo zdravnika Po kodovane ali spremenjene baterije ni dovoljen...

Page 46: ...jalo za orodja 2 Pritrdilna obojka vpenjala za orodja 3 Ohi je 4 Ro aj 5 Preklopnik smeri vrtenja 6 Ro aj 7 Baterija 8 Gumb za priklop baterije 9 Vklopno stikalo 10 Osvetlitev 11 Dioda LED 12 Polnilni...

Page 47: ...e v polo aj slika E Odstranitev delovnega orodja poteka v obratnem vrstnem redu od namestitve Med uporabo kratkih vija nih nastavkov in bitov je treba uporabljati dodatni adapter za vija ne nastavke S...

Page 48: ...avljenost na vibracije znatno ni ja Za zavarovanje uporabnika pred u inki vibracij je treba izvesti dodatne varnostne ukrepe npr vzdr evanje elektri nega orodja in delovnega pribora poskrbeti je treba...

Page 49: ...e kontakto su oda arba akimis jeigu nety ia skystis pateko ant odos tai sutept viet nedelsdami nuplaukite gausiu varaus vandens kiekiu ir esant galimybei neutralizuokite skys io poveik velnia r g timi...

Page 50: ...sukimui ir sukimui medien metal arba plastmas rankis da niausiai naudojamas savisriegi var t tvirtinimui d l didelio grei io taip pat ilgesni medienai skirt var t sukimui d l auk to sukimo momento ran...

Page 51: ...arbo metu leid ia tiksliai kontroliuoti i sukimo ir sukimo proces EKSCENTRINIS SM GIS Besisukantis rankio suklys sukimo metu generuoja ekscentrin sm g Did jant s kiams sm gis sijungia automati kai Tuo...

Page 52: ...e tai min t prie as i vibracijos lygis viso darbo metu gali b ti didesnis nei nurodyta Norint tiksliai vertinti vibracijos poveik reikia atsi velgti momentus kai rankis i jungtas arba kai jis yra jung...

Page 53: ...zumu iesp ju robe s neitraliz jot idrumu ar vieglu sk bi piem citronsulu vai eti i ja idrums nok s ac s nekav joties veikt acu skalo anu ar lielu t r dens daudzumu vismaz 10 min tes un v rsties pie rs...

Page 54: ...roier ces iedarb ba uz operatora rok m skr v anas laik ir neliela Nedr kst izmantot elektroier ci neatbilsto i tai paredz tam izmanto anas m r im GRAFISK S DA AS APRAKSTS Zem k min t numer cija attiec...

Page 55: ...elikt darbinstrumenta serdeni darbinstrumentu patron 1 ieb dot to l dz galam var b t nepiecie ams pagriezt darbinstrumentu l dz tas ie ems atbilsto u st vokli Atlaist darbinstrumentu patronas nostipri...

Page 56: ...ce ir izsl gta vai ir iesl gta bet netiek izmantota darbam di kop j vibr cijas ekspoz cija var k t iev rojami maz ka Lai pasarg tu lietot ju no vibr cijas sek m j nodro ina t di papildu dro bas l dzek...

Page 57: ...atud v i deformeerunud Kahjustatud v i deformeerunud akud v ivad toimida ettearvamatul viisil p hjustada tulekahju plahvatust v i kehavigastusi V ltige aku kokkupuudet niiskuse v i veega Hoidke akut e...

Page 58: ...oonise ja toote enda vahel GRAAFILISTE T HISTE SELGITUS T HELEPANU ETTEVAATUST PAIGALDUS SEADISTAMINE INFO ETTEVALMISTUS T KS AKU EEMALDAMINE PAIGALDAMINE Reguleerige p rlemissuuna mberl liti 5 keskmi...

Page 59: ...vikeerajaotsakute lisaadapterit P RLEMISSUUND PAREMALE VASAKULE P rlemissuuna mberl liti 5 abil saab muuta spindli p rlemise suunda joonis F P rlemine paremale seadke l liti 5 rmisesse vasakusse asend...

Page 60: ...olla m rgatavalt v iksem Seadmega t taja kaitsmiseks vibratsiooni m ju eest tuleb v tta t iendavaid ohutusmeetmeid nagu t riista ja t tarvikute regulaarne hooldamine k te ige temperatuuri tagamine so...

Page 61: ...61 58G012 0o C 50 C 130 C 130 C 265 F...

Page 62: ...62 Li Ion Li Ion 1 2 3 4 7 5 Max 50 C 6 8 9 10 11 1 2 3 4 5 6 7 8 9 10 11 50 C 1 2 3 4 5 6 7 8 9...

Page 63: ...63 10 11 LED 12 13 14 LED 5 8 7 7 8 40 C 400 C 3 5 7 A 230 V AC 7 12 B 230 V AC 11 7 12 11 14 2 1 11 14 15 14 8 3 LED 14 13 C 2 1 9 9 9 9 LED 10 9 2 D 1...

Page 64: ...unku obrot w 5 jest we w a ciwym po o eniu 3 6 18V DC 0 2200 min 1 6 35 mm 180 Nm III 1 2 kg 2017 Graphite Energy 58G001 58G004 18 V DC 18 V DC Li Ion Li Ion 2000 mAh 4000 mAh 40 C 400 C 40 C 400 C 58...

Page 65: ...tanja vijaka vrsto dr ite elektri ni alat jer mo e do i do kratkotrajnih visokih momenata reakcije Koristite isklju ivo preporu enu aku bateriju i punja Aku baterije i punja nikad ne koristite u drug...

Page 66: ...stva potrebnog za sigurno kori tenje punja a ne smiju koristiti punja bez nadzora odgovorne osobe U suprotnom mo e do i do opasnosti od nepravilne uporabe punja a to bi moglo uzrokovati tjelesne povre...

Page 67: ...na punja u Izbjegavajte kratkotrajna punjenja akumulatora u nizu Ne nadopunjujte aku bateriju nakon kratkog kori tenja iste Primjetno smanjenje intervala izme u sljede ih punjenja zna i da je aku bate...

Page 68: ...Te ina 1 2 kg Godina proizvodnje 2017 Aku baterije sustava Graphite Energy Parametar Vrijednost Akumulator 58G001 58G004 Napon aku baterije 18 V DC 18 V DC Tip aku baterije Li Ion Li Ion Kapacitet ak...

Page 69: ...ke Kontakt sa strujnim kablom mo e dovesti do prenosa struje na metalne delove ure aja to mo e dovesti do opasnosti od strujnog udara DODATNI SAVETI ZA BEZBEDAN RAD SA UDARNIM KLJU EM Zabranjeno je pr...

Page 70: ...eca i osobe sa smanjenim fizi kim senzornim ili mentalnim sposobnostima ili nedostatkom znanja i iskustva ne bi trebalo da koriste punja osim ako rade u skladu sa uputstvom za upotrebu ure aja ili pod...

Page 71: ...a napunjenosti akumulatora ugasi e se nakon odre enog vremena Isklju iti struju pre va enja akumulatora iz punja a Izbegavajte sukcesivna kratka punjenja Ne bi trebalo dopunjavati akumulator nakon kra...

Page 72: ...0 2200 min 1 Dr ka ure aja 6 35 mm Maksimlani obrtni momenat 180 Nm Klasa bezbednosti III Masa 1 2 kg Godina proizvodnje 2017 Akumulator sistema Graphite Energy Parametar Vrednost Akumulator 58G001 5...

Page 73: ...e ti e odlaganja akumulatora i baterija Zadr ava se pravo izmena Grupa Topex Sp ka z ograniczon odpowiedzialno ci Sp ka komandytowa sa sedi tem u Var avi ulica Pograniczna 2 4 u daljem tekstu Grupa To...

Page 74: ...74 10 50 C 130 130 265 F Li Ion Li Ion...

Page 75: ...75 1 2 3 4 7 5 Max 50 C 6 8 9 10 11 1 2 3 4 5 6 7 II 8 9 10 11 50 C 1 2 3 4 5 6 7 8 9 10 11 12 13 14 5 8 7 A 7 8 4O C 40O C 3 5 7 A 230 V AC 7 12 B 230 11 7 12 11 14...

Page 76: ...76 1 11 14 15 14 8 3 LED 14 13 C 2 1 9 9 9 9 10 9 2 D 1 2 2 E 5 F 5 5 5 5 3 6...

Page 77: ...Li Ion 2000 mAh 4000 mAh 40 C 400 C 40 C 400 C 58G002 1 h 2 h 0 400 kg 0 650 kg 2017 2017 Graphite Energy 58G002 230 V AC 50 Hz 22 V DC 2300 mA 40 C 400 C 58G001 1 h 58G004 2 h II 0 300 kg 2017 LpA L...

Page 78: ...de tiles Si el til no est funcionando correctamente montado en la sujeci n de tiles puede aflojarse y el usuario puede perder el control durante la operaci n Al apretar y aflojar los tornillos debe su...

Page 79: ...de da os no utilice el cargador No debe intentar desmontar el cargador Cualquier reparaci n debe realizarse en un punto de servicio t cnico autorizado El montaje del cargador realizado de forma incor...

Page 80: ...al La iluminaci n por pulsaci n de 1 diodo indica un estado de carga de la bater a alto Despu s de cargar la bater a el diodo 11 en el cargador se ilumina en verde y todos los diodos del estado de car...

Page 81: ...ce agua ni otros l quidos La herramienta el ctrica la bater a y el cargador deben limpiarse con un trapo seco o con chorro de aire comprimido a baja presi n No utilice detergentes ni disolventes ya qu...

Page 82: ...abilidad civil y penal TRADUZIONE DELLE ISTRUZIONI ORIGINALI AVVITATORE A PERCUSSIONE SENZA FILI 58G012 ATTENZIONE PRIMA DI UTILIZZARE L ELETTROUTENSILE LEGGERE ATTENTAMENTE IL PRESENTE MANUALE CHE VA...

Page 83: ...a rete di alimentazione Non utilizzare caricabatterie posizionati su superfici infiammabili ad es carta tessuti o in prossimit di sostanze facilmente infiammabili A seguito dell aumento della temperat...

Page 84: ...aricabatterie alla presa di rete 230 V AC Inserire la batteria ricaricabile 7 nel caricabatterie 12 fig B Controllare che la batteria sia correttamente inserita infilata fino in fondo Dopo il collegam...

Page 85: ...e del selettore del senso di rotazione 5 questa previene l avviamento accidentale dell elettroutensile In questa posizione non sar possibile avviare l elettroutensile La sostituzione delle punte e deg...

Page 86: ...ori misure di sicurezza volte a proteggere l utente contro gli effetti delle vibrazioni quali manutenzione di elettroutensili ed utensili di lavoro mantenimento di un adeguata temperatura delle mani c...

Page 87: ...was deze plaats overvloedig met het schoon water of eventueel neutraliseer het vloeistof met gebruik van een zacht zuur zoals citroensap of azijn bij contact van het vloeistof met de ogen spoel deze m...

Page 88: ...voor het vast en losdraaien van bouten en schroeven in hout metaal kunststoffen Dankzij de aangeboden snelheid het toestel wordt gebruik voor montage van zelfborende bouten en dankzij een groot draai...

Page 89: ...nden wat het opladen van de accu weergeeft Tegelijkertijd gaan de groene diodes 14 van de indicatie van de oplaadstatus met een pulslicht in verschillende combnaties branden zie eronder Pulslicht van...

Page 90: ...ten neem de periodes van het uitzetten van het elektrogereedschap of de periodes van het aanzetten zonder gebruik in acht Op die manier kan de totale blootstelling aan trillingen aanzienlijk lager zij...

Page 91: ...91...

Page 92: ......

Reviews: