6
5
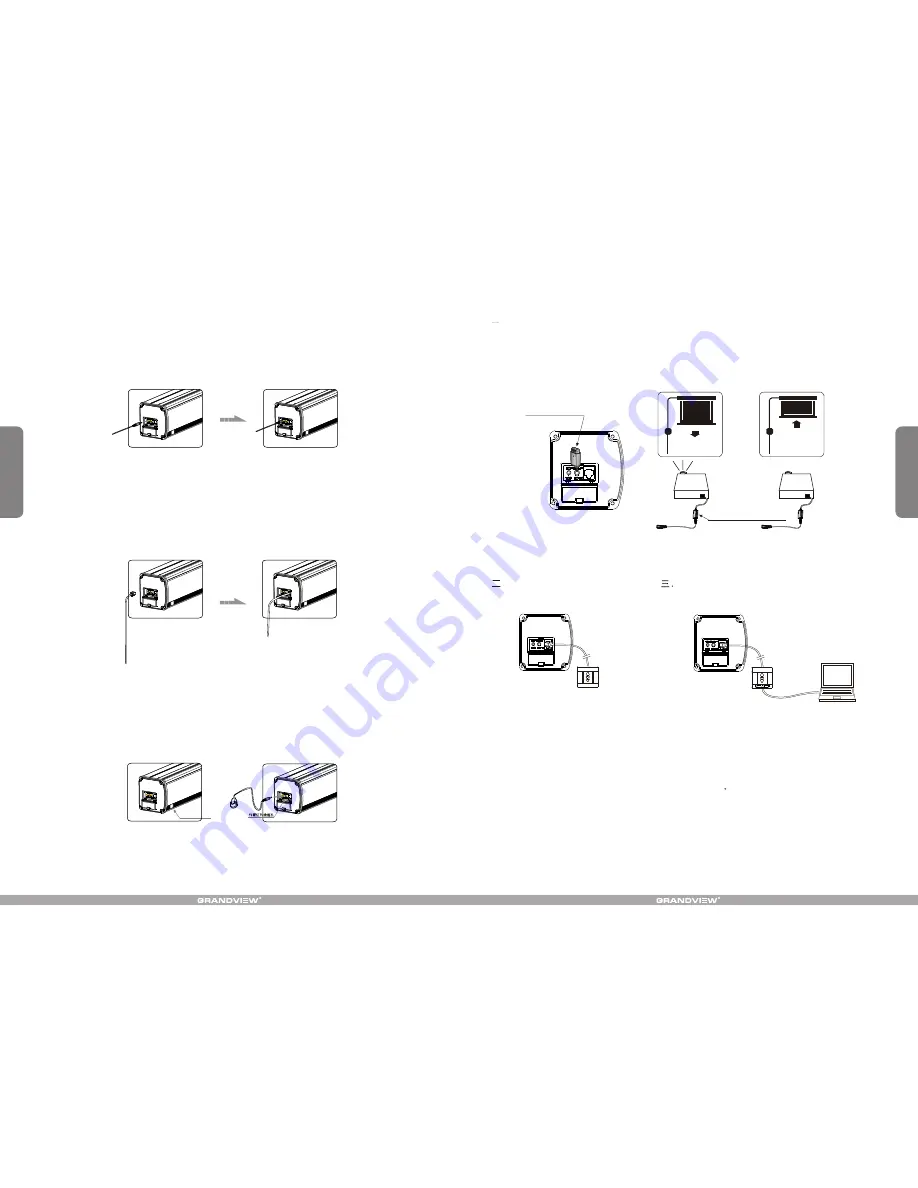
Externd IR sensor
Automatic Trigger Control Description
3.You can remove the 12V trigger wire if there is no need.
1.Insert one end of trigger into the trigger jack at left side of screen's end cap TRIG (Figure 22),, and insert another
end into 12V output hole.
2.When the projector is running, screen fabric will go down automatically; when the projector is closed, screen fabric
will retreat automatically.
External Controls (Central Control or RS232, Grandview Wall Switch) Function
Plug one side of the signal cord into the computer output jack at left side of the screen's end cap, the other side of
the singal cord to the Central Control jack, RS232 or Grandview Wall Switch (Figure 41-42), and then you can
control the up/stop/down of the screen via central control or computer.
IR Remote Control Function
1.When nothing blocks the sight of IR window, you can use the controller to control the screen (Figure43).
2.For hidden installation or IR window is blocked by something, please take out the External IR Receiver and plug
its head to the revelant hole, and then fix it at the position where IR signal is available. (Figure 44)
Figure 41
Figure 42
Figure 43
Figure 44
Figure 39
Figure 40
Other Options Connection Diagram
. Function Destription for convertion from FM to IR Control
When you insert the Wireless Synchro Convertor Receiver into EXTIR plug of the screen(Figure 45), you can
use FM wireless remote control device. The Intelligent Synchro Power Supply Control Adapter(for all projectors),
with 12V wireless trigger (for projectors with trigger output), can synchronously control the screen. (Figure 46-47)
Wireless Synchro
Convertor Receiver
Figure 45
Intelligent Synchro Power
Supply Control Adapter
. External Wall Switch
Manual control for screen up/stop/down.
Figure 48
Intelligent control for screen up/stop/down when
connected to the intelligent interface of the screen.
Intelligent control for screen up/stop/down when
connected to the computer's RS232 or USB
interface
Figure 49
Figure 46
Figure 47
External Intelligent Wall Switch Connection


