


7
4
How to use External Control (Central Controller or RS232/USB):
1. Turn the manual/IR remote control switch to position "0" (remote control stalls)
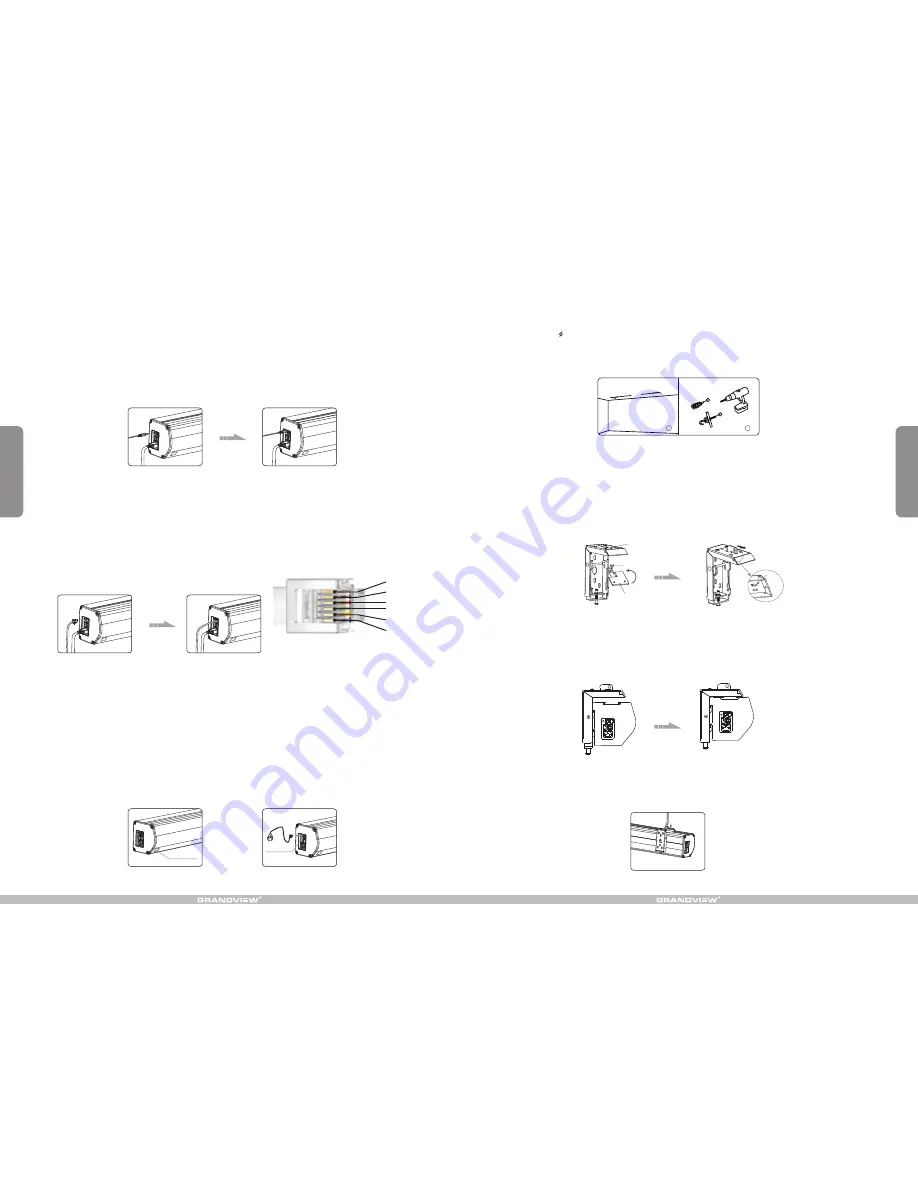
2. Plug one side of the signal cord into the computer output jack at left side of the screen's end cap, the other side
of the singal cord to plug into the jack of Central Controller or computer RS232/USB
(Figure 26-27),
and then you can control up/pause/down of the screen via Central Controller or computer.
(Note: in order to use RS232
Control, an Adapter is necessary to be connected with, the Adapter is not in the accessory package)
How to use IR Remote Control
:
1. Turn the manual/IR remote control switch to position "0" (remote control stalls)
2. When there's nothing to keep our of the IR window, you can use the controller to control up/pause/down of the
screen (Figure 28).
3. For hidden installation or IR window is being kept out by something, please take out the IR Receiver Head and
plug it to the revelant hole, and then install it at the position where IR signal is available (Figure 29)
Inner IR Receiver
Window
External IR Jack
How to use Trigger
Trigger
(Figure 24-25)
. Switch Manual/Remote Control Button to position "0" (remote control stalls).
rigger control
Control:
1. Insert one end of the signal cable into the
jack of the handle controller, and the other end into the
DC5V-12V output hole of the projector
.
2
3. When running the projector, the screen will spread the fabric automatic by synchronous; when closing the
projector, screen will be back automatic by synchronous too.
4. If you don't need to use the t
, please draw off the burst line directly, then control it by your hand.
Figure 24
Figure 25
Figure 26
Figure 27
Figure 28
Figure 29
A
1
2
To choose the tapping screws with hanger or other screws with hanger (unprovided) according to ceiling material.
(Tips: Wood screws 5 x 40 for wook ceiling and tapping screws for concrete wall.)
1. To drill two same holes with an electric drill horizontally with wall, then fasten hangers(unprovided) onto the
ceiling. (Figure 12)
Figure12
Floating hanging bracket installation
2. Incline the ceiling hanger to a certain degree to make the hanger hole go through the oval hole in the middle of
top side of the wall bracket. Then level the ceiling hanger to ensure that the base clings to the top of wall bracket,
so that the front button can go right through the wall bracket's fixing hole. Push the ceiling hanger ahead until the
front button fully locks the top panel of the wall bracket. Fix the ceiling hanger to the wall bracket with the help of
M6x10 size of screws. (Figure 13-14) (Note: Make sure the front button of the ceiling hanger fully lock the top side
panel of the wall bracket to prevent the screen falling down.)
3. After fix the ceiling hanger, make sure the up groove and the down groove on the housing match with Up
buckle and Down buckle on the bracket separately and fasten the fixing screw on the bracket, to fix housing
tightly onto the brackets.( Figure 15-16)
4. After finished step 2 and step 3, check whether wall bracket fix on the housing of screen tightly then you can
hang the screen according to the figure 17.
Figure 13
Figure 14
Figure 17
Fixing hole
Front button
Base
Front
button
Wall
bracket
Figure 15
Figure 16
RS
232 3
P
(
TXD
)
RS
232 5
P
(
GND
)
COM
STOP
DOWN
UP
RS232 interface settings
:
bps
::2400
data bit
:8
parity check
:
no
stop bit
:1
control code
:
up
:0
xff
,0
xee
,0
xee
,0
xdd
stop
:0
xff
,0
xee
,0
xee
,0
xcc
down
:0
xff
,0
xee
,0
xee
,0
xee


