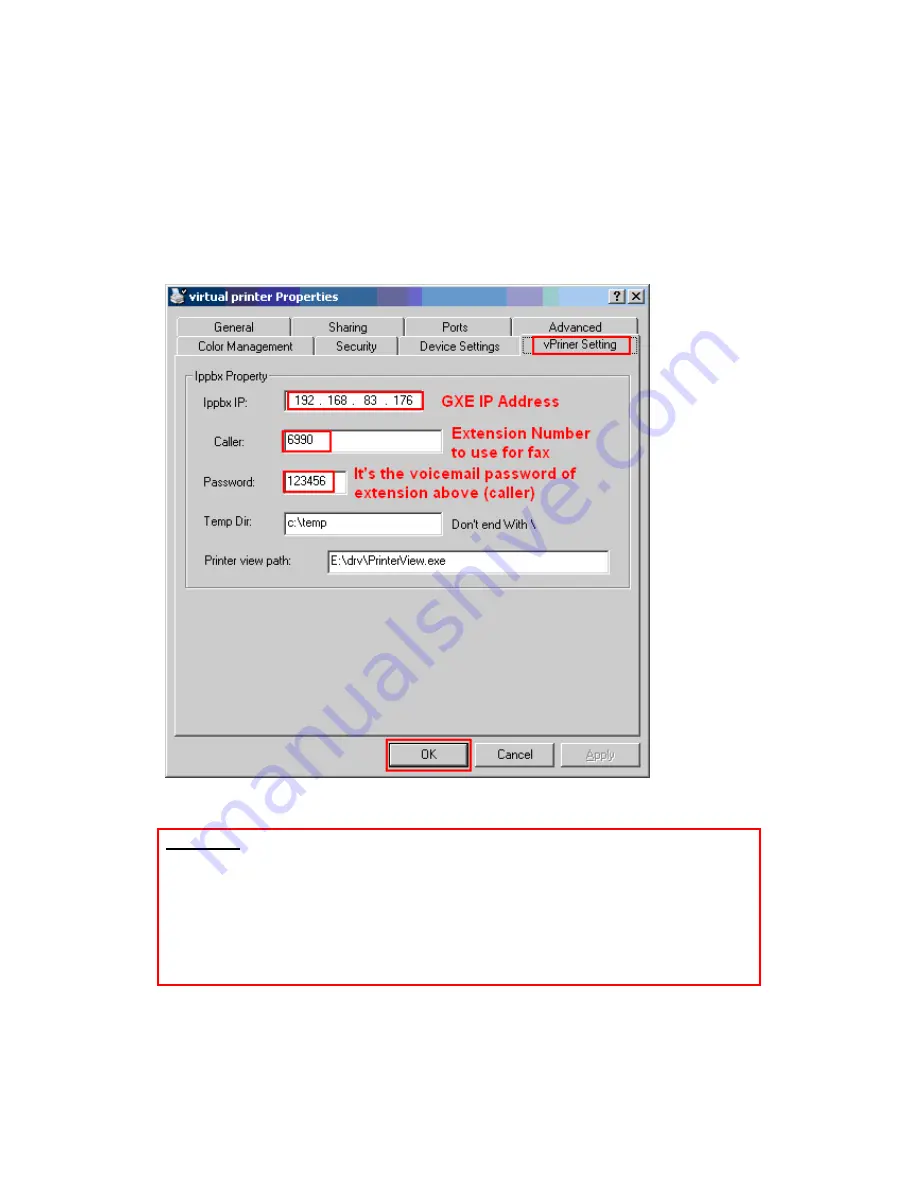
2. Configure the Virtual Printer
Right click the virtual printer icon after the installation process and select the “
Properties
” menu.
Click the “
vPrinter Setting
” tab and enter your IP-PBX IP address, caller number, caller
password, choice a temporary directory, and print task track program all path, click “
OK
”.
You must reboot your system after configuring the printer settings for the changes to take effect.
Important:
- The virtual printer will act as the GXE’s client, you will need to create an
extension for the Vprinter.
- The IP-PBX IP is the GXE IP address in our case.
- The Caller is the Extension number created in the GXE Web UI.
- The password used is the voicemail password (not the SIP password), the default
Voicemail password is the extension number. If it is changed, you must update it
in the virtual printer configuration page (image above)


