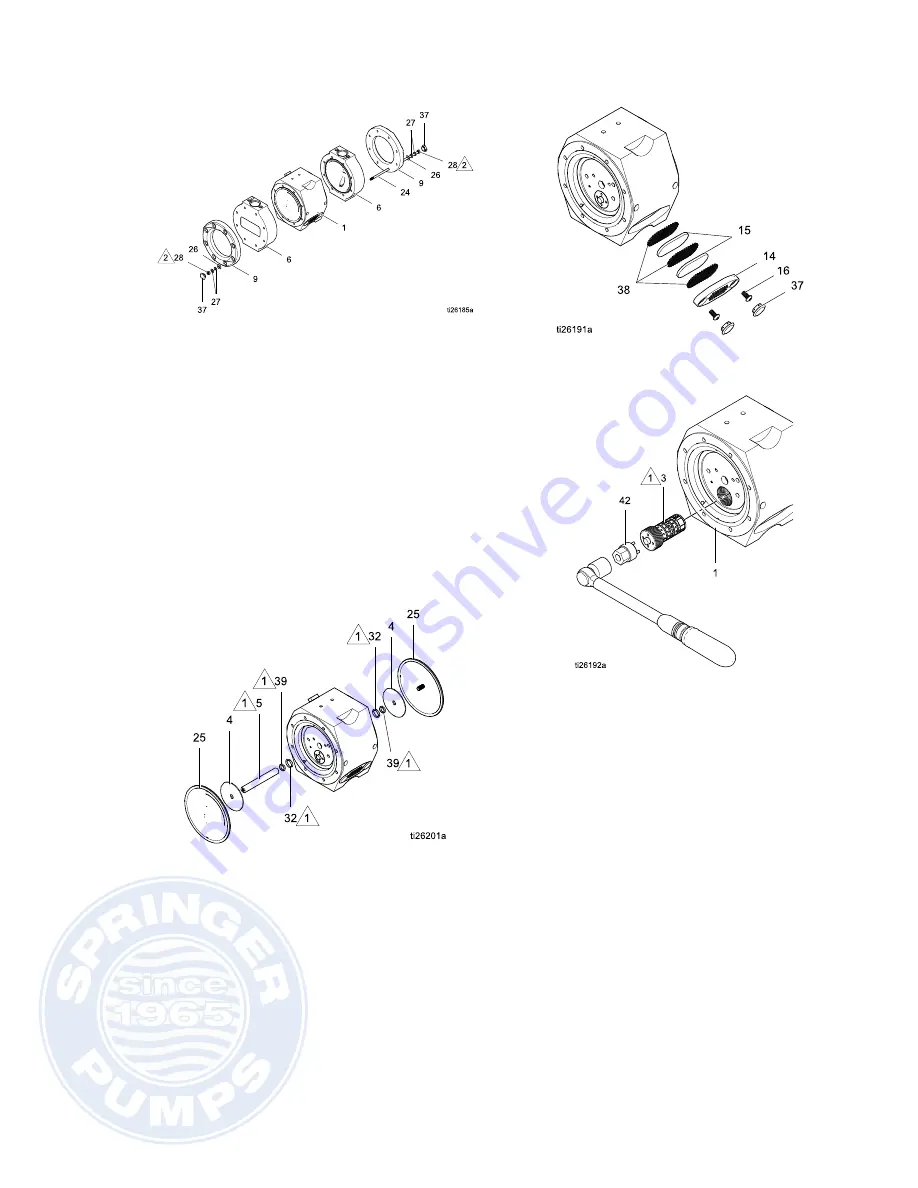
10. Remove the nuts (28) and bolts (24) by using two
10 mm wrenches, to hold on one side and to turn
the other. The nuts (28) will come off of one side
only. Remove the bolts (24).
NOTE:
NOTE:
NOTE: The nuts are permanently affixed to one
end of the bolts.
11. Remove the fluid cover retainers (9) and the fluid
covers (6) from the body (1).
Disassemble
Disassemble
Disassemble the
the
the Center
Center
Center Section
Section
Section
1.
One diaphragm (25) and strike plate (4) should
screw off by hand. Slide the second diaphragm
and strike plate out with the shaft (5).
2.
Inspect the o-ring seals (32) and glide shaft seals
(39). Replace as needed.
3.
Carefully remove the cap plugs (37) from both
muffler locations.
4.
Use a 4 mm Allen wrench to remove the screws
(16) and muffler caps (14).
5.
Inspect the mesh baffle spacers (38) and felt
mufflers (15). Replace as needed.
6.
Use a 19 mm socket and the supplied tool (42) to
remove the spool assembly (3).
7.
Inspect each spool assembly (3) for worn or
damaged parts. Replace each assembly as
needed.
Replace
Replace
Replace the
the
the Air
Air
Air Motor
Motor
Motor
1.
Use pin wrench (43) to remove the air motor
assembly (2) to remove from the body (1).
2.
Inspect o-rings (33) & (34), and replace if
necessary.
3.
Apply a thin film of lubricant (46) to air motor
o-rings (34) & (33), and to the outside of the air
motor assembly (2), and screw back into the
body (1), small end first.
NOTE:
NOTE:
NOTE: Be careful not to clog air holes with
lubricant.
334794B
19
Springer Pumps, LLC
Telford, PA 18969
Tel: 866-777-6060 / Int'l: 215-949-2900
Fax: 866-777-6383 / Int'l: 215-721-1296
shop.springerpumps.com


