www.gracobaby.com
s/WNERS-ANUALs-ANUALDELPROPIETARIO
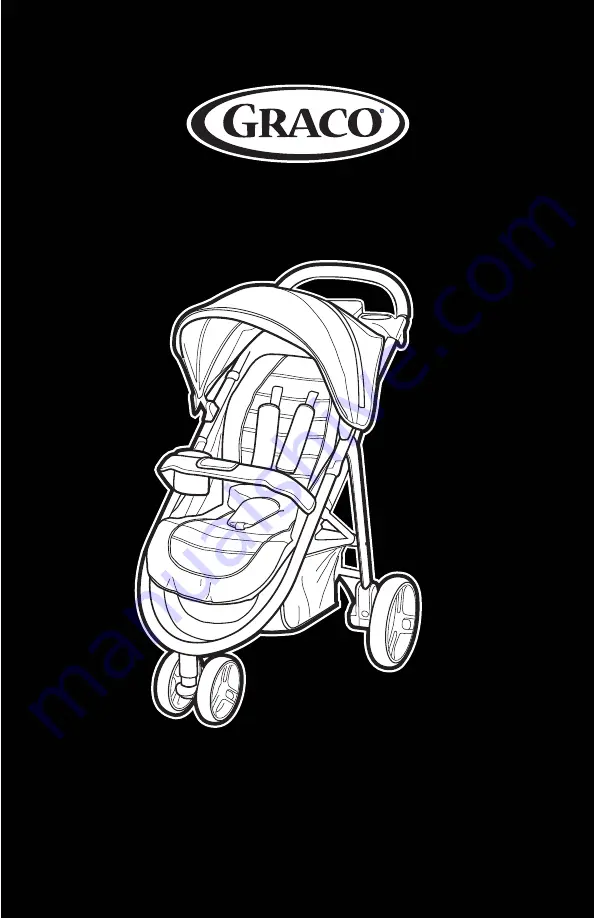
Aire3
™
Click Connect
,IGHTWEIGHT3TROLLERs#OCHECITOLIVIANO
©2013 Graco PD253021D 12/13
Page 1: ...www gracobaby com s WNER S ANUAL s ANUAL DEL PROPIETARIO Aire3 Click Connect IGHTWEIGHT 3TROLLER s OCHECITO LIVIANO 2013 Graco PD253021D 12 13...
Page 2: ...IRS or escalators You may suddenly lose control of the stroller or your child may fall out Also use extra care when going up or down a step or curb s STROLLER TO BE USED only at walking speed Product...
Page 3: ...ICO S JUNIORBABY and ASSURA infant car seats Improper use of this stroller with other manufacturers car seats may result in serious injury or death s READ THE MANUAL provided with your Graco car seat...
Page 4: ...erque al mismo s EVITE LA ESTRANGULACI N NO ponga art culos con un cord n alrededor del cuello del ni o suspenda cordones de este producto ni ponga cordones a los juguetes s NUNCA USE EL COCHECITO EN...
Page 5: ...E UN TRANSPORTADOR SNUGRIDE CLICK CONNECT DE GRACO en este sistema de viaje No debe usarse con SnugRide SnugRide 30 SnugRide 32 SnugRide 35 Infant SafeSeat AUTOBABY LOGICO S JUNIORBABY y asientos de a...
Page 6: ...oduct If any parts are missing call Customer Service No tools required LL MODELS s 4ODOS MODELOS N CERTAIN MODELS s N CIERTOS MODELOS 2X Veri que que tiene todas las piezas de este modelo ANTES de arm...
Page 7: ...Stroller s BRIR EL COCHECITO 1 2 Storage latch Traba de almacenamiento 3 CHECK that the stroller is completely latched open every time you open the stroller and before continuing with the rest of the...
Page 8: ...8 ANOPY s ALDAQUIN s APOTA 1 To adjust Para ajustarlo 2 3...
Page 9: ...9 RONT 7HEEL s A RUEDA DELANTERA CHECK that wheel is securely attached by pulling on wheel assembly SNAP RUIDO VERIFIQUE que la rueda est bien contactada tirando de el montaje de las rueda...
Page 10: ...ing Hazard Remove and immediately discard protective end cap from each wheel DO NOT remove rear wheels unless replacing them Child could fall on exposed rear axle and be injured ADVERTENCIA Peligro de...
Page 11: ...are when snapping the arm bar on the stroller with a child in the stroller ADVERTENCIA Asegure siempre a su ni o con el cintur n de seguridad La barra para los brazos no es un dispositivo de seguridad...
Page 12: ...12 0ARENTS 4RAY s A BANDEJA PARA PADRES SNAP RUIDO 1 2 Press parent tray onto canopy wire Oprima la bandeja para padres sobre el alambre de la capota...
Page 13: ...djuster at shoulder and waist for tighter adjustment To change shoulder harness slots see page 15 Use el ajuste deslizable en el hombro y la cintura para hacer ajustes m s apretado Para cambiar ranura...
Page 14: ...ebilla de 3 puntos To convert to 3 pt harness Use slide adjuster at waist for tighter adjustment Para convertirlo en un arn s de 3 puntos Use el ajuste deslizable a la cintura para hacer ajustes m s a...
Page 15: ...arness anchor in the slots that are closest to child s shoulder height Use slide adjuster for further adjustment Anclaje del arn s del hombro ni o grande Anclaje del arn s del hombro ni o peque o Ajus...
Page 16: ...AKES s OS FRENOS WARNING Always apply brake CHECK that the brake is on by trying to push stroller ADVERTENCIA Use siempre el freno VERIFIQUE que el freno est activado tratando de empujar el cochecito...
Page 17: ...lock for use on uneven surfaces such as grass stones or gravel 3WIVEL 7HEEL s A RUEDA GIRATORIA 1 2 PARA PREVENIR UNA SITUACI N PELIGROSA E INESTABLE no ponga m s de 10 libras 4 5 kg en la canasta de...
Page 18: ...O saque las ruedas traseras a menos que las cambie El ni o podr a caerse sobre el eje trasero expuesto y sufrir una lesi n To remove wheel push button and pull wheel off Repeat with the other wheel Re...
Page 19: ...siento del cochecito aseg rese que la cabeza brazos y piernas del ni o est n lejos de las piezas del asiento que se mueven y del armaz n del cochecito El ni o puede deslizarse entre las aperturas para...
Page 20: ...ull strap up WARNING DO NOT allow child to play with the fold handle FOLD strap located under this pocket ADVERTENCIA NO deje que el ni o juegue con la manija para plegarlo PLIEGUE la correa situada d...
Page 21: ...iento del cochecito hacia atr s hasta la posici n m s baja WARNING Do not use enclosure with an older child that can lift up on hands and knees or crawl out ADVERTENCIA No use el recinto de montaje co...
Page 22: ...ide to secure 3 Unfasten flaps 2 Lift enclosure Levante el recinto Destrabe las aletas Pase las correas a trav s de los agujeros en cada costado de la funda del asiento Sujete la cinta de nudo y ganch...
Page 23: ...s already in the car seat check that the child is secured with the harness Para los modelos que no vienen con un asiento de autom vil para beb se puede comprar uno por separado ADVERTENCIA Use solamen...
Page 24: ...o del cochecito hacia atr s hasta la posici n m s baja Tenga la seguridad de que la capota est en la posici n trasera antes de instalar el asiento de autom vil para beb 2 Pull on armbar to be sure it...
Page 25: ...at infant car seat is securely attached by pulling up on it VERIFIQUE QUE el asiento de autom vil para beb est debidamente instalado conectado con firmeza tirando hacia arriba de la misma 5 To remove...
Page 26: ...r repair the parts as needed Use only Graco replacement parts s EXCESSIVE EXPOSURE TO SUN OR HEAT could cause fading or warping of parts s IF STROLLER BECOMES WET open canopy and allow to dry thorough...
Page 27: ...ras rotas Cambie o repare las piezas seg n sea necesario Use solamente repuestos marca Graco s EL CONTACTO EXCESIVO CON EL SOL o el calor podr a causar que se desti a o se tuerzan algunas piezas s SI...
Page 28: ...registrar su producto Graco desde dentro de los EE UU vis tenos en l nea en www gracobaby com productregistration o env e la tarjeta de registro provista con su producto Actualmente no aceptamos regi...
Page 29: ...SnugRide Click Connect 35 2013 Graco PD261465A 10 13 US...
Page 30: ...nt Information 8 12 3 1 Warnings for Use as an Infant Restraint 8 10 3 2 Warnings for Use With a Stroller 10 3 3 Additional Warnings for Use as a Carrier 11 3 4 Height and Weight Limits 12 4 0 Choosin...
Page 31: ...fant Restraint Without Base Using Vehicle Belt 26 27 6 2 Installing the Infant Restraint and Base Using Vehicle Belt 28 29 6 3 Using LATCH to Install Base 30 31 6 4 Reclining Infant Restraint Base 32...
Page 32: ...and cause serious injury or death of your child Check vehicle owner s manual for information about side air bags and infant restraint installation No infant restraint can guarantee protection from inj...
Page 33: ...a suitable location in your vehicle Some seating positions such as those equipped with air bags may not be safe locations for this infant restraint 2 Inserting the harness straps in the proper slots f...
Page 34: ...traints could be recalled for safety reasons You must register this restraint to be reached in a recall Send your name address and the restraints model number and date of manufacture to Graco Children...
Page 35: ...tenance When you contact us please have your product s model number and date of manufacture ready so that we may help you quickly These numbers can be found on a sticker on the underside of your infan...
Page 36: ...your child if the infant restraint is not properly installed or if your child is not properly secured in the infant restraint PLACE THIS INFANT RESTRAINT ONLY IN A REAR FACING POSITION when using it...
Page 37: ...red LATCH connectors are properly stored in base REPLACE THE INFANT RESTRAINT AND BASE AFTER A CRASH OF ANY KIND EVEN IF INFANT RESTRAINT WAS UNOCCUPIED A crash can cause damage to the infant restrain...
Page 38: ...not have an owner s manual please call toll free 1 800 345 4109 to obtain one or visit our website at www gracobaby com Never use a Graco infant restraint with other manufacturer s strollers as this...
Page 39: ...place carrier on beds sofas or other soft surfaces STRANGULATION HAZARD Children have STRANGLED in loose or partially buckled harness straps Fully restrain the child even when carrier is used outside...
Page 40: ...ches 81 cm or less in height IMPORTANT MAKE SURE the top of the childs head is at least 1 below the top of the infant restraint TO AVOID SERIOUS INJURY OR DEATH DO NOT USE THE INFANT RESTRAINT WITH A...
Page 41: ...ant restraint in your vehicle consult your vehicle owner s manual or call Graco at 1 800 345 4109 Whenever possible secure the infant restraint in the center position of the seat directly behind the f...
Page 42: ...strike the child in a sudden stop or crash A FEW SEAT BELT SYSTEMS ARE NOT SAFE TO USE WITH THE INFANT RESTRAINT THE VEHICLE SEAT BELT MUST BE DESIGNED TO HOLD THE INFANT RESTRAINT TIGHTLY AT ALL TIM...
Page 43: ...crash or sudden stop Combination Lap Shoulder Belt with Retractor Each strap has a retractor at one end and is attached to the latch plate at the other end Passive Restraint Lap Belt with Motorized S...
Page 44: ...ions When using infant restraint without the base adjust the belt as described in this section for these types of vehicle seat belts Some vehicle lap shoulder seat belts have a plastic button on the b...
Page 45: ...gthen once it is buckled Tighten the belt by feeding the belt back into the retractor while pushing down hard on the infant restraint Once it is buckled this type of belt has a latch plate that will n...
Page 46: ...by pulling and push ing hard on the infant restraint If belt loosens or lengthens repeat procedure Locking clip Combination Lap Shoulder Belt with Sliding Latch Plate This belt has a latch plate that...
Page 47: ...r identification and requirements for use with an infant restraint Vehicle Lower Anchor Points Vehicle Seat Crease Typical seat in a passenger vehicle Other vehicle types may have different LATCH loca...
Page 48: ...k Handle adjustment button Harness buckle tongues Chest clip Harness buckle Harness adjustment button Harness adjustment strap Harness straps Handle adjustment button Hip slots 5 0 Features and Compon...
Page 49: ...n the bottom of the infant restraint You will need to use it with certain types of vehicle lap shoulder seat belts REAR VIEW Harness adjustment strap Canopy Crotch strap clip Click Connect attachment...
Page 50: ...IN PLACE of vehicle belt ONLY if vehicle is equipped with LATCH anchor points Please refer to vehicle owner s manual for LATCH locations BASE LATCH Adjustment Belt Level indicator Level Indicator The...
Page 51: ...base 1 Press handle adjustment buttons on both sides of handle 2 Rotate handle until it clicks into any of the 4 positions Position A MUST be used when carrying by handle Position A B C D may be used...
Page 52: ...into slots in canopy mounts on both sides of infant restraint as shown Pull canopy over back of infant restraint To remove press button on canopy mount and pull canopy bow out of slot repeat on other...
Page 53: ...odel does not include a body support you can use a rolled towel as shown To prevent ejection in sudden stop or crash Always make sure shoulder straps are threaded through slots and properly positioned...
Page 54: ...kle The seat belt should not be twisted or turned Make sure vehicle is on level ground so that the level indicator can be used to properly recline the infant restraint Refer to your vehicle owner s ma...
Page 55: ...belt 4 Tighten the vehicle seat belt To create a secure installation push down hard with your free hand on the infant restraint and pull and tighten the vehicle belt 5 Check infant restraint is level...
Page 56: ...lace the base in a rear facing position on a forward facing vehicle seat 6 2 Installing the Infant Restraint and Base Using Vehicle Belt Lap Belt Lap Shoulder Belt 3 Buckle the seat belt Make sure the...
Page 57: ...t procedure 6 Push the infant restraint down into the base and make sure that you hear a click Pull up on the infant restraint to be sure it is latched securely into the base If the infant restraint d...
Page 58: ...ition base in vehicle seat as shown 4 Make sure LATCH is through vehicle LATCH belt path normally used for vehicle seat belt Belt must lie flat and not be twisted 5 Attach connectors to vehicle lower...
Page 59: ...e LATCH stays tight and does not slip from the tightened position If it does not stay tight try another seating position or contact Graco at 1 800 345 4109 10 To remove LATCH push button while pulling...
Page 60: ...int must be properly reclined according to the following instructions Infant restraint must be properly reclined Too upright can result in breathing difficulties For your child s safety it is importan...
Page 61: ...evel indicator You must look straight on at the indicator WHEN READING THE LEVEL INDICATOR If the indicator shows light blue in the window the restraint is level for infants 0 months in age If the ind...
Page 62: ...towel under the foot until ONLY blue shows When using only the infant restraint without the base CHECK infant restraint is level with the ground Red level line on the warning label see step on pg 27...
Page 63: ...s must be adjusted remove child from infant restraint and move harness straps to the proper harness slots by doing the following FAILURE TO PROPERLY ADJUST THE HARNESS STRAPS FOR YOUR CHILD INCREASES...
Page 64: ...them through the appropriate slots Both harness straps must be through the same set of slots in the seat and pad D Depending on the size of your child you may need to adjust the harness straps as sho...
Page 65: ...junction plate as shown in not as shown in CHECK that the loops are completely within junction plate slots CHECK that straps are secure by pulling on them Shoulder Straps for a LARGER Baby Use top 2 s...
Page 66: ...TS MINIMUM WEIGHT IS 4LB shoulder straps should be in the lowest set of harness slots and the upper strap loops see page 37 FOR LARGER BABIES Turn infant restraint over and remove crotch strap clip by...
Page 67: ...ent of a sudden stop or crash Even when used only as a carrier make sure the harness straps are properly secured 7 3 Securing Child in the Infant Restraint 1 Move infant restraint handle to sitting po...
Page 68: ...harness straps around your child 5 Insert the two buckle tongues into the harness buckle on the crotch strap Make sure that you hear each tongue click into the buckle DO NOT use the infant restraint i...
Page 69: ...e of chest level with armpits and away from the neck 9 SAFETY CHECK a CHECK that harness straps are not twisted b CHECK that the harness is snug You should not be able to pinch the harness strap if it...
Page 70: ...belt or LATCH is fastened securely around the infant restraint base Holding the infant restraint or base near the vehicle belt path TURN AND PULL the infant restraint forward and to both sides to mak...
Page 71: ...omobile with a lap only belt If using the infant restraint only install following the same instructions as in an automobile Notify the airline ahead of time that you intend to bring the seat on board...
Page 72: ...and 3 Unfasten hook and loop tape in seat area of pad and pull out from around harness hip straps 4 Refer to your care tag on your seat pad for washing instructions NO BLEACH Reverse steps to reinstal...
Page 73: ...ed or replaced DO NOT IMMERSE THE HARNESS STRAPS IN WATER Doing so may weaken the harness straps NEVER iron the harness straps IF HARNESS STRAPS have cuts fraying or become badly twisted you MUST repl...
Page 74: ...sehold detergents Never lubricate buckle 3 Shake out excess water and allow to air dry harness webbing should be dry before use 4 Repeat Step 2 and 3 as needed 5 Re attach buckle into the desired slot...
Page 75: ...47 Notes...
Page 76: ...48 To purchase parts or accessories or for warranty information in the United States please contact us at the following www gracobaby com or 1 800 345 4109 9 0 Replacement Parts Bottom of Base...
Page 77: ...SnugRide Click Connect 35 2013 Graco PD261465A 10 13 US...
Page 78: ...tencias sobre el uso como sistema de seguridad para ni os 8 10 3 2 Advertencias sobre el uso con un cochecito 10 3 3 Advertencias adicionales sobre el uso como transportador 11 3 4 Limitaciones de pes...
Page 79: ...ur n del veh culo 26 27 6 2 Instalaci n del sistema de seguridad para ni os y la base usando el cintur n del veh culo 28 29 6 3 Utilizaci n del LATCH para instalar la base 30 31 6 4 Reclinaci n de la...
Page 80: ...rte a su ni o Consulte el manual del due o del veh culo para obtener informaci n sobre las bolsas de aire laterales y la instalaci n del sistema de seguridad para ni os Ning n sistema de seguridad par...
Page 81: ...mo aquellas equipadas con bolsas de aire podr an ser lugares peligrosos para este sistema de seguridad para ni os 2 Introduzca las correas de arn s en las ranuras adecuadas para su ni o 3 Asegure debi...
Page 82: ...sistemas de seguridad para ni os pueden ser retirados del mercado por problemas de seguridad Debe registrar este sistema para que lo podamos contactar en dicho caso Env e su nombre direcci n el n mer...
Page 83: ...nimiento Cuando se ponga en contacto con nosotros por favor tenga listo el n mero de modelo y la fecha de fabricaci n para que lo podamos ayudar m s r pidamente Los n meros se pueden encontrar en una...
Page 84: ...a ni os no est debidamente instalado o si el ni o no est debidamente sujetado en el sistema de seguridad para ni os PONGA ESTE SISTEMA DE SEGURIDAD PARA NI OS EN LA POSICI N MIRANDO HACIA ATR S SOLAME...
Page 85: ...arada repentina o accidente S quelo o aseg rese de que est debidamente sujetado en el veh culo Si no usa el LATCH aseg rese que los conectores del LATCH que no est n enganchados est n debidamente alma...
Page 86: ...fabricantes ya que podr a resultar en una lesi n seria o la muerte EL SISTEMA DE SEGURIDAD PARA NI OS PUEDE ALCANZAR ALTAS TEMPERATURAS SI QUEDA EN EL SOL Toque siempre la superficie de cualquier piez...
Page 87: ...e una cama sof u otra superficie blanda 3 52 675 1 8 0 172 Ni os se han ESTRANGULADO con correas del arn s sueltas o parcialmente trabadas Refrene completamente al ni o incluso cuando use el transport...
Page 88: ...A SEGURIDAD de que la parte de arriba de la cabeza del ni o est por lo menos 1 pulgada por debajo de la parte de arriba del sistema de seguridad para beb PARA EVITAR SERIAS LESIONES O LA MUERTE NO USE...
Page 89: ...consulte su manual del due o del veh culo o llame a Graco al 1 800 345 4109 Cuando sea posible asegure el sistema de seguridad para ni os en la posici n central del asiento directamente atr s de los...
Page 90: ...repentina ALGUNOS SISTEMAS DE CINTURONES DE SEGURIDAD NO SON SEGUROS PARA USAR CON EL SISTEMA DE SEGURIDAD PARA NI OS EL CINTUR N DE SEGURIDAD DEL VEH CULO DEBE HABER SIDO DISE ADO PARA RETENER AL SI...
Page 91: ...epentina Combinaci n de cintur n para la falda y el hombro con retractor Cada correa tiene un retractor en una punta y est conectada a la placa de seguridad en la otra punta Cintur n pasivo Cintur n p...
Page 92: ...s sin la base ajuste el cintur n como se describe en esta secci n para estos tipos de cinturones del asiento del veh culo Algunos cinturones de seguridad de los hombros falda de ciertos veh culos tien...
Page 93: ...etado en la hebilla Ajuste el cintur n pasando el cintur n por el retractor mientras empuja con fuerza el sistema de seguridad para ni os hacia abajo Una vez que est trabado en la hebilla este tipo de...
Page 94: ...tirando y empujando con fuerza el sistema de seguridad para ni os Si el cintur n se afloja o se alarga repita el procedimiento Traba de seguridad RPELQDFLyQ FLQWXUyQ SDUD OD falda y el hombro con pla...
Page 95: ...los requisitos para su uso con un sistema de seguridad para ni os Puntos de anclaje inferiores del veh culo Pliegue del asiento del veh culo Un asiento t pico de un veh culo de pasajeros Otros tipos...
Page 96: ...o Bot n de ajuste de la manija Lenguas de la hebilla del arn s Presilla para el pecho Hebilla del arn s Bot n de ajuste del arn s Correa de ajuste del arn s Correas del arn s Bot n de ajuste de la man...
Page 97: ...s de cinturones para la falda hombro del veh culo VISTA TRASERA Manija de liberaci n Almacenamiento de la traba de seguridad Correa de ajuste del arn s Capota Presillas de la correa de la entrepierna...
Page 98: ...TE EN LUGAR del cintur n del veh culo si el veh culo est equipado con puntos de anclaje LATCH Por favor consulte el manual del due o del veh culo para identificar las ubicaciones del LATCH Correa de a...
Page 99: ...st trabado firmemente en la base 1 Apriete los botones de ajuste de la manija en ambos costados de la manija 2 Gire la manija hasta que se trabe en una de las 4 posiciones Posici n A DEBE usarla cuand...
Page 100: ...para ni os como se indica en Tire la capota sobre la parte de atr s del sistema de seguridad para ni os Para sacarla oprima el bot n en el montante de la capota y tire el arco de la capota de la ranu...
Page 101: ...a enrollada como se indica Para prevenir la eyecci n en un accidente o parada repentina Aseg rese siempre que las correas del hombro pasan por las ranuras y est n debidamente instaladas en los hombros...
Page 102: ...ta Aseg rese de que el veh culo est sobre piso nivelado para que el indicador del nivel se pueda usar para reclinar debidamente el sistema de seguridad para ni os Consulte su manual del due o del veh...
Page 103: ...uridad del veh culo Para crear una instalaci n segura apriete hacia abajo con fuerza con su mano en el sistema de seguridad para ni os y tire y apriete el cintur n de seguridad del veh culo 5 Verifiqu...
Page 104: ...en un asiento del veh culo orientado hacia adelante 6 2 Instalaci n del sistema de seguridad para ni os y la base usando el cintur n del veh culo Cintur n de la falda Cintur n del hombro falda 3 Trabe...
Page 105: ...guridad para ni os hacia abajo en la base y aseg rese de que escucha un clic Tire hacia arriba del sistema de seguridad para ni os para asegurarse que est trabado apretadamente en la base Si el sistem...
Page 106: ...seg rese de que el LATCH pase por la v a del cintur n del veh culo LATCH que normalmente se usa para el cintur n de seguridad del veh culo El cintur n debe mantenerse en posici n plana sin doblarse 5...
Page 107: ...fique que el LATCH se mantiene apretado y no se suelta de la posici n apretada De no mantenerse apretado col quelo en otro lugar en el asiento o p ngase en contacto con Graco llamando al 1 800 345 410...
Page 108: ...las siguientes instrucciones El sistema de seguridad para ni os debe estar debidamente reclinado Una posici n demasiado vertical podr a causar dificultad respiratoria Es importante que su sistema de s...
Page 109: ...e el indicador del nivel Debe mirar de frente al indicador CUANDO LEE EL INDICADOR DEL NIVEL Si el indicador aparece azul claro en la ventana el sistema de seguridad est nivelado para reci n nacidos S...
Page 110: ...sta que aparezca la zona de color azul Cuando solamente usa el sistema de seguridad para ni os sin la base VERIFIQUE que el sistema de seguridad para ni os est nivelado con el piso La l nea de nivel r...
Page 111: ...e deben ajustar las correas del arn s saque al ni o del sistema de seguridad para beb s y mueva las correas del arn s a las ranuras correctas del arn s NO AJUSTAR DEBIDAMENTE LAS CORREAS DEL ARN S DEL...
Page 112: ...s del mismo juego de ranuras en el asiento y almohadilla D Seg n el tama o de su ni o podr a ser necesario ajustar las correas del arn s la hebilla de la correa de la entrepierna o las correas de la c...
Page 113: ...indica en VERIFIQUE que los nudos est n completamente dentro de las ranuras de la placa de uni n VERIFIQUE que las correas est n aseguradas tirando de las mismas Correas para los hombros para un beb M...
Page 114: ...de los hombros deber n estar en el juego m s bajo de las ranuras del arn s y los nudos superiores de la correa vea p gina 37 PARA BEB S M S GRANDES De vuelta el sistema de seguridad para ni os y saqu...
Page 115: ...usa solamente como transportador aseg rese que las correas del arn s est n debidamente ajustadas 1 Mueva la manija del sistema de seguridad para ni os a la posici n de sentado vea la p gina 23 2 Oprim...
Page 116: ...n s alrededor de su ni o 6 Inserte las dos lenguas de la hebilla en la hebilla del arn s en la correa de la entrepierna Aseg rese que escucha el clic de cada lengua en la hebilla NO use el sistema de...
Page 117: ...cho en el medio del pecho a nivel con la axila y lejos del cuello 10 VERIFICACI N DE SEGURIDAD a VERIFIQUE que las correas del arn s no est n dobladas b VERIFIQUE que el arn s est tensionado No deber...
Page 118: ...alrededor de la base sistema de seguridad para ni os Mientras agarra el sistema de seguridad para ni os o la base cerca de la v a del cintur n GIRE Y TIRE el sistema de seguridad para ni os hacia ade...
Page 119: ...az n inst lela siguiendo las mismas instrucciones que para un autom vil Notifique a la aerol nea con anticipaci n que piensa transportar una silla a bordo sela solamente en un asiento de la avi n orie...
Page 120: ...e gancho y nudo en el lugar del asiento de la almohadilla y tire de las correas de la cadera del arn s 4 Consulte la etiqueta de cuidado de la almohadilla del asiento para obtener las instrucciones de...
Page 121: ...JA LAS CORREAS DEL ARN S EN AGUA Hacerlo podr a debilitar las correas del arn s NUNCA planche las correas del arn s SI LAS CORREAS DEL ARN S tienen cortes est n muy dobladas o deshilachadas DEBE cambi...
Page 122: ...a hebilla 3 Elimine el exceso de agua y deje que se seque el aire la correa del arn s debe estar seca antes del uso 4 Repita los pasos 2 y 3 seg n sea necesario 5 Vuelva a colocar la hebilla en la ran...
Page 123: ...47 Notas...
Page 124: ...ar piezas o accesorios o para obtener informaci n sobre la garant a en los Estados Unidos por favor comun quese con nosotros en www gracobaby com o 1 800 345 4109 9 0 Piezas de repuesto El lado inferi...