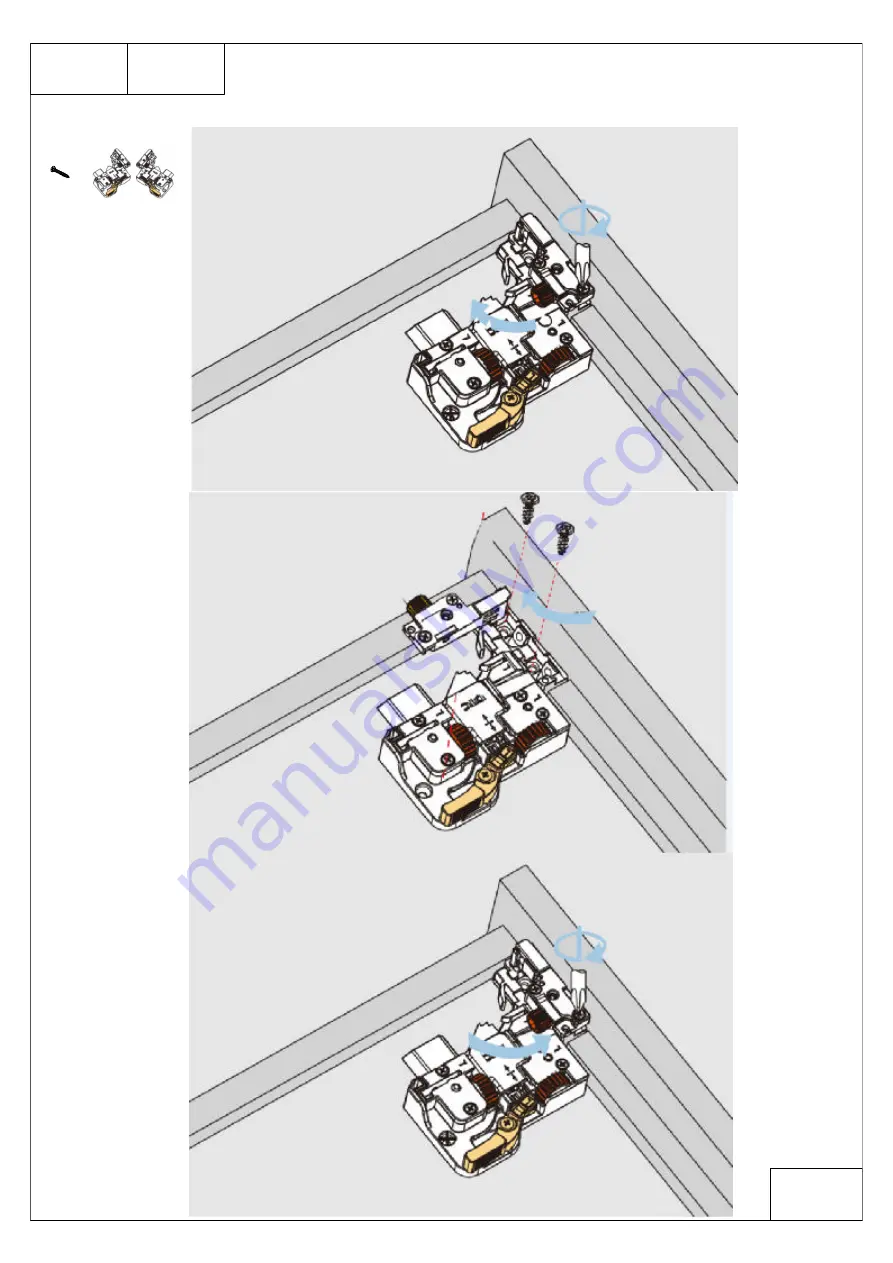
Slides Front Assembly Drawing
Page 7
GHDC215WHGHDC218WH
GHDC215WNGHDC218WN
d
Q
t
y
4
Qty
2
Sets
j
Page 1: ...read the instructions before starting the installation During assembly please follow all generally accepted safety procedures Failure to adhere to the following instructions will invalidate the manuf...
Page 2: ...el Bottom Panel Back Panel Toe Kick Front Rail Cabinet Parts Detail GHDC215WH GHDC218WH Hardware Bag a b g e Qty 18 f Qty 18 c d h Page 2 QTY 1 2 1 1 1 1 3 Qty 16 Qty 2 Sets A C B D E F G GHDC215WN GH...
Page 3: ...ces Soft Surface Hard Surface A A After unpacking place the panels on a soft surface Screw the hardware onto the side panel with an electric drill c Qty 8 a Qty 18 C A Qty 2 Page 3 GHDC215WH GHDC218WH...
Page 4: ...ttom panel back rail front rail and toe kick with the rubber mallet Connect with the right side panel Tighten it with a screwdriver Insert the back panel b Qty 9 Page 4 D F B G E e Qty 9 GHDC215WH GHD...
Page 5: ...Fasten the left side panel with a screwdriver b Qty 9 e Qty 9 Page 5 C GHDC215WH GHDC218WH GHDC215WN GHDC218WN...
Page 6: ...Drawer Assembly Drawing g Qty 16 Qty 2 h Page 6 GHDC215WH GHDC218WH GHDC215WN GHDC218WN Back Sides...
Page 7: ...Slides Front Assembly Drawing Page 7 GHDC215WH GHDC218WH GHDC215WN GHDC218WN d Qty 4 Qty 2 Sets j...
Page 8: ...received and up to the point of final installation Partially assembled fully assembled or installed closet is considered accepted by the buyer may not be returned or exchanged for any reason The manu...