Goodmans GTVL32W17HDF Instruction Manual Download Page 31

0

USING THE FEATURES

USING THE FEA

TURES

OPTION

DESCRIPTION

Edit Channel 
List

Lock some channels that are not 

suited for younger members of the 

family, skip/add the channel list as 

you wish.

Configuration

Add new channel, set audio language, 

subtitle language, as you wish. Upgrade 

the system. View the signal information.

Parental 
Control

Enable or Disable the menu 

protection system and allows the PIN 

code to be changed.

EPG

Electronic Program Guide

Setup

Press

DTV OSD Menu Operation
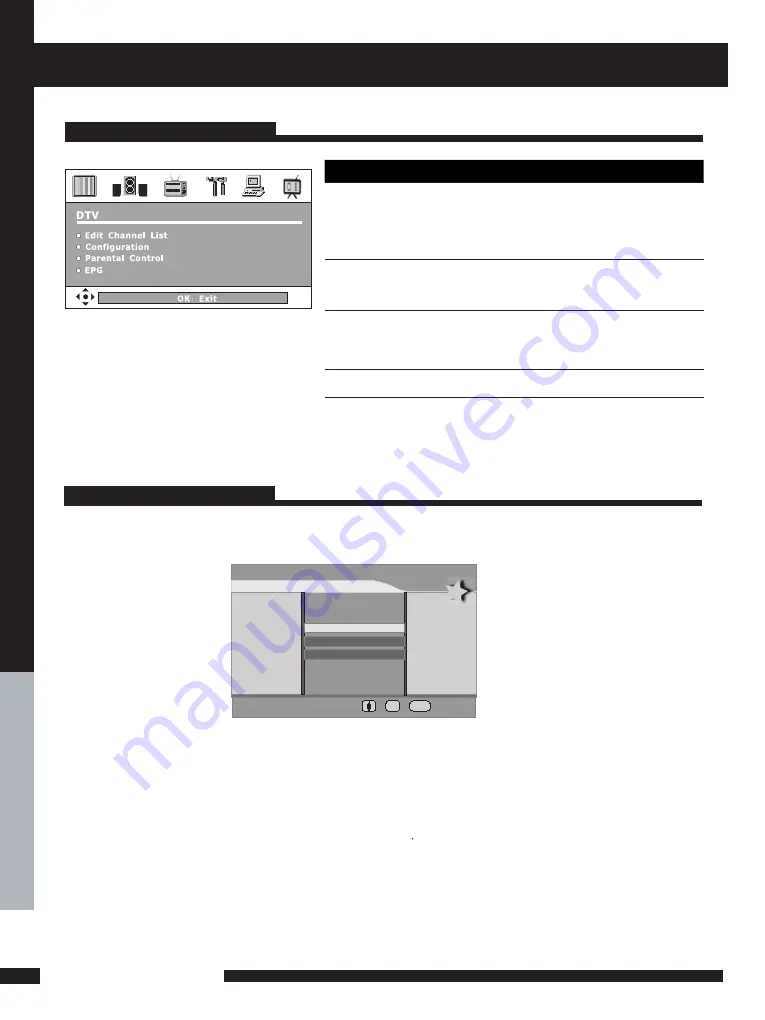
Edit Channel List 

USING THE DTV FEATURES

Highlight the Edit Channel List option, then press OK button,there are three Items in the menu.

Edit Favourite List

C r eate a fav our ite list

Modifty a fav our ite list

Delete a fav our ite list

OK

E XI T

CREATE A FAVOURITE LIST

Highlight the Create a favourite list item, pressing OK button, then The  menu is displayed on the screen 

now. Once you enter the  Create a favourite list menu,a new channel list will be created,you can create a 

maximum of 4 favourites list.

You can lock or unlock the selected channel by pressing the RED button. A locked channel means that the 

selected channel cannot be viewed without entering in the child lock code. Pressing the BLUE button to skip 

or add the selected channel. If you want to skip or add all, first press the GREEN button, then press either 

the RED button to skip all, or the GREEN button to add all. A channel selected as a locked appears in the 

channel  list  with  a  lock  icon  (  red  button  )  against  the  channel  name,  a  channel  selected  as  an  added 
channel appears in the channel list with a add icon ( tick ) against the channel name.

Summary of Contents for GTVL32W17HDF

Page 1: ...GTVL32W17HDF DIGITAL TERRESTRIAL LCD TV GTVL37W17HDF GTVL42W17HDF...

Page 2: ...do not disassemble this equipment by anyone except a qualified service personnel This symbol is intended to alert the user to the presence of important operating and maintenance instructions in the l...

Page 3: ...r 2 core or 3 core Follow the appropriate wiring instructions given below In both cases ensure that the outer sheath of the cable is firmly held by the cable clamp WARNING Do not connect either wire t...

Page 4: ...ll the AC power cord Do not handle the AC power cord with a wet hand Remove the plug from the wall outlet if the equipment will not be used for a long period of time Do not expose the equipment to ext...

Page 5: ...ust off the cabinet of the unit with clean dry soft cloth Apply non ammonia cleansing lotion onto the cloth not directly onto the screen Put your unit in a well ventilated area away from high humidity...

Page 6: ...Basic Operation 14 Connecting a DVD Player 16 Connecting a VCR a Video Camera 17 Connecting a TV Box and Satellite Receiver 18 Connecting a HDMI sourcer 19 Connecting an AUDIO amplifier 20 HDMI 21 US...

Page 7: ...atio 800 1 1000 1 1200 1 NICAM FM Stereo Function Auto Programme Sort APS Manual search Sleep Timer User selectable colour temperature settings Built in ATV and DTV Tuners WSS Wide Screen Scale Functi...

Page 8: ...extra cable connector etc Package Contents Once you open the box make sure all of the following contents are included If you re missing any items please contact your dealer These items are all you nee...

Page 9: ...s the main menu item and change values for items when in the OSD mode CHANNEL Scans up and down through channels Selects sub menu item when in the OSD mode INPUT Chooses from different input signal so...

Page 10: ...Connects the all digital AV equipment with HDMI 1 HDMI2 connector HDMI supports enhanced high definition video S VIDEO AV4 Connects to the S VIDEO and AUDIO L R output sockets on external video equip...

Page 11: ...o check the remaining sleep time press the SLEEP button once b To cancel the sleep time repeatedly press the SLEEP button until the display off appears c If you turn the set off after setting the slee...

Page 12: ...am include the Sub MHEG on the DTVSource 21 TEXT Turns on and off the Teletext function Enter the MHEG on the DTV Source CH LIST Display all channel list name GUIDE In DTV mode pressing GUIDE key disp...

Page 13: ...ds of the batteries with the and ends indicated in the battery compartment Align the lower tabs of the back cover to the remote control and squeeze the cover into place Do not use caustic cleaners por...

Page 14: ...on a Lift foam packaging material from the top of the LCD out of the box b Lift LCD out of the box with the bottom foam packaging material still attached and place onto a stable surface a b Stand Ship...

Page 15: ...ed and stored in the memory When APS is completed BBC1 digital TV will show press CH buttons to view the other channels stored To view analogue TV press INPUT button and use the up down arrow buttons...

Page 16: ...red by pressing 1 2 or 3 etc on the remote button pad Adjusting the Volume Press the VOL button on the remote control or the VOL button on the LCD TV to adjust the volume To Mute the Sound 1 Press MUT...

Page 17: ...o connect the DVD s audio output sockets to your LCD TV Use a S Video cable to connect your LCD TV and DVD player Use an A V cable to connect the DVD s composite output sockets to your LCD TV Use a SC...

Page 18: ...RT socket Connect all power sources before turning on the power switch of the LCD TV or other connected equipments Press the POWER button to turn on your LCD TV Connecting a VCR a Video Camera 1 METHO...

Page 19: ...he LCD TV s SCART socket 1 Connect all power sources before turning on the power switch of the LCD TV or other connected equipments 3 Press the POWER button to turn on your LCD TV To watch TV cable bo...

Page 20: ...ecting a HDMI source Connect an HDMI source to the HDMI input socket as show There are 2 HDMI sockets and both can be used to connect to an HDMI Skybox or DVD player with HDMI output HDMI cable is not...

Page 21: ...DIGITAL OUT sockets 1 3 Press the POWER button to turn on your LCD TV 2 Connect all power sources before turning on the power switch of the LCD TV or other connected equipments For best Sound quality...

Page 22: ...l devise HDMI sends Digital Video and Audio with one cable HDMI HDMI This TV can accept High Definition Multimedia Interface HDMI This TV SET supports HDCP High bandwidth Digital Content Protection Pr...

Page 23: ...wide screen settings Press the P SIZE button repeatedly to select the screen format you want 4 3 Displays at 4 3 aspect ratio Wide Screen Viewing 16 9 When watching 4 3 image the original image will s...

Page 24: ...INAL Stretches the image vertically and horizontally to keeps the image size consistent in the center of the screen and stretches the sides ZOOM Stretches the image vertically and horizontally to fill...

Page 25: ...re in picture mode MAIN SUB Using Picture In Picture Press SWAP to toggle the picture source between the main window and the sub window Press the POSITION button to change the position of the second w...

Page 26: ...ictures between the main and sub windows Press WINDOW to activate either the main or sub window then press the INPUT button to display the Input List Press to change input source and press the OK butt...

Page 27: ...nfiguration p arental control EPG Electronic Programme Guide with which you can set the DTV as you wish 2 Press the MENU button on the remote control The main menu will appear on the screen 3 Use to h...

Page 28: ...UAL 2 OPTION DESCRIPTION Advanced Display Mode Allows you to select the display mode to be 16 9 14 9 4 3 Zoom Original Noise Reduction Allows you to adjust the noise reduction to be off low mid high D...

Page 29: ...l Poland Sweden Slovenia Slovakia Turkey Others Manual Search Allows you to adjust the manual search by hand if signal is too weak or picture is blurry Channel Setup Press the button to select Sort De...

Page 30: ...Timer Allows you to select the sleep timer to be off 15min 30min 60min OSD Timer Allows selection of the display time of the on screen menu 5 s 10 s 15 s 20 s 25 s OSD Reset Allows you to restore the...

Page 31: ...te a favourite list OK EXIT CREATE A FAVOURITE LIST Highlight the Create a favourite list item pressing OK button then The menu is displayed on the screen now Once you enter the Create a favourite lis...

Page 32: ...Once you lock a channel you must enter the PIN Code that is set in the parental control menu at first before the channel is displayed By pressing the YELLOW button you can sort the channels in the lis...

Page 33: ...e favourite list press O K to confirm OK EXIT MODIFY A FAVOURITE LIST You can modify the favourite list which you have created The list named TV RADIO is the default list that all the favourite lists...

Page 34: ...cation or want to rescan for new channels Press OK button to display the channel installation menu If you want TV to auto search the channels press OK button to continue Then you should choose the ins...

Page 35: ...llowing menu Using to cycle the channel option then the bar graphs of signal level and signal quality will indicate whether any channels are likely to be found You should choose the channel of which t...

Page 36: ...language options Subtitle language This function selects the desired subtitle language whenever subtitle information is broadcast Highlight the subtitle language line in the user settings menu and us...

Page 37: ...hlight the Signal information item in the configuration menu pressing OK button to display the Signal information menu Cycle through the channel option by using the buttons on the remote control The s...

Page 38: ...channels you locked in the edit channel list menu can t be displayed before you enter the PIN CODE Maturity level There are 18 levels total If you toggle this option to a number 1 18 for example you...

Page 39: ...ghted Use Channel Up Down buttons to change channels and view the other programmes on the selected channel Press the Arrow up Arrow down navigation buttons to scroll through and show programme content...

Page 40: ...POWER button on the remote Press the TV button on the remote then press the INPUT button repeatedly to select the connected video sources Make sure that the main power switch on the back panel is swi...

Page 41: ...UDIO L R 2 2 AUDIO OUT L R 1 1 HEADPHONE 1 1 Power Source MAX AC230V 50Hz 200W AC230V 50Hz 264W Dimension W x D x H 805 x 246 x 635 mm 930 x 246 x 716 mm WEIGHT Net 15 kg 22 kg MODEL GTVL42W17HDF LCD...

Page 42: ...during manufacture Display Mode VGA TIMING Dot X Line Horizontal Frequency kHz Vertical Frequency Hz 640 x 480 31 46 59 94 640 x 480 37 86 72 80 640 x 480 37 50 75 00 800 x 600 37 87 60 31 800 x 600 4...

Page 43: ......

Reviews: