5
IMPORTANT SAFEGUARDS
PREFITTED MAINS PLUGS
For you convenience a mains plug has been fitted to this appliance. For your safety please
observe the following information.
1. Should the fuse in the plug fall remove the plug from the wall socket and replace the fuse with
a 3 Amp ASTA approved to BS 1362 fuse.
2. Never use the plug without the fuse cover fitted. Replacement fuse covers are available
from your dealer or most electrical retail outlets.
3. If the mains plug is out off the cable, rewire the replacement plug in accordance with
instruction give in this manual.
4. CAUTION: Under no circumstances should the discarded plug be inserted into the mains
socket. To prevent a shock hazard carefully dispose of the discarded plug.
Do not leave the plug lying around where children might see it.
WARNING: To prevent fire or shock hazard do not expose this unit to rain or moisture.
CAUTION:
DANGEROUS VOLTAGES EXIST INSIDE THIS UNIT DO NOT REMOVE COVER (OR
BACK).
NO USER SERVICEABLE PARTS INSIDE REFER SERVICING TO QUALIFIED SERVICE
PERSONNEL. DISCONNECT FROM MAINS SUPPLY WHEN NOT IN USE.
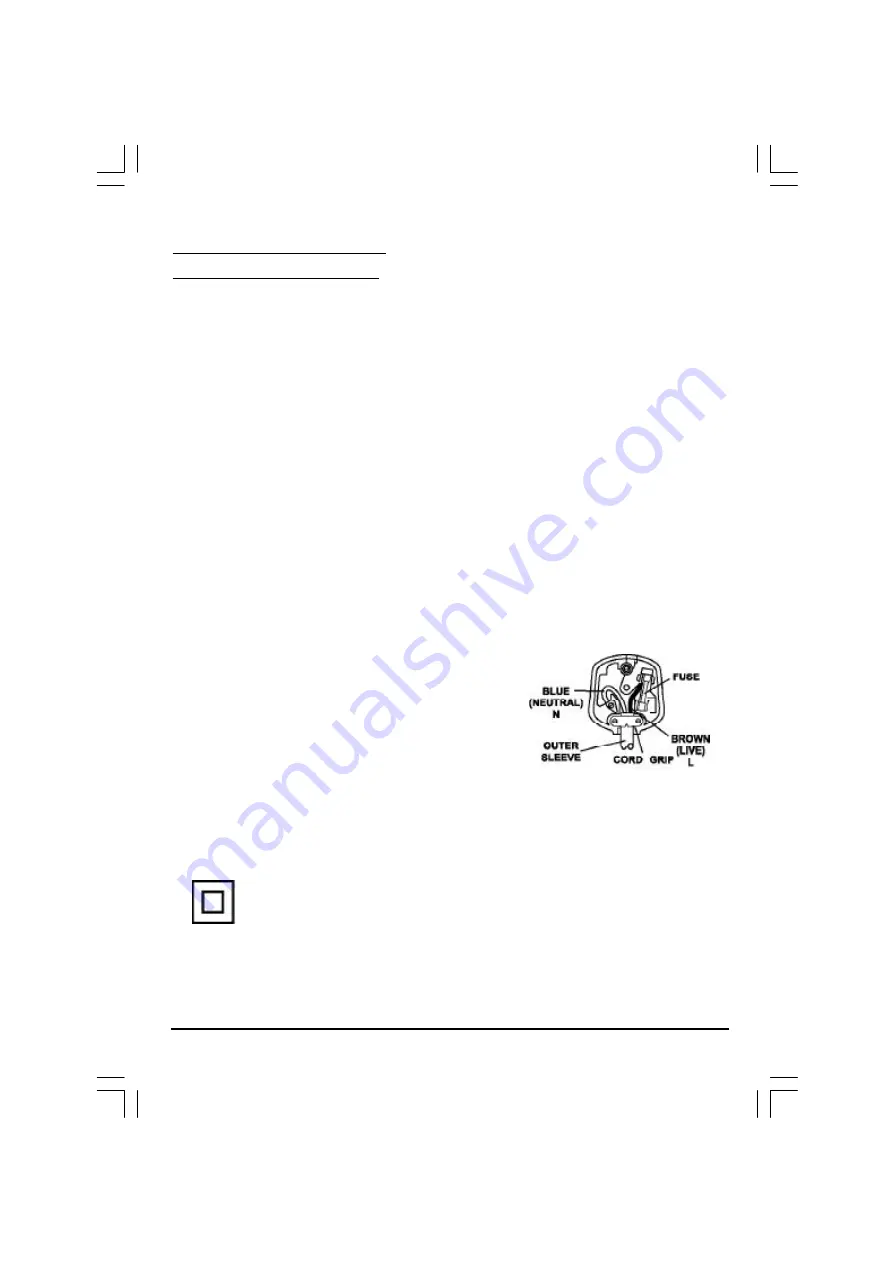
This wires in this mains lead are coloured in accor-
dance with the following wiring codes:
Blue................................... Neutral
Brown................................... Live
This wires in this mains lead must be connected to
the terminals in the plug as follows:
Blue Wire........................... N or Black
Brown Wire.......................... L or Red
Only a 3 Amp fuse should be fitted in the plug or a 5 Amp fuse at the distribution board.
WARNING: UNDER NO CIRCUMSTANCES MUST THE LIVE OR NEUTRAL WIRES BE
CONNECTED TO THE EARTH TERMINAL IN A 3 - PIN MAINS PLUG.
This symbol means that this unit is double insulated. An earth connection is not
required.
SMD-2716(Ph+Win-CT908)11761-00.p65
2004/4/15, 下午 04:54
5