Goodmans GCR1888DABBT User Manual Download Page 10

Operating Instructions

05

10

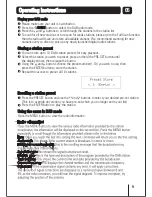
Press and hold the MENU button to enter the main menu, press the     and     buttons to
scroll through the options listed: Full scan, Manual tune, DRC, Prune, Alarm set, Sleep set,  
Reset and SW version. After that press ENTER to select.

<Full scan>

In the main menu, use the navigation buttons to select the Full scan menu.
Press the ENTER button to confirm and the unit will perform a Full scan and store all 
available DAB stations.

1
2

1
2
3
4

You can also choose to manually scan for your favourite DAB station to obtain optimum 
reception.


 In the main menu, use the navigation buttons to select the manual tune menu.

     Press the ENTER button to confirm.
     Use the navigation buttons to scroll through the available frequencies.
     Press the ENTER button to confirm and play.

You can also press and hold the ENTER button to enter the Manual tune mode directly and 
then repeat the step 2~4.

<Manual tune>

<DRC>

Dynamic range control (DRC) adds or removes a degree of compensation for the 
differences in the dynamic range between radio stations.
     Press the MENU button to access the main menu.
     Press the     and     buttons until DRC is displayed.
     Press the ENTER button to confirm.
     Using the     and     buttons to select off, low or high to prune and then press the 
     ENTER button to confirm.

<<

<<

<<

<<

1
2
3
4

<Prune>

If your station list includes that you can no longer receive, you can select the Prune 
option to remove any stations that can no longer be received form the station list.


Press the MENU button to access the main menu.


Press the     and     buttons until Prune is displayed.


Press the ENTER button to confirm.


Use the     and     buttons to select Yes or No to prune and then press the ENTER 


button to confirm.

<<

<<

<<

<<

1
2
3
4

<<

<<

Summary of Contents for GCR1888DABBT

Page 1: ...GCR1888DABBT ENTER SNOOZE MENU PRESET VOL VOL MODE...

Page 2: ...ith using a similar unit but please take the time to read the instructions relevant for your model Your safety is very important so please ensure you read the safety instructions before you operate th...

Page 3: ...01 02 03 04 05 06 4 Your DAB Radio 5 What Is DAB 6 Getting Started 7 8 Operating Instructions 9 12 Troubleshooting Specifications 13 14 Safety Instructions Guarantee 3 Contents 07...

Page 4: ...d other connected cables so that they are not likely to be walked on pinched or where items can be placed on or against them Do not use the unit in humid or damp conditions Do not allow the unit to ge...

Page 5: ...vel 9 PRESET Press to store and preset radio stations 10 DISPLAY LED display showing all information on the radio 11 ANTENNA The radio comes with a pigtail antenna Adjust the antenna for best receptio...

Page 6: ...eflected signals to actually reinforce the end result allowing for better service most of the time A signal DAB frequency can be used to cover the whole of U K solving many of the problems experienced...

Page 7: ...na aerial for the best reception possible Turning on the radio 3 1 Press the button to turn on the radio 2 Press the button and hold to enter STANDBY mode Note 1 This unit is designed to enter STANDBY...

Page 8: ...back of the unit as shown above Adjust the volume level by pressing the VOL button to increase the volume or decrease the volume by pressing the VOL button Changing the volume Getting Started 04 Conne...

Page 9: ...up to 10 DAB station presets for easy playback Select the station you wish to preset press and hold the PRE SET button until the display shows then release the button Using the and buttons choose the...

Page 10: ...the ENTER button to confirm and play You can also press and hold the ENTER button to enter the Manual tune mode directly and then repeat the step 2 4 Manual tune DRC Dynamic range control DRC adds or...

Page 11: ...rm To turn off the alarm you will need to change the ON setting to OFF To silence the alarm press the button 1 3 2 4 5 6 7 Alarm set NOTE The alarm will keep sounding for 60 minutes if you do not pres...

Page 12: ...nd recalling a station preset is the same as the functions in DAB mode AUX connection The radio has an auxiliary input This can be used to connect an external devices such as MP3 players and other aud...

Page 13: ...tooth mode 1 Put unit in Bluetooth mode 2 Open audio device in Bluetooth mode If a fault occurs first check the points listed below before taking the set to repair If you are unable to remedy a proble...

Page 14: ...the boundaries of the country of purchase The product must be correctly installed and operated in accordance with the instructions contained in this User Guide This Digital Radio must be used solely f...

Page 15: ...0871 230 1777...

Reviews: