background image

27

Presets

Save a preset

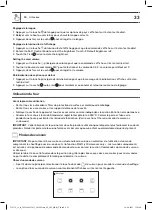
3.  On the Left Touch Screen select the Cooking Mode Key 

, Defrost Mode Key   or Microwave Mode Key 

and then select the mode required, for example, Standard Mode.

Presets

Presets

4.  On the Right Touch Screen select the Temperature and Time required, for example: Standard Mode, 

180 ºC, 01:45.

Presets

Temperature

Time

5.  Touch the “Save a preset” Key 

 to store this to memory.

6.  The Preset number created will be displayed on the screen; touch the Tick   to exit and the Preset is shown in 

the Left Touch Screen.

Using a Preset

1500g 

hr

hr

-

1

30

00

min

min

220

Presets

Save a preset

1.  All Presets are stored across four menu pages.
2.  Swipe the screen from right to left to access these pages and locate your required Preset.
3.  Touch the Preset on the left screen to select it and then touch the Start Key 

 on the right screen to 

commence cooking.


EN 

Use

213170_s2_s8_5059340213811_GoodHome_A5_IM_Multi_V02.indd   27

213170_s2_s8_5059340213811_GoodHome_A5_IM_Multi_V02.indd   27

18-08-2021   12:23:38

18-08-2021   12:23:38

Summary of Contents for 5059340213811

Page 1: ...059340213811 GHCOM50a Bamia V10821 BX220IM 213170_s2_s8_5059340213811_GoodHome_A5_IM_Multi_V02 indd 1 213170_s2_s8_5059340213811_GoodHome_A5_IM_Multi_V02 indd 1 18 08 2021 12 23 32 18 08 2021 12 23 32...

Page 2: ...R Utilisation 31 PL U ytkowanie 47 RO Utilizare 63 Care and maintenance 79 FR Entretien et maintenance 81 PL Czyszczenie i konserwacja 83 RO ngrijire i ntre inere 85 213170_s2_s8_5059340213811_GoodHom...

Page 3: ...tentivement le guide de s curit s par avant utilisation PL WA NE Przed u yciem prosz dok adnie zapozna si z instrukcj bezpiecze stwa RO IMPORTANT V rug m s citi i cu aten ie ghidul de siguran separat...

Page 4: ...reil Cet appareil contient du verre Rester prudent lors du montage ou de la manipulation pour viter toute blessure ou tout dommage de l appareil La plaque signal tique est disponible sur cet appareil...

Page 5: ...ili i amplasarea corespunz toare pentru aparat Acest aparat con ine sticl Ave i grij la montare sau manipulare pentru a preveni v t m rile corporale sau deteriorarea aparatului Pl cu a cu specifica ii...

Page 6: ...er le d collement L appareil doit tre install dans des l ments r sistants la chaleur Penser respecter la hauteur minimale d installation de l unit de cuisine Faire attention aux dimensions minimales d...

Page 7: ...as soulever l appareil par la poign e de la porte afin d viter tout dommage potentiel au niveau du verre et des charni res Attention Si le cordon d alimentation est endommag il doit tre remplac par le...

Page 8: ...s PL Po umieszczeniu piekarnika we w a ciwym miejscu wewn trz zabudowy zlokalizowa dwa otwory w obudowie piekarnika i zamocowa go za pomoc element w 10 11 i 12 Przestroga Nie dokr ca zbyt mocno rub 10...

Page 9: ...L Monta i zacisk w ceramicznych prowadnic bocznych RO Instalarea clemelor ceramice i a inelor laterale 03 x 2 04 x 2 05 x 1 06 x 1 EN Installation FR Installation PL Instalacja RO Instalare 213170_s2_...

Page 10: ...j prowadnicy 05 RO Instalarea inei laterale st ngi 05 04 05 03 05 03 04 05 x 1 EN Installation FR Installation PL Instalacja RO Instalare 213170_s2_s8_5059340213811_GoodHome_A5_IM_Multi_V02 indd 10 21...

Page 11: ...L Monta prawej prowadnicy 06 RO Instalarea inei laterale drepte 06 03 04 06 EN Installation FR Installation PL Instalacja RO Instalare 213170_s2_s8_5059340213811_GoodHome_A5_IM_Multi_V02 indd 11 21317...

Page 12: ...04 EN Installation FR Installation PL Instalacja RO Instalare 213170_s2_s8_5059340213811_GoodHome_A5_IM_Multi_V02 indd 12 213170_s2_s8_5059340213811_GoodHome_A5_IM_Multi_V02 indd 12 18 08 2021 12 23...

Page 13: ...on to any future owners After unpacking the appliance please check that it is not damaged If in doubt do not use the appliance but contact Customer Services see end of Care Maintenance section for det...

Page 14: ...uszkodzenia przewodu zasilania powinien on zosta wymieniony przez producenta przedstawiciela serwisowego lub inn osob o podobnych kwalifikacjach aby unikn zagro e OSTRZE ENIE Jest to urz dzenie klasy...

Page 15: ...alimentare cu 3 fire conductoare i trebuie conectat la sursa de alimentare printr un ntrerup tor bipolar cu o distan minim ntre contacte de 3 mm la fiecare conector Aparatul trebuie conectat direct l...

Page 16: ...g 6 3 7 9 1 8 2 4 5 1 Control panel 2 Fixing holes x 2 3 Oven lamp 4 Fan 5 Door 6 Carrying handles x 2 7 Side rails x 2 8 Mains cable at rear not shown 9 Door handle Control Panel 19 45 1 2 3 12 4 5 8...

Page 17: ...d 6 2 5 7 1 3 4 Settings 1 Exit Master Settings Key 2 Clock Key 3 Date Key 4 Language Key 5 Display Brightness Key 6 Master Volume Key 7 Factory Reset Key Setting the time 1 Touch the Clock Key and th...

Page 18: ...a Cooking Mode below IMPORTANT Keep the kitchen well ventilated during this first use to help disperse the odours produced Keep kitchen doors closed and ensure children and pets are not present Cookin...

Page 19: ...microwave cooking is also available Fanned 100 235 C in 5 C increments 160 C Not applicable Combination of the fan and both heating elements provides more even heat penetration saving up to 30 40 of...

Page 20: ...ance on recommended cooking times and temperatures Once familiar with the performance of the appliance the temperatures and times may be varied to adapt them to your personal tastes Check that frozen...

Page 21: ...210 C 1 135 150 DOUBLE GRILL Food Temperature setting C Recommended shelf position from the bottom Cooking time in minutes Toast 240 C 4 6 8 Cooking Mode Controls 1 2 3 4 5 6 7 8 9 12 11 11 10 Standa...

Page 22: ...up faster to the selected temperature by switching on all elements for a short period until the operating temperature is reached The oven will then switch off those elements not used in the selected C...

Page 23: ...time to turn the oven off and cancel the timer Using Defrost 1 From the Main Menu choose the Defrost Key to enter the Defrost Menu 2 The Defrost Mode options are now shown on the Left Touch Screen Def...

Page 24: ...60 00 1 minute 65 00 90 00 5 minutes 5 Rotate the 360 Control Key to set the weight of the food you want to defrost 6 Touch the Start Key to instantly commence defrosting If you touch the Stop Cookin...

Page 25: ...rosting stops automatically and will beep for 1 minute or until the Defrost complete key is touched Defrost Defrost complete Using Microwave Mode IMPORTANT Do not use any metallic accessories or cooki...

Page 26: ...nated Microwave Power Timer Pause cooking Use the Pause Key to temporarily stop cooking without resetting the microwave to its default settings for example when you need to stir food part way through...

Page 27: ...ated will be displayed on the screen touch the Tick to exit and the Preset is shown in the Left Touch Screen Using a Preset 1500g hr hr 1 30 00 min min 220 Presets Save a preset 1 All Presets are stor...

Page 28: ...ol Knob NOTE The Child Lock will also remain active if the oven is switched off using the Master On Off Key To Lock Touch the padlock and a large padlock will then show in the centre of the Right Touc...

Page 29: ...T Glass shelf for microwave use Remove the metal rack 02 grill tray 09 and trivet 08 during microwave use 213170_s2_s8_5059340213811_GoodHome_A5_IM_Multi_V02 indd 29 213170_s2_s8_5059340213811_GoodHom...

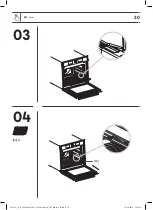
Page 30: ...30 EN Use 03 04 02 02 x 1 213170_s2_s8_5059340213811_GoodHome_A5_IM_Multi_V02 indd 30 213170_s2_s8_5059340213811_GoodHome_A5_IM_Multi_V02 indd 30 18 08 2021 12 23 39 18 08 2021 12 23 39...

Page 31: ...9 1 8 2 4 5 1 Panneau de commande 2 Trous de fixation x 2 3 Lampe du four 4 Ventilateur 5 Porte 6 Poign es de transport x 2 7 Rails lat raux x 2 8 C ble secteur l arri re non illustr 9 Poign e de por...

Page 32: ...it de l cran tactile droit baisse au cours de diverses fonctions comme lors de la modification des r glages 6 2 5 7 1 3 4 Param tres 1 Touche principale de sortie des r glages 2 Touche d horloge 3 Tou...

Page 33: ...cavit Nettoyer la cavit de l appareil et tous les accessoires comme indiqu dans la section Entretien et maintenance Allumer le four choisir le mode Standard et r gler la temp rature 250 C Fermer la po...

Page 34: ...appropri pour les g teaux et les p tisseries mais aussi pour les r tis lorsque vous les d sirez bien cuits l ext rieur et tendres l int rieur Aucun pr chauffage n est n cessaire lors de l utilisation...

Page 35: ...p tisseries base croustillante Convient galement la cuisson lente de rago ts et de plats mijot s Conseils de cuisson pratiques Cet appareil vous offre de nombreuses solutions pour faire cuire n import...

Page 36: ...profonde GRILL Aliments R glage de la temp rature C Position de la grille recommand e partir du bas Temps de cuisson en minutes Toast 240 C 3 4 5 Bifteck 240 C 2 15 GRILL ET VENTILATEUR Aliments R gl...

Page 37: ...ation d un mode de cuisson au micro ondes uniquement le temps peut tre r gl de 1 seconde 90 minutes avec les niveaux de puissance allant de 100 700 W et de 1 seconde 30 minutes avec le niveau de puiss...

Page 38: ...temps de cuisson actuel 4 Touche de s curit enfant 5 Touche d arr t de cuisson 6 Temp rature interne du four 7 Touche de pause de cuisson La grande ic ne Pause s affiche au centre de l affichage et l...

Page 39: ...ong lation minutes secondes Viande Poulet Poisson L gumes 100 4 10 3 00 2 00 150 3 00 200 7 30 6 00 4 00 4 00 250 5 00 300 10 50 9 00 6 00 6 00 350 7 00 400 14 10 12 00 8 00 8 00 450 9 00 500 17 30 15...

Page 40: ...de commande principal 360 pour d finir le temps de d cong lation requis de 1 seconde 90 minutes Le temps par d faut est de 1 minute 4 Appuyer sur la touche de d marrage pour commencer la d cong lation...

Page 41: ...00 900 W 7 Touche d arr t de cuisson 4 Heure actuelle 8 Touche de d marrage de cuisson R glage de la puissance du micro ondes Faire sortir le bouton de commande 360 si n cessaire et le tourner pour r...

Page 42: ...t appuyer une troisi me fois pour annuler compl tement la cuisson Pr r glages Il est possible de cr er et de sauvegarder jusqu douze pr r glages d utilisateur pour pouvoir utiliser vos r glages favori...

Page 43: ...gauche pour le s lectionner puis appuyer sur la touche de d marrage de l cran droit pour d marrer la cuisson Suppression d un pr r glage 1 partir du menu de pr r glages localiser l l ment enregistr e...

Page 44: ...Pour d verrouiller Appuyer et maintenir enfonc le gros cadenas sur l cran Un compte rebours de trois secondes s affiche jusqu ce qu il soit rel ch Jeudi 21 Juin FR Utilisation 213170_s2_s8_5059340213...

Page 45: ...ondes Retirer la grille en m tal 02 la plaque 09 et la grille de cuisson 08 pendant l utilisation du micro ondes FR Utilisation 213170_s2_s8_5059340213811_GoodHome_A5_IM_Multi_V02 indd 45 213170_s2_s...

Page 46: ...46 03 04 02 02 x 1 FR Utilisation 213170_s2_s8_5059340213811_GoodHome_A5_IM_Multi_V02 indd 46 213170_s2_s8_5059340213811_GoodHome_A5_IM_Multi_V02 indd 46 18 08 2021 12 23 42 18 08 2021 12 23 42...

Page 47: ...3 7 9 1 8 2 4 5 1 Panel sterowania 2 Otwory monta owe x 2 3 O wietlenie piekarnika 4 Wentylator 5 Drzwi 6 Uchwyty do przenoszenia 2 7 Szyny boczne x 2 8 Przew d sieciowy z ty u nie przedstawiono 9 Uc...

Page 48: ...jak zmiana ustawie jest zjawiskiem normalnym 6 2 5 7 1 3 4 Ustawienia 1 Przycisk wyj cia z ustawie g wnych 2 Przycisk zegara 3 Przycisk daty 4 Przycisk j zyka 5 Przycisk jasno ci wy wietlacza 6 Przyci...

Page 49: ...ratur 250 C Zamkn drzwi i odczeka jedn godzin aby wypali pozosta o ci po procesie produkcji Patrz sekcja Wyb r trybu pieczenia poni ej WA NE Podczas pierwszego u ycia w kuchni nale y zapewni dobr went...

Page 50: ...i s je li maj by dobrze wypieczone na zewn trz i delikatne w rodku W tym trybie nie jest wymagane wst pne podgrzewanie dodatkowo mo liwe jest pieczenie w trybie kuchenki mikrofalowej Pizza 100 250 C z...

Page 51: ...pi cy sp d Nadaje si r wnie do powolnego duszenia i zapiekanek Praktyczne porady dotycz ce pieczenia Szeroki wyb r opcji dost pnych w urz dzeniu pozwala przyrz dzi dowolne potrawy w najlepszy mo liwy...

Page 52: ...tawienie temperatury C Zalecana p ka od do u Czas pieczenia w minutach Tost 240 C 3 4 5 Stek wo owy 240 C 2 15 GRILL I WENTYLATOR Produkt Ustawienie temperatury C Zalecana p ka od do u Czas pieczenia...

Page 53: ...1 minuty do 4 godzin w trybie piekarnika Podczas korzystania wy cznie z trybu kuchenki mikrofalowej mo na ustawi czas pieczenia w przedziale od 1 sekundy do 90 minut przy ustawieniach mocy od 100 do...

Page 54: ...ta y czas Gdy nieustawiony przedstawia bie cy czas pieczenia 4 Przycisk blokady przed dzie mi 5 Przycisk zatrzymania pieczenia 6 Wewn trzna temperatura piekarnika 7 Przycisk wstrzymania pieczenia Na r...

Page 55: ...urczak Ryba Warzywa 100 4 10 3 00 2 00 150 3 00 200 7 30 6 00 4 00 4 00 250 5 00 300 10 50 9 00 6 00 6 00 350 7 00 400 14 10 12 00 8 00 8 00 450 9 00 500 17 30 15 00 10 00 600 20 50 18 00 12 00 700 24...

Page 56: ...rozmra ania w przedziale od 1 sekundy do 90 minut Domy lny czas wynosi 1 minut 4 Dotkn przycisku Start aby natychmiast rozpocz rozmra anie Jednokrotne dotkni cie przycisku zatrzymania pieczenia spowo...

Page 57: ...cisk o wietlenia piekarnika pomara czowy gdy w czone 6 Przycisk blokady przed dzie mi 3 Pokr t o mocy 100 300 500 700 900 W 7 Przycisk zatrzymania pieczenia 4 Bie ca godzina 8 Przycisk rozpocz cia pie...

Page 58: ...enia spowoduje zresetowanie timera do warto ci domy lnej Drugie dotkni cie przycisku zresetuje ustawienia temperatury a trzecie dotkni cie ca kowicie anuluje proces pieczenia Nastawy Mo na utworzy i z...

Page 59: ...stawy s zapisywane na czterech stronach menu 2 Przesun palcem po ekranie od prawej do lewej strony aby uzyska dost p do tych stron i znale dan nastaw 3 Dotkn nastawy na lewym ekranie aby j wybra a nas...

Page 60: ...a pomoc g wnego przycisku w wy W czanie blokady rodzicielskiej Dotkn k dki na rodku prawego ekranu dotykowego pojawi si du a k dka Czwartek 21 Czerwiec Czwartek 21 Czerwiec Zwalnianie blokady rodzicie...

Page 61: ...i mikrofalowej Wyj metalow kratk boczn 02 tac grillow 09 i blach 08 w trakcie korzystania z trybu kuchenki mikrofalowej PL U ytkowanie 213170_s2_s8_5059340213811_GoodHome_A5_IM_Multi_V02 indd 61 21317...

Page 62: ...62 03 04 02 02 x 1 PL U ytkowanie 213170_s2_s8_5059340213811_GoodHome_A5_IM_Multi_V02 indd 62 213170_s2_s8_5059340213811_GoodHome_A5_IM_Multi_V02 indd 62 18 08 2021 12 23 47 18 08 2021 12 23 47...

Page 63: ...6 3 7 9 1 8 2 4 5 1 Panou de control 2 Orificii de fixare x 2 3 Lamp cuptor 4 Ventilator 5 U 6 M nere pentru transport x 2 7 ine laterale x 2 8 Cablu de alimentare n spate nu este vizibil 9 M ner u P...

Page 64: ...c nd sunt modificate Set rile 6 2 5 7 1 3 4 Set ri 1 Buton p r sire set ri principale 2 Buton ceas 3 Buton dat 4 Buton limb 5 Buton luminozitate afi aj 6 Buton principal volum 7 Buton resetare set ri...

Page 65: ...re de mai jos IMPORTANT Asigura i v c buc t ria este bine aerisit n timpul primei utiliz ri pentru a permite dispersarea mirosurilor produse ine i u ile buc t riei nchise i asigura i v c nu sunt preze...

Page 66: ...suplimentar cu microunde este de asemenea disponibil Pizza 100 250 C n trepte de 5 C 180 C 100 300 500 W 300 W Ideal pentru pizza i preparate care au nevoie de mult c ldur de dedesubt Sunt folosite a...

Page 67: ...re te o baz crocant Adecvat i pentru g titul la foc mic al tocanelor i caserolelor Sfaturi practice pentru g tit Acest aparat ofer o gam larg de alternative care v permit s g ti i orice tip de prepara...

Page 68: ...mperaturii C Pozi ie pe raft recomandat fa de partea inferioar Timp de g tire n minute P ine pr jit 240 C 3 4 5 Friptur de vit 240 C 2 15 GRILL FAN Preparat Setarea temperaturii C Pozi ie pe raft reco...

Page 69: ...ombina ia cuptor C nd se utilizeaz doar un mod de g tire cu microunde timpul poate fi setat de la 1 secund la 90 de minute utiliz nd nivelurile de putere 100 700 W i de la 1 secund la 30 de minute uti...

Page 70: ...at Afi eaz timpul de g tire curent 4 Buton de blocare pentru copii 5 Buton de oprire g tire 6 Temperatura intern a cuptorului 7 Buton de ntrerupere g tire Pictograma mare de ntrerupere va fi afi at n...

Page 71: ...elare minute secunde Carne Pui Pe te Legume 100 4 10 3 00 2 00 150 3 00 200 7 30 6 00 4 00 4 00 250 5 00 300 10 50 9 00 6 00 6 00 350 7 00 400 14 10 12 00 8 00 8 00 450 9 00 500 17 30 15 00 10 00 600...

Page 72: ...3 Roti i butonul principal rotativ de control 360 pentru a seta timpul de decongelare necesar de la 1 secund la 90 de minute Timpul prestabilit este de 1 minut 4 Atinge i butonul de pornire pentru a...

Page 73: ...urent 8 Buton de pornire g tire Ajustarea puterii microundelor Ejecta i butonul rotativ de control 360 dac este necesar i roti i l pentru a seta puterea dorit a microundelor pe ecranul tactil dreapta...

Page 74: ...final ap sa i a treia oar pentru a anula complet g titul Preset ri YPute i crea i salva p n la dou sprezece preset ri pentru set rile dvs preferate care pot fi folosite n orice moment Fiecare presetar...

Page 75: ...Trage i cu degetul pe ecran de la dreapta la st nga pentru a accesa aceste pagini i localiza i presetarea dorit 3 Atinge i Presetarea de pe ecranul din st nga pentru a o selecta apoi atinge i butonul...

Page 76: ...rincipal de Pornire Oprire Pentru Blocare Atinge i lac tul i n centrul Ecranului tactil dreapta va ap rea un lac t mare IunieJoi 21 Iunie IunieJoi 21 Iunie Pentru deblocare Atinge i i men ine i ap sat...

Page 77: ...cu microunde Scoate i suportul metalic 02 tava gr tarului 09 i suportul 08 n timpul utiliz rii cuptorului cu microunde RO Utilizare 213170_s2_s8_5059340213811_GoodHome_A5_IM_Multi_V02 indd 77 213170_s...

Page 78: ...78 03 04 02 02 x 1 RO Utilizare 213170_s2_s8_5059340213811_GoodHome_A5_IM_Multi_V02 indd 78 213170_s2_s8_5059340213811_GoodHome_A5_IM_Multi_V02 indd 78 18 08 2021 12 23 54 18 08 2021 12 23 54...

Page 79: ...2 Clean the cavity with a damp cloth soft brush or fine sponge and then wipe dry 3 In case of heavy soiling use hot soapy water and a sponge Wipe dry with a clean cloth Cleaning the side rails 1 Remo...

Page 80: ...ting Error code Problem Solution The thermal safety switch off function has been activated Contact the Customer helpline Communication error between the display and the power supply Contact the Custom...

Page 81: ...Nettoyer l int rieur l aide d un chiffon humide d une brosse douce ou d une ponge fine puis l essuyer 3 En cas de salissures tenaces utiliser de l eau chaude savonneuse et une ponge Essuyer avec un c...

Page 82: ...nce d une ampoule contacter l assistance t l phonique mentionn e la fin de ce manuel D pannage Code d erreur Probl me Solution La coupure thermique de s curit a t activ e Contacter l assistance t l ph...

Page 83: ...yj wszystkie akcesoria 2 Wyczy ci komor wilgotn szmatk mi kk szczotk lub delikatn g bk a nast pnie wytrze do sucha 3 W przypadku silnych zabrudze nale y u y g bki i gor cej wody z dodatkiem detergentu...

Page 84: ...o cu niniejszej instrukcji Rozwi zywanie problem w Kod b du Problem Rozwi zanie Zosta a w czona funkcja termicznego wy cznika bezpiecze stwa Skontaktuj si z infolini obs ugi klienta Zosta a w czona fu...

Page 85: ...itatea cu o lavet umed o perie moale sau un burete delicat apoi usca i cu o lavet 3 n cazul n care cavitatea este foarte murdar folosi i ap fierbinte cu s pun i un burete terge i cu o lavet curat Cur...

Page 86: ...la sf r itul acestui manual Depanare Cod de eroare Problem Solu ie A fost activat func ia de ntrerupere a termostatului de siguran Contacta i linia de asisten clien i A fost activat func ia de ntreru...

Page 87: ...www castorama fr www bricodepot fr Assistance t l phonique sans frais 0805 114 951 france kingfisherservice com Pour consulter les manuels d instructions en ligne rendez vous sur le site www kingfish...

Reviews: