29
1
1.
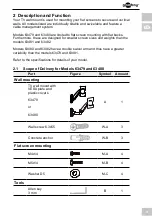
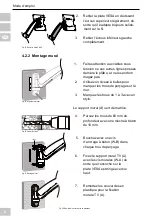
Lean the flat screen vertically
on a soft, large surface or a
wall and protect it of scratches
and
overturning.
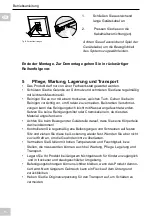
Make sure that screw 1 sits on the
flatscreens top side with the pre-
assembled nut, like shown in chapter
4.2. These parts keep VESA plate
Fig. 23: Aligning the VESA plate 4.3.1
and flat screen while attaching them
to
the
wall
plate.
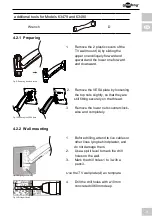
2.
Attach the VESA plate with the
washers and screws, fitting to
your flat screen at the flat
screens
back
as
shown.
Fig. 24:Attaching the VESA plate 4.3.1
4.3.2 Flat screens with arched back
Tools for all Models
Using flat screens with arched backs is only possible with models 63481 and
63482.
1
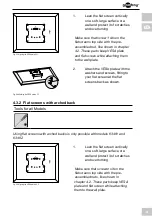
1.
Lean the flat screen vertically
on a soft, large surface or a
wall and protect it of scratches
and
overturning.
Make sure that screws1 sit on the
flatscreens top side with the pre-
assembled nuts, like shown in
chapter 4.2. These parts keep VESA
Fig. 25: Aligning the VESA plate 4.3.2
plate and flat screen while attaching
them to the wall plate.


