background image

7

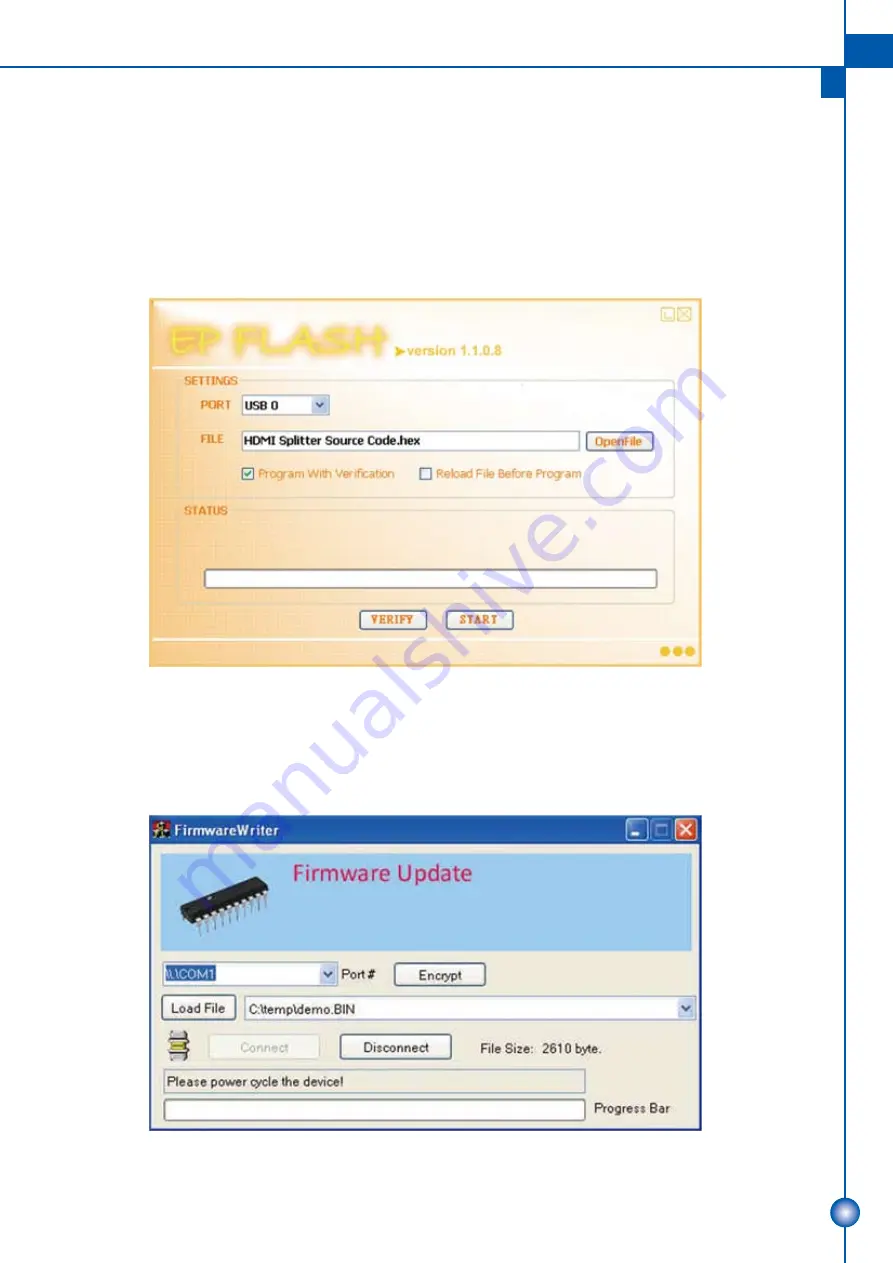
5.  For updating the first microcontroller, please set the pin 1 & 2 of the bottom DIP as the positions shown 

in the above table. Then, turn off the power, plug USB cable connected to your PC, and then power 

up the module! In this setup, the power LED indicator will NOT blink, and this is normal! Execute the 

attached or download EPFlash.exe, and the following window will pop up. Click on “OpenFile” button 

to direct to the new firmware HEX file, and keep PORT at USB 0! Meantime, keep “Program With 

Verification” selected, and then click on “START” button on the bottom of the window! Wait for seconds 

until the update process is completed! After firmware update is successfully accomplished, please 

unplug USB cable and power off the splitter! 

6.  For updating the second microcontroller if necessary, please execute the attached firmware program 

as below first! After the “Firmware Writer” is executed, please set the pin 1& 2 of the bottom DIP as 

Combination 4 in the above table to prepare to enter updating mode first. Wait for 1 ~ 2 seconds, 

please set the DIP switch as Combination3. The “Firmware Writer” will load automatically the latest 

firmware into the second micro-controller!

Summary of Contents for SP-5108E

Page 1: ...7 1 CH AUDIO 7 1 CH AUDIO rev 110304 Made in Taiwan SP 5108E User Manual 1x8 HDMI Splitter with EDID Manager...

Page 2: ...unit Do not attempt to service this unit yourself except where explained in this manual Provide proper ventilation and air circulation and do not use near water Keep objects that might damage the devi...

Page 3: ...and flexibly FEATURES HDMI 1 3c and DVI 1 0 compliant Full HDMI 1 4 3D video support HDCP 1 2 compliant Wide Frequency Range 25MHz 225MHz Video bandwidth 6 75Gbps Supports conversion of HDMI signalin...

Page 4: ...al 100 single 50 Firmware update Feasible via USB port EDID capacity Auto 4 Presets Input TMDS signal 1 2 Volts peak to peak Input DDC signal 5 Volts peak to peak TTL Input 1x HDMI 7 1ch audio video O...

Page 5: ...1 8 for connecting to display through HDMI cable or through Cat 5e cable with our HDMI over Cat 5e extender 3 USB for firmware update use only 4 Power Red light means power is on 5 5V DC connect to 5...

Page 6: ...cluding monitors 2 Connect to the receivers 3 Connect an HDMI source such as a Blu ray Disc player to the HDMI In 4 Plug in 5V DC power supply unit 5 Power on the HDMI monitors 6 Power on the HDMI sou...

Page 7: ...TMDS Data2 Shield Pin 9 TMDS Data0 Pin 16 SDA Pin 3 TMDS Data2 Pin 10 TMDS Clock Pin 17 DDC CEC Ground Pin 4 TMDS Data1 Pin 11 TMDS Clock Shield Pin 18 5V Power Pin 5 TMDS Data1 Shield Pin 12 TMDS Clo...

Page 8: ...E users MUST follow different steps to complete the firmware update For some cases users may need to update both controllers but in most of the cases only one of them may need to be upgraded For norma...

Page 9: ...am With Verification selected and then click on START button on the bottom of the window Wait for seconds until the update process is completed After firmware update is successfully accomplished pleas...

Page 10: ...assume the risk of loss or damage in transit Under no circumstances will a unit be accepted without a return authorization number The warranty is in lieu of all other warranties expressed or implied...

Reviews: