5
HARDWARE INSTALLATION
1. Read the EDID from a HDMI display manually
1. Connect the display device to the EDID Reader/Writer/Re-timer via
Monitor-HDMI
port.
2. Plug in the 5V DC power supply unit.
3. Set CV-5005H to the mode 6.
4. The EDID reading sequence is done when the green LED lights off.
5.
Switch the rotary switch back to mode 0 ~ 4.
2. Recall the EDID from a HDMI display via software
1. Set CV-5005H to the mode 7.
2. Connect the display device to the EDID Reader/Writer/Re-timer via
Monitor-HDMI
port.
3. Plug in the 5V DC power supply unit.
4. Connect the CV-5005H to the serial port of PC.
5.
Click on “HDMI Monitor Reader” button to read the EDID information from HDMI display.
6.
The EDID reading sequence is done when the green LED lights off.
3. Write an EDID to the HDMI displays
1. Set CV-5005H to the mode 7.
2. Connect the display device to the EDID Reader/Writer/Re-timer via
Monitor-HDMI
port.
3. Plug in the 5V DC power supply unit.
4. Connect the CV-5005H to the serial port of PC.
5.
Click on “HDMI Monitor Writer” button to write the EDID information to HDMI display.
6. The EDID reading sequence is done when the green LED lights off.
*The EDID Reader/Writer may not work on the monitors with EDID write-protection.
6
OPERATION SOFTWARE
1) Getting Started:
Your Computer’s System Requirements:
The software supports Windows XP consistently. Both Windows7 and Windows 8 are supported
after manually configuring the compatibility properties.
Windows7 and Windows 8: Please configure the compatibility properties manually.
Step1.
Right-click the link for the software that you want to configure, and then click Contents.
Step2.
On the Compatibility tab, click Run this program in compatibility mode.
Your Hardware Requirements:
Before running the software, please make sure the rotary switch is set to 7.
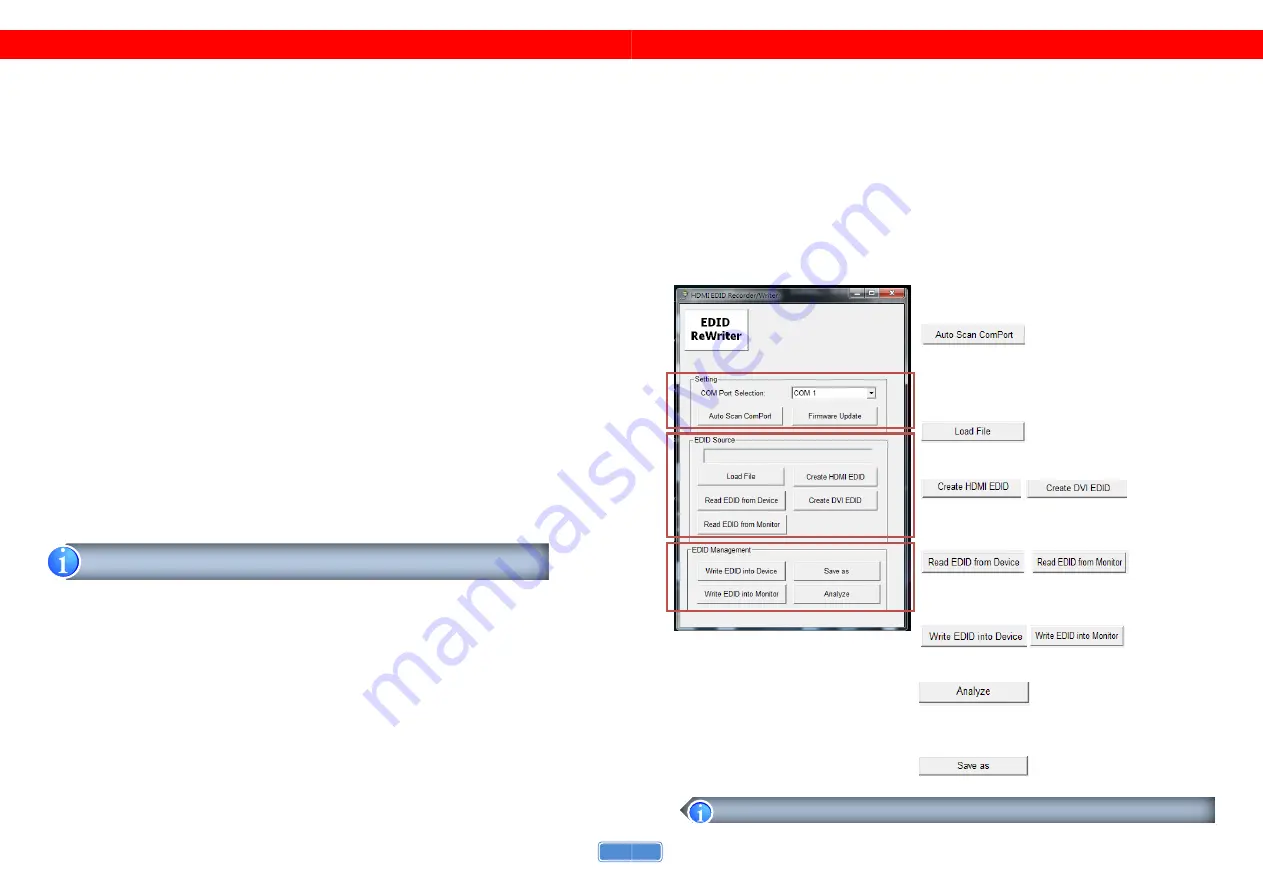
Start Software:
Step1. Setting
: Please click on the button to
choose COM Port. Following pop-up the
“Successful”
message which indicates the connection setting is
automatically detected and connected.
Step2. EDID Source
: To select EDID source by loading
the file you saved.
/
: To create EDID
source which users are capable of monitoring or
modifying.
/
:
To read EDID
info from the connected device/monitor
.
Step3. EDID Management
/
: To write
EDID info info the connected device/monitor.
: Make a quick analysis of EDID
information you process, which users are capable of
monitoring or modifying.
: To save the EDID information on
hard disk for your future reference.
*If you want to read EDID from a DVI display, please refer to Hardware Installation section.


