background image

PA G E   1 2  

                  i n s t r u c t i o n   m A n uA l                                      t X 6 5 5

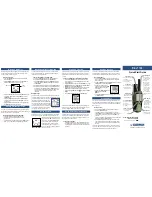
MENu OpTIONS

Display

Functions

Settings

‘Flashing’

Change Channel

01 – 40

CTC

Change CTCSS Code

01 – 38, oF

Po

Set TX Power

Lo / HI

dh

Select Dual Watch Mode

01 – 40, oF

Uo

Select Hands Free (VOX)

Lo / HI / oF

rb

Activate Roger Beep

on / oF

bP

Activate Key Beep

on / oF

bb

Activate Room Monitor

on / oF

it

Intercom

on / oF

Sr

Scrambler

on / oF

C

Change Call Tone

01 – 03

seleCTiNG CHANNels

Press the 

MODE

 button. The channel number will flash. Press the 

or   buttons to select the desired channel. Press the 

PTT

 or wait for 

5 seconds to store your choice.

CTCss CoDes

CTCSS (Continuous Tone Coded Squelch System) is a Squelch 
quieting system that allows several groups of users to share the 
same channel without disturbing each other. The system applies a 
continuous low‑level tone to your transmission and uses a matching 
tone decoder in your receiver to control its Squelch. With CTCSS 
enabled, the channel remains quiet to all incoming signals unless 
they carry the correct tone. When a transmission with the correct 
tone is received, the Squelch opens and remains open for as long 
as the signal is present. When the transmission ends, the channel 
becomes quiet again. Transmissions that do not use the correct tone 
will not be heard.

The TX655 is fitted with 38 different CTCSS codes (see code chart). 
You can select or change the current CTCSS code via the MODE 
Menu. If the other radios you are communicating with are not using 
CTCSS, set your CTCSS code to ‘oF’. The TX655 allows CTCSS to be 
enabled or disabled on individual channels.

Summary of Contents for TX655

Page 1: ...1 watt compact UHF CB radios I N S T R U C T I O N M A N U A L...

Page 2: ...ED 2 SAFETY INFORMATION 2 IMPORTANT INFORMATION 3 Possible Issues 4 TELEMETRY CHANNELS 5 Features 5 Batteries and charging 6 RADIO CONTROLS 7 LCD Display 8 Control Descriptions 9 BASIC RADIO OPERATION...

Page 3: ...light AVOID storing or using your radio where temperatures are below 20 C or above 60 C IMPORTANT INFORMATION CONCERNING UHF CB RADIO The use of the Citizen Band radio service is licensed in Australia...

Page 4: ...simply adjust your radio volume for best performance Depending on how close your receiving radio is to another transmitting radio there can be interference from the transmitting radio if it is using...

Page 5: ...mmable Scan Function Scans up to 80 UHF CB channels In built CTCSS User selectable Continuous Tone Coded Squelch system for quiet channel operation 1 watt 0 5 watt RF Power When transmitting in close...

Page 6: ...aptor s DC plugs to the charger cradles The LED s will not be lit Battery Charging Insert your radio into one of the charging cradles until it clicks into place The Charging LED will light RED and the...

Page 7: ...l PAGE 7 radio CONTROLS Push to Talk PTT Neck Lanyard Attachment LCD Microphone Jack LED Earphone Jack Antenna Duplex Speaker Mode Scan Lock Monitor Lamp Volume Up Mode Adjust Volume down Mode Adjust...

Page 8: ...r Icon 5 Key Beep Icon 6 Room Monitor Icon 7 Duplex Icon 8 Scan Icon 9 Battery Warning Icon 10 Scrambler Icon 11 Roger Beep Icon 12 Dual Watch Icon 13 Low TX Power Icon 14 Intercom Icon 15 VOX Icon 16...

Page 9: ...enus and select different setting options Monitor Lamp Button Press this button briefly to switch the flashlight LED on or off The flashlight LED will operate only while the radio is switched on Press...

Page 10: ...pears on the display Scan Lock Button Press this button briefly to activate or deactivate scanning where appropriate Press and hold this button for 2 seconds to activate or deactivate the keypad lock...

Page 11: ...e the PTT when you have finished speaking ADJUSTING THE VOLUME There are 7 volume levels to suit your personal preference To adjust the volume level press the or button UL is displayed along with a vo...

Page 12: ...ups of users to share the same channel without disturbing each other The system applies a continuous low level tone to your transmission and uses a matching tone decoder in your receiver to control it...

Page 13: ...is displayed Press the or buttons to select the desired power setting Select HI for high power or Lo for Low power Press the PTT or wait for 5 seconds to store your choice A HI or Lo icon will be dis...

Page 14: ...epeatedly until Uo is displayed Press the or buttons to select the sensitivity level HI or Lo Press the PTT or wait for 5 seconds to store your choice This will activate the VOX mode The icon will be...

Page 15: ...tor function is not a replacement for regularly checking the safety and security of children If you move out of communication range you will not hear transmissions INTERCOM The intercom function allow...

Page 16: ...regardless of CTCSS code settings It also sets the squelch to minimum which will allow weaker signals to be heard To Activate or Deactivate the Monitor Press and hold the MONITOR LAMP button below the...

Page 17: ...s are disabled whilst scanning however pressing the or buttons will select the direction of the scan To increase battery life use the Scan Mode sparingly CTCSS CODE SCAN The TX655 has a CTCSS code sca...

Page 18: ...7 16 476 800 36 477 300 56 47 17 476 825 37 477 325 57 47 18 476 850 38 477 350 58 47 19 476 875 39 477 375 59 47 20 476 900 40 477 400 60 47 PAGE 18 instruction manual TX655 Emergency use only Offici...

Page 19: ...477 2625 477 275 55 476 7875 75 477 2875 477 300 56 476 8125 76 477 3125 477 325 57 476 8375 77 477 3375 477 350 58 476 8625 78 477 3625 477 375 59 476 8875 79 477 3875 477 400 60 476 9125 80 477 412...

Page 20: ...9 15 110 9 28 173 8 3 71 9 16 114 8 29 179 9 4 77 0 17 118 8 30 186 2 5 79 7 18 123 0 31 192 8 6 82 5 19 127 3 32 203 5 7 85 4 20 131 8 33 210 7 8 88 5 21 136 5 34 218 1 9 91 5 22 141 3 35 225 7 10 94...

Page 21: ...cing 12 5 kHz Operating Mode Simplex or half duplex Privacy Codes 38 Operating Temperature 10 C to 60 C Battery Source Li Ion 3 7 V DC 720 mAh rechargeable battery pack Operating Time 10 Hrs Transmit...

Page 22: ...s in materials and workmanship for the warranty period see warranty table from the date of original sale or another period we agree to in writing Subject to our obligations under clause 1 2 we will at...

Page 23: ...ax 02 9816 4722 Email servadmin gme net au 2 8 If we determine that your goods are defective we will pay for the cost of returning the repaired or replaced goods to you and reimburse you for your reas...

Page 24: ...PN 310538 DN 45711 4...

Reviews: