background image

t X 4 5 0 0  

I n s t r u c t I o n   m A n uA l  

PA G E   1 9

selecting. You can use this feature to locate and store 
active frequencies while you are tuning.

to program more than 19 channels, you will need 
to switch to another channel bank. simply press the 

MENU

 key repeatedly until the 

RX-

 channel Bank 

option appears then select another channel Bank. once 
selected, press the 

MENU

 key repeatedly to return 

to the frequency programming option and continue 
programming your preferred frequencies.

To close the Channel Editor

switch the radio oFF then on again to close the 
channel editor and restore normal operation. Your 
programmed frequencies will now be accessible from 
the 

Channel knob 

above cH80. remember, if you 

have stored channels into different channel banks, you 
will need to select the appropriate channel bank to 
access them.

NOTE: 

under normal operation, only those channels 

that have been programmed with frequencies will be 
visible. channels that were marked with –oFF- in the 
channel editor will no longer be visible.

Deleting an RX-Only channel 

to delete an rX-only channel;

1.  Enable the channel Editor.

2.  select the channel you wish to delete.

3.  Press and hold the 

MENU

 key until the radio beeps.

4.   rotate the 

Channel 

knob all the way to the left 

until –oFF– is displayed.

5.   Press and hold the 

Channel 

knob to store the new 

setting.

6.   switch the radio oFF then on again to restore 

normal operation.

the deleted channel will no longer be visible.

Displaying the RX-Only channel’s frequency or  
Alpha label

By default the radio displays the signal strength meter 
to the right of the channel number. You can configure 
the display to show the Frequency or the Alpha name of 
the selected channel. 
Before starting, ensure the radio is in the numeric mode 
(press 

F

 then 

ALPHA

 so that ‘numEr’ is displayed).

1.   select an rX-only channel (the following menu 

option is only available when an rX-only channel  
is selected).  

2.  Press and hold 

MENU

 until the radio beeps.

3.  Briefly press 

MENU

 repeatedly until 

S-MET

 appears.

4.   rotate the 

Channel 

knob to the right until 

ALPHA


is displayed.

5.  Press the

 PTT

 to exit the 

Menu

.

the radio will now display the channel frequency to 
the right of the channel number whenever an rX-only 
channel is selected.  

To display the channel’s ALPHA label

Briefly press 

F

 then 

ALPHA

. ‘AlPHA’ will appear 

briefly then the channel’s Alpha label will be displayed 
to the left of the channel number. If the Alpha label is 
blank, then an Alpha label has not yet been set for this 
channel. use the following steps to enter your preferred 
Alpha label.

Adding names to your RX-Only channels

NOTE: 

You do not need to activate the channel editor 

to make changes to rX-only channels that have already  
been programmed.

1.   select an rX-only channel. the channel frequency 

will be displayed to the left of the channel number.

2.   Press 

F

 then 

ALPHA

 to switch to Alpha mode. 

‘AlPHA’ will be displayed briefly.

3.   Press and hold the 

MENU

 key until the radio beeps. 

the cursor will flash in the left character position.

4.   rotate the 

Channel 

knob to select the required character. 

Press the 

Channel 

knob to advance to the next character 

position. 

5.   When the desired name is displayed, press and hold 

the 

Channel 

knob to store the name.

6.   Briefly press the 

PTT

 to exit and return to 

normal operation.

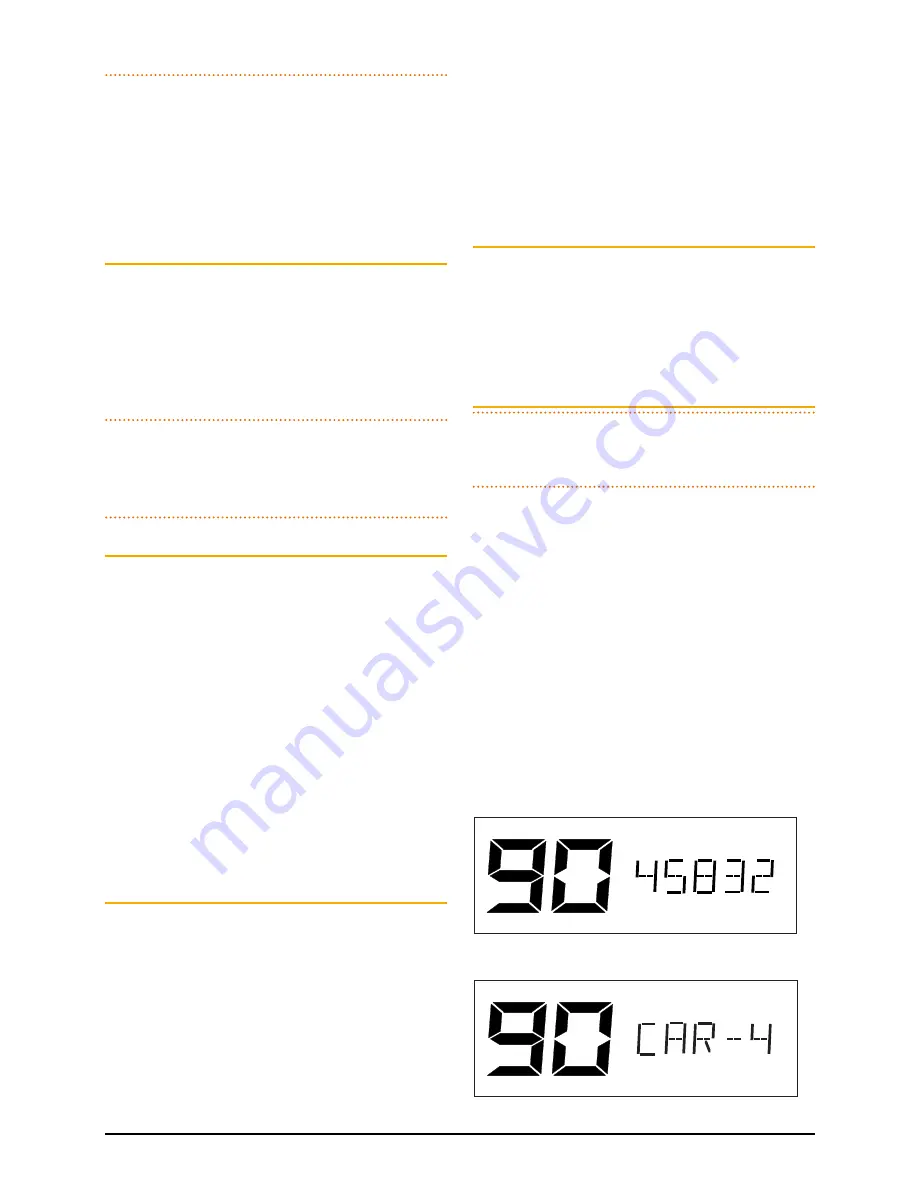
RX-Only channel frequency

 (458.325 mHz) 

RX-Only channel label (CAR-4)

Summary of Contents for TX4500

Page 1: ...I N S T R U C T I O N M A N U A L DIN size fully featured 5 watt UHF CB radio...

Page 2: ...ighting 7 Bandwidth Filter Settings 7 Dynamic Volume Control 8 Voice Scrambler 8 Repeaters and Duplex Mode 8 Priority Channel 9 Scanning 9 CTCSS DCS 11 Selective Calling 13 Using Selcall 13 Quiet Mode...

Page 3: ...Original 40 channel wideband Radios will continue to operate on the original 40 channels however they will not be able to converse on the newer channels 41 80 The newer narrowband radios will be able...

Page 4: ...ur voice so that communications are only intelligible to others using the same scrambler technology Programmable Scan Function Scans the selected UHF CB channels with both Group and Open Scan function...

Page 5: ...iority 1 Priority 2 Duplex Alpha Silent Quiet Front Mic Socket SILENT QUIET DUP ALPHA VOLUME SQUELCH CHANNEL PRI 1 PRI 2 SCAN OS GS MENU F LCD PANEL Scan Quiet Busy Transmit Channel Display Selcall Al...

Page 6: ...quelch can be opened or closed using the Squelch knob When the Squelch is open the receiver s background noise can be heard and the symbol is displayed When the Squelch is closed the receiver remains...

Page 7: ...the available settings Rotate the Channel knob left or right to adjust the current setting There are three backlight settings available BKLGT Brightness Setting Provides a continuously variable bright...

Page 8: ...eeps 2 Briefly press the Menu key repeatedly until ENCOF or ENCON is displayed 3 Rotate the Channel knob to make your selection Select ENCON to activate the scrambler encoder or ENCOF to disable it 4...

Page 9: ...is feature can be used to provide instant access to your working channel or your local repeater channel at the press of a key It can also be used in conjunction with the Group Scan function Your TX450...

Page 10: ...is mode press the F key again or wait 10 seconds for the function to time out This option can be used to quickly jump between channels of interest or to quickly review which channels are in the Scan m...

Page 11: ...d your conversation and there has been no further activity for 5 seconds the radio will resume scanning the other channels If the scan pauses on a busy channel and you don t wish to listen to that con...

Page 12: ...or 50 to access the DCS tones DCS tones are displayed as DT001 DT104 Rotate left CTCSS Off CTCSS Tone 50 DCS Tone 104 Rotate right 5 To see the actual sub tone instead of the tone label briefly press...

Page 13: ...channel display when you first turn the radio on You will need to make your Ident known to anyone who may need to call you using Selcall NOTE Although your radio is factory programmed with a unique Se...

Page 14: ...t the required number in the flashing digit position 5 Briefly press the Channel knob again to select the next digit position 6 Repeat steps 4 and 5 to enter all 5 digits as required 7 Now press and h...

Page 15: ...the PTT switch The alarm will be cancelled and the channel will be open for normal communication You can now talk on the channel in the usual way Quiet Mode The Quiet Mode mutes the receiver to preve...

Page 16: ...mal signal is received on an open channel scanning will pause while the channel is busy and will resume scanning 5 seconds after the channel becomes clear If you were scanning in Group Scan mode the r...

Page 17: ...lcalls to every tenth radio by setting the second digit to A e g Sending Ident 145A5 will call radios 14505 14515 14525 14535 14545 14595 Call acknowledge in Group mode There is no call acknowledge wh...

Page 18: ...is 25 kHz You should select a frequency step that matches the channel allocations in the frequency band you are programming When selecting 25 kHz or 12 5 kHz steps the appropriate wideband or narrow...

Page 19: ...he channel number You can configure the display to show the Frequency or the Alpha name of the selected channel Before starting ensure the radio is in the Numeric mode press F then ALPHA so that NUMER...

Page 20: ...e Scrambler Enables or disables the Voice Scrambler Scrambler Encoder ON Scrambler Encoder Off Beep tone level Adjusts the volume level of the beep tones associated with key presses Beep level 9 Beep...

Page 21: ...only channel memory consists of 5 banks of 19 channels Channel banks are labelled RX A to RX E CH Bank C CH Bank B CH Bank A CH Bank E CH Bank D INSTALLATION Your TX4500 is supplied with a DIN mounti...

Page 22: ...negative terminal Connect the radio s positive Red lead via the 2 amp fuse to the accessory point in the fuse box This point should supply 13 8 volts ONLY when the ignition is switched ON or in the A...

Page 23: ...he radio has a built in high voltage detection system to warn you if an overvoltage situation occurs If the power supply voltage exceeds 18 volts DC the channel display will flash hi dc for 5 seconds...

Page 24: ...5 35 225 7 12 11 97 4 29 165 5 46 229 1 13 12 100 0 30 27 167 9 47 36 233 6 14 13 103 5 31 171 3 48 37 241 8 15 14 107 2 32 28 173 8 49 38 250 3 16 15 110 9 33 177 3 50 254 1 17 16 114 8 34 29 179 9 D...

Page 25: ...0 46 476 5625 66 477 0625 7 476 575 27 477 075 47 476 5875 67 477 0875 8 476 600 28 477 100 48 476 6125 68 477 1125 9 476 625 29 477 125 49 476 6375 69 477 1375 10 476 650 30 477 150 50 476 6625 70 47...

Page 26: ...quency Error 1 5 kHz Modulation FM Maximum Deviation 2 5 kHz at 20 dB AF limiting Transmit Frequency Response 6 dB per octave 300 Hz to 3 kHz 1 3 dB Demodulated Audio Signal to Noise 45 dB unweighted...

Page 27: ...rvices supplied again 2 4 For repairs outside the warranty period we warrant our repairs to be free from defects in materials and workmanship for three months from the date of the original repair We a...

Page 28: ...op Dunn Pl Dandenong South Thebarton 10 12 Harvard Way 89 101 Factory Rd 22 24 College St East Tamaki VIC 3165 SA 5031 Canning Vale Oxley Gladesville Manukau 2013 T 03 9798 0988 T 08 8234 2633 WA 6155...

Reviews: