background image

Global Mainstream Dynamic Energy Technology Ltd.                                                 


- 41 -


User Manual   
GHESS 9.8-14.4-TH hybrid system 
 

4.1.5.14 Setting Feed-in Grid Percentage 


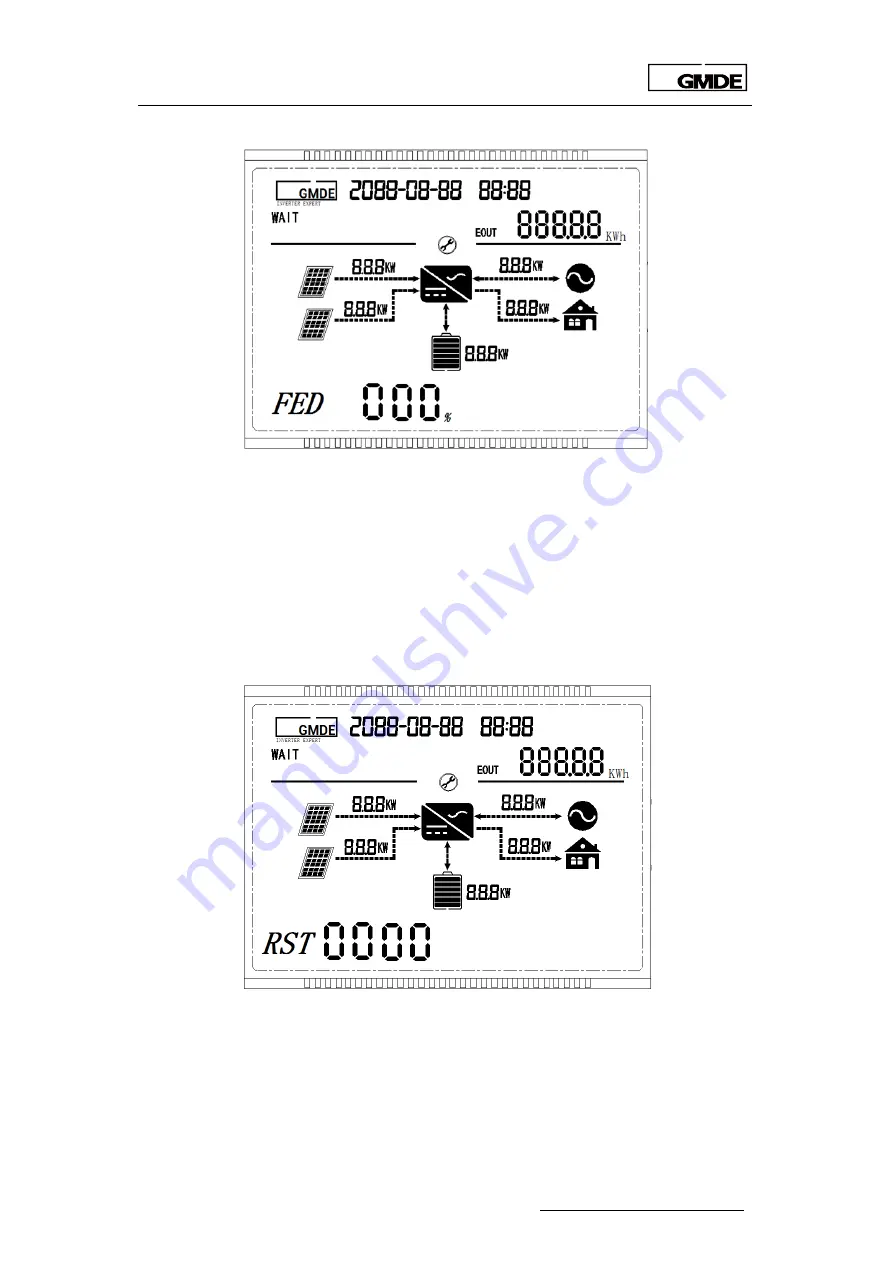
Figure 47    Feed-in grid percentage setting 


FED refers to feed-in grid percentage. The system is not allowed to feed any energy into the grid 
if the FED value is set to 0%. The system is free to export to the grid if the FED setting to 100%.If the 
FED is set to 10%, then the largest power allowed to be fed into the grid is 9600W*10%=960W. 
The default FED value is 100%; please press “OK” to modify it. 
 

4.1.5.15 Restore to Factory Setting 

Press “

”to enter setting interface as shown in Figure .   


Figure 48    Restore to factory setting 


RST refers to restore to the factory setting. Please input the value “1111” if you need to restore 
the system into the initial setting out of factory. Press  “ESC” to quit from the setting page and 
enter the display menu.   
Note:  The  setting  should  be  operated  when  the  Powervortex  309KTL  is  under  “wait”  status, 

Summary of Contents for GHESS 9.8-14.4-TH

Page 1: ...User Manual 3 Phase Residential Energy Storage System For GHESS 9 8 14 4 TH ...

Page 2: ...cription 8 3 System Installation 10 3 1 Unpacking and Install Preparations 10 3 1 1 Before Unpacking 10 3 1 2 Before Mounting 10 3 1 3 Packing List 12 3 2 Mounting 15 3 2 1 Mounting Hybrid Inverter 15 3 2 2 Mounting Battery Cabinet 16 3 2 3 Mounting Energy Meter 22 3 3 System Connection 25 3 3 1 How to Make Power Connecting Line 27 3 3 2 RS485 Communication Line 28 4 System Settings 28 4 1 LED 28 ...

Page 3: ...i Configuration 42 5 System Operation 45 5 1 System Settings 45 5 2 System Starting 46 5 3 System Operating Instructions 46 5 3 1 On grid Operation 46 5 3 2 Off grid Operation 47 5 4 System Maintenance 47 6 Troubleshooting 47 6 1 Safety during Troubleshooting 47 6 2 Fault Messages List 48 6 3 Fault Acknowledgement 49 6 4 Technical Service 50 ...

Page 4: ... 21 60710806 service global mde com Legal Disclaimer All information in this documentation has been compiled and checked with most care Despite of this errors or deviations cannot be completely excluded We assume no liability therefore User is encouraged to check updated version at http www global mde com Copyright The details of this documentation are the property of GMDE Using and publicizing th...

Page 5: ...version of the manual please note that you can click the content to find information you want quickly All the characters with underline are clickable A phrase named Back to Top at the bottom of each chapter can help you go back to the first page quickly Before using this device please ensure that you have read this manual including installation and safety operation carefully Should you have any di...

Page 6: ...njury will occur Warning Death or severe personal injury may occur Caution Personal injury or material damage may occur Explanations Electric shock Do not open the device Dangerous voltage may still be applied inside the device even after it has been switched off High leakage current Make absolutely sure you establish connection to ground before connecting the device to the supply circuit Health r...

Page 7: ...he product Please refer to Disconnecting for maintenance in Section 5 4 System Maintenance Note that after disconnecting the hybrid inverter from AC grid PV panels and battery packs wait at least 15 minutes before proceeding Operating the product Do not commission the device until the whole system complies with the application specific national rules and safety regulations The ambient conditions g...

Page 8: ...loss or damage to property any personal injury any damage or injury arising from or as a result of misuse or abuse or the incorrect installation integration or operation of the product We disclaim any liability for direct or indirect damages due to 1 Improper installation or commissioning 2 Modifications alterations or repair attempts 3 Inappropriate use or operation 4 Insufficient ventilation of ...

Page 9: ...he generated electricity from PV is used by the household loads charged into the battery packs or fed into the grid And the inverter is charging discharging the battery packs according to commands from integrated energy management unit B Battery cabinet Battery packs an on off grid auto switching component and system Terminal Box are all integrated in the Battery Cabinet as shown in Figure 2B Batt...

Page 10: ... in the original packages that they were delivered 3 1 2 Before Mounting 1 Don t install the device in direct sunshine External heating from exposure to the sun may cause excessive internal heating This may result in output power de rating to avoid damage on internal components 2 The Powervortex 309KTL hybrid inverter weights 55kg and Battery Cabinet weights roughly 200kg The installation wall mus...

Page 11: ...al GHESS 9 8 14 4 TH hybrid system Figure 3 Powervortex 309KTL dimension Module Powervortex 309KTL Battery cabinet battery included Dimension L W D 540mmx670mmx289mm 563mm x 1609mm x400mm Weight 55kg 200kg Table 1 Mechanical data of inverter and Battery Cabinet ...

Page 12: ... 1 Unpacking the Powervortex 309KTL Inverter User Manual A1 A2 A3 A4 A5 Figure 5 Powervortex 309KTL packing list Item Description pcs A1 Powervortex 309KTL hybrid inverter 1 A2 Powervortex 309KTL user manual 1 A3 Aviation plug for AC Grid on the Battery Cabinet 1 A4 Wall bracket 1 A5 Expansion tube M8 12mm 4 Table 2 Powervortex 309KTL packing list ...

Page 13: ...e 6 Battery cabinet packing list Item Description pcs B1 Upper Battery Cabinet 1 B2 Lower Battery Cabinet 1 B3 Wall lock and screws 4 SETs Table 3 Battery cabinet packing list 3 1 3 3 Unpacking Battery Modules CO M2 B B STATUS Link Port 1 Link Port 0 RS232 Figure 7 H48050A 15S battery module C Item Description pcs C H48050A 15S battery module 6 Table 4 Battery packing list 3 1 3 4 Unpacking the Ac...

Page 14: ... MC4 terminals 1 D5 String connecting cable between 2 battery modules 0 18 m 4 D6 String connecting cable between 2 battery modules in upper and lower cabinet 1 0 m 1 D7 Connecting cable between battery module and battery controller 1 0 m 1 D8 Connecting cable between battery module and battery controller 0 8 m 1 D9 Communication line between inverter and Battery Cabinet CAN ports 1 5m 1 D10 Commu...

Page 15: ...he wall by four expansion bolts M8 12mm thread diameter is 8mm nominal diameter is 12mm Select the appropriate screw types and dimensions for the wall material is very important Mount the wall bracket according to the following steps 1 Mark the installation position of wall bracket 2 Remove the wall bracket and then drill installation holes 3 Fix the wall bracket on the wall with screws 4 Tighten ...

Page 16: ...Mounting inverter on the bracket 3 2 2 Mounting Battery Cabinet 3 2 2 1 Wall Lock and Battery Modules Installation 1 Mount the wall lock on the upper and lower Battery Cabinets as shown below Figure 11 Wall lock mounting 1 Open the side door and install the 3 battery modules into the lower Battery Cabinet ...

Page 17: ... TH hybrid system Figure 12 Put battery into lower Battery Cabinet 2 Lay the upper Battery Cabinet on the lower Battery Cabinet lock the upper and lower Battery Cabinet with screws Figure 13 Installing Battery Cabinets 3 Install the rest 3 battery modules into the upper cabinet ...

Page 18: ...0 RS232 B B STATUS Link Port 1 Link Port 0 RS232 B B STATUS Link Port 1 Link Port 0 RS232 Figure 14 Side view of battery installation Fix the 6 battery modules on the cabinet with 24 units of M5 12 screws each with 4 screws After communication and electric connection close the side doors of the Battery Cabinet Screw the wall locks of the Battery Cabinets into the wall 3 2 2 2 Wiring inside Battery...

Page 19: ...em Front view of integrated battery controller and Terminal Box Back view of integrated battery controller and Terminal Box Figure 15 Battery controller and system Terminal Box Inside the Battery Cabinet electric wiring and communication line connecting work to be done are illustrated as below ...

Page 20: ... U T2B O U T3A O U T3B O U T4A O U T4B I N1A I N1B I N2A I N2B B B STATUS Link Port 1 Link Port 0 RS232 B B STATUS Link Port 1 Link Port 0 RS232 B B STATUS Link Port 1 Link Port 0 RS232 B B STATUS Link Port 1 Link Port 0 RS232 B B STATUS Link Port 1 Link Port 0 RS232 B B STATUS Link Port 1 Link Port 0 RS232 D D B B RS485 CAN RS232 LinkPort SOC STATUS ADD O U T1 A RESET ON OFF POWER O U T1 B O U T2...

Page 21: ...B 7 B B STATUS Link Port 1 Link Port 0 RS232 D D B B RS485 CAN RS232 LinkPort SOC STATUS ADD O U T1 A RESET ON OFF POWER O U T1 B O U T2 A O U T2 B O U T3 A O U T3 B O U T4 A O U T4 B I N 1 A I N 1 B I N 2 A I N 2 B D7 6 battery module B Battery controller B Table 6 Electric wiring inside Battery Cabinet Communication connecting inside Battery Cabinet with battery module connecting from top to bot...

Page 22: ... RS232 B B STATUS Link P ort 1 Link P ort 0 RS232 5 6 D14 4 battery module Link Port 1 5 battery module Link Port 0 D14 5 battery module Link Port 1 6 battery module Link Port 0 Table 7 Communication connecting inside Battery Cabinet 3 2 3 Mounting Energy Meter The energy meter should be mounted on the AC side of the hybrid system between the system and the grid Generally the energy meter is mount...

Page 23: ... meter L1 L2 L3 N port on the meter is to connect with the public grid L1 L2 L3 N port is to connect with the TO GRID on the back of Terminal Box on the Battery Cabinet as Figure SE T Energy Meter L3 N L3 N 11 12 L2 L2 L1 L1 7 8 9 10 GRID SYSTEM Figure 18 Energy meter output port The Meter Address is referring to the Address marked on every meter label marked in red as ...

Page 24: ...0E C XXXXXXXXX XXXX XXXXXXX XXXXXXXXXXXXXXX DATE 06 06 16 XXXXXX X 99999999999999 A N Load kWh 20 80 A Address 003 A B RS485 L2 L2 L3 L3 N 1 3 4 N B C Figure 19 Meter address Warning Please ensure the grid is disconnected before installation Caution A standard AC breaker should be installed after the GRID port of the inverter Table 8 Warning ...

Page 25: ...nection 7 8 9 10 11 12 L1 L2 L3 N L1 L2 L3 N PV1 BAT AS B OX AC GRID R S485 C AN DC Switch ON OFF Et he rnet WIFI To Battery To Battery To Ethernet Meter PV2 PV1 PV2 R S T N G RS485 BAT BAT COM RS 485 To Inverter Output To Load To Grid CAN PIN3 6 RS485 Grid tied Load Emergen cy Load Figure 20 System connection ...

Page 26: ...rn off Follow these steps to finish the electrical and communication connection of this system from DC to AC side from electrical wiring to communication connection 1 Inserter MC4 ports from PV array into PV1 PV1 PV2 PV2 ports on Powervortex 309KTL inverter 2 Connect the BAT BAT port between Powervortex 309KTL inverter and Terminal Box with D4 DC cable terminated with MC4 ports 3 Connect the AC GR...

Page 27: ...nnection before system operation Note 1 The PV power should be lower than 13 0kW 2 The emergency load connected should not be over 5 0kW 3 A 32A 400V AC Breaker and 300mA leakage protector should be installed between the hybrid system and the grid 4 A 32A 400V AC Breaker and 300mA leakage protector should be installed between the hybrid system and the emergency load 3 3 1 How to Make Power Connect...

Page 28: ...s as the RS485 communication port The RJ45 plug pin allocation is illustrated by Figure Pin No Illustration 1 2 3 Data 4 GND 5 GND 6 Data 7 5V 8 5V Figure 26 RJ45 plug pins allocation Table 9 RJ45 plug pins allocation 4 System Settings 4 1 LED 4 1 1 LED Interface All information related to the inverter can be obtained from the LED display There are 4navigation keys on the LED display panel The fun...

Page 29: ...when hybrid inverter system is running smoothly Battery operation light Light on if the communication between PV inverter and Battery manger is fine Wi Fi operation light Light on when the Wi Fi is running Warning light Light on when system warning happens Table 11 LED status light definition 4 1 3 LED Display Definition Figure 28 LED display No Item Definition 1 Time Current date and time 2 Syste...

Page 30: ...NCY LOAD voltage off grid EMERGENCY LOAD current off grid TEM Powervortex 309KTL temperature FRE Grid frequency ET1 Daily PV production SOC Status of Charge for battery packs NUM Number of BMS communication SWC Software version No of Powervortex 309KTL communication conversion board SWM CPU software version No of Powervortex 309KTL Master Table 13 LED display menu content 4 1 5 LED Setting Menu Se...

Page 31: ...Feed in grid percentage 100 default 15 IRE Recommended charging discharging current Display value 16 RET Restore to factory setting Table 14 LED parameter settings Notice By 2 minutes without actions the LED background light will be turned off Turn on the DC switch to connect Powervortex 309KTL inverter to the grid wait until the LED is displaying the interface as shown Figure Long pressing OK but...

Page 32: ...as Figure 31 showed and choose different information by pressing buttons Users can press ESC button to quit from setting and enter into the display menu 4 1 5 2 Setting Time Figure 31 Time setting TIM refers to system time press OK button to modify the time Press and OK buttons to adjust the numbers on the interface successively press OK to finish the setting After time setting the system will aut...

Page 33: ... 06 Press OK button and input the corresponding battery type code to modify Press OK to finish the setting and you will enter the setting interface as shown in Figure 4 1 5 4 Setting Battery Charging Cut off Voltage Figure 33 Battery charging cut off voltage setting BVH refers to battery charging cut off voltage The working range is 150 to 800 Vdc the default value for BVH is 320V Please set the v...

Page 34: ...ltage setting BVL refers to battery discharging cut off voltage with battery working range from 150V to 800Vdc Default BVL value is 285V Please set the voltage according to the battery recommended value for different battery types Press OK to modify the value and please make sure the BVL value input is smaller than the BVH value in 4 1 5 4 Press OK to finish this setting and you will enter the set...

Page 35: ... Charging Current Figure 36 Battery maximum charging current setting Ic refers to the maximum charging current with setting range from 5A to 20A The default value is 20A Please set this current value according to the battery recommended value of different battery types Press OK to finish this setting and you will enter the setting interface as shown in Figure 18 4 1 5 8 Setting PV String Connectio...

Page 36: ...tion mode setting MDE refers to operation mode The MDE code 00 refers to self use mode 01 refers to time of use mode The default value is 00 and press OK to modify it If modify MDE value into 01 as shown in Figure 39 press OK the system will enter the charging time range setting interface as shown in Figure 40 For example if you want the system start to charge the battery at 22 00 and stop chargin...

Page 37: ...gy Technology Ltd 37 User Manual GHESS 9 8 14 4 TH hybrid system Figure 39 Time of Use ToU mode setting Figure 40 Charging time range setting under ToU operation mode Figure 41 Discharging time range setting under ToU operation mode ...

Page 38: ...c grid to connect the grid power data ME2 refers to the address of meter that is to connect right after the PV inverter to connect PV generation data Please check the address column on energy meter label as shown in Figure you will find the ME1 value is 018 Press OK and change the meter address to 018 accordingly Please check the address column on energy meter label as shown in Figure you will fin...

Page 39: ... indirect metering case Please check the current transfer ratio listed on the current transformer label and press OK to modify it Note Different current transformer has different current ratios please input the right ratio If the meter is direct connected and measured the CT ratio value is 01 CT1 is the current transfer value of Grid Meter CT2 is the current transfer value of PV Meter In this syst...

Page 40: ... Currently BMS and battery from Pylon is the only one available in the standard system So this value doesn t need to modify Please press to enter the interface as Figure showed 4 1 5 13 Setting Battery State of Charge SOC Figure 46 SOC setting SOC refers to the left percentage of battery energy before stopping discharging For example set SOC as 10 the system will stop discharging when the battery ...

Page 41: ... the FED is set to 10 then the largest power allowed to be fed into the grid is 9600W 10 960W The default FED value is 100 please press OK to modify it 4 1 5 15 Restore to Factory Setting Press to enter setting interface as shown in Figure Figure 48 Restore to factory setting RST refers to restore to the factory setting Please input the value 1111 if you need to restore the system into the initial...

Page 42: ...Fi signal is available on the installation site to be received by the antenna integrated in the inverter PV1 BAT ASBOX AC GRID RS485 CAN DC Switch ON OFF Ethernet WIFI PV2 Figure 49 Wi Fi Antenna 4 2 2 Wi Fi Configuration 4 2 2 1 Get Connected with the Inverter Wi Fi End user can connect to the Wi Fi generated by inverter via smart ends like smartphone PC or iPad etc Choose the Wi Fi portal create...

Page 43: ... set your Wi Fi network name and the password SSID name of the Wi Fi in your house Key password of the Wi Fi in your house Figure 52 Input your home Wi Fi data Note in this step in Figure the SSID refer to the Wi Fi Name in your house the normal Wi Fi generated by your Power router and your Smart phone or PC normally connects with Input your Wi Fi password into the Key table Don t input MDE as MDE...

Page 44: ...ps 4 2 2 3 User Account Registration Registration procedures are as following 1 Visit your website portal http portal global mde com and log in Figure 54 Log in Key in Username password e mail address and monitor SN Please notice the Monitor SN is the Suffix of the GMDE_XXXXXXXX For example if the Wi Fi of one device is GMDE_3E227BB2 then the Monitor SN you should key in is 3E227BB2 Figure 55 GMDE...

Page 45: ...y the log in password 5 System Operation 5 1 System Settings 1 Please confirm each connection lines are correctly and securely wired according to Figure System connection 2 Turn the DC switch Optional on PV1 BAT ASBOX AC GRID RS485 CAN DC Switch ON OFF Ethernet WIFI PV2 Figure 57 Powervortex 309KTL DC switch 3 After the LED lighting on users can set parameters including password time battery type ...

Page 46: ...RUN Console SOC ALM CAN Link Port1 IN GND NO2 COM2 Figure 58 Battery pack power and SW button 5 Turn on the DC breaker on the battery controller D D B B RS485 CAN RS232 LinkPort SOC STATUS ADD O U T1 A RESET ON OFF POWER O U T1 B O U T2 A O U T2 B O U T3 A O U T3 B O U T4 A O U T4 B I N 1 A I N 1 B I N 2 A I N 2 B Figure 59 DC breaker on the battery controller 5 3 System Operating Instructions 5 3...

Page 47: ...ting at least 15 min before maintenance 5 After disconnecting all the cables please move the inverter to a proper position for maintenance Note if the system is not used for a long time please turn off the whole system for safety 6 Troubleshooting 6 1 Safety during Troubleshooting High electric voltage Risk of death or personal injury by electric shock Never work with live wires It is prior to all...

Page 48: ...fci Curr Warning E07 Gfci Device Warning E08 Isolation Warning E09 Relay Warning E10 Grid Volt Warning E11 Grid Freq Warning E12 Meter Abnormal Warning E13 No Utility E14 Pv Over Volt Warning E15 Internal Com Warning E16 Pv Over Temp Warning E17 Consistent Volt E18 Consistent Dci E20 Bus Soft Time out E21 Inv Soft Time out E22 Bus Low Warning E23 Bus High Warning E24 Consistent Freq E25 Pv Boost O...

Page 49: ...mp alarm E59 Pack discharge low temp alarm E60 Pack Charge Over Current E61 Pack discharge Over current E62 Module Low voltage alarm E63 Module High voltage alarm E64 Cell Low voltage Protection E65 Cell high voltage Protection E66 Pack low voltage Protection E67 Pack high voltage Protection E68 Pack low temperature Protection E69 Pack high temperature Protection E70 Pack discharge high temp pro E...

Page 50: ... or turn the GMDE inverter off with the DC switch Wait for a while and turn the device on again 6 4 Technical Service Global Mainstream Dynamic Energy Technology Ltd 3rd Floor Building 7 Eureka City Industrial Park No 333 Zhujian Rd Minhang District Shanghai China TEL 86 21 60710809 818 FAX 86 21 61730300 E mail Service global mde com WEB www global mde com ...

Reviews: