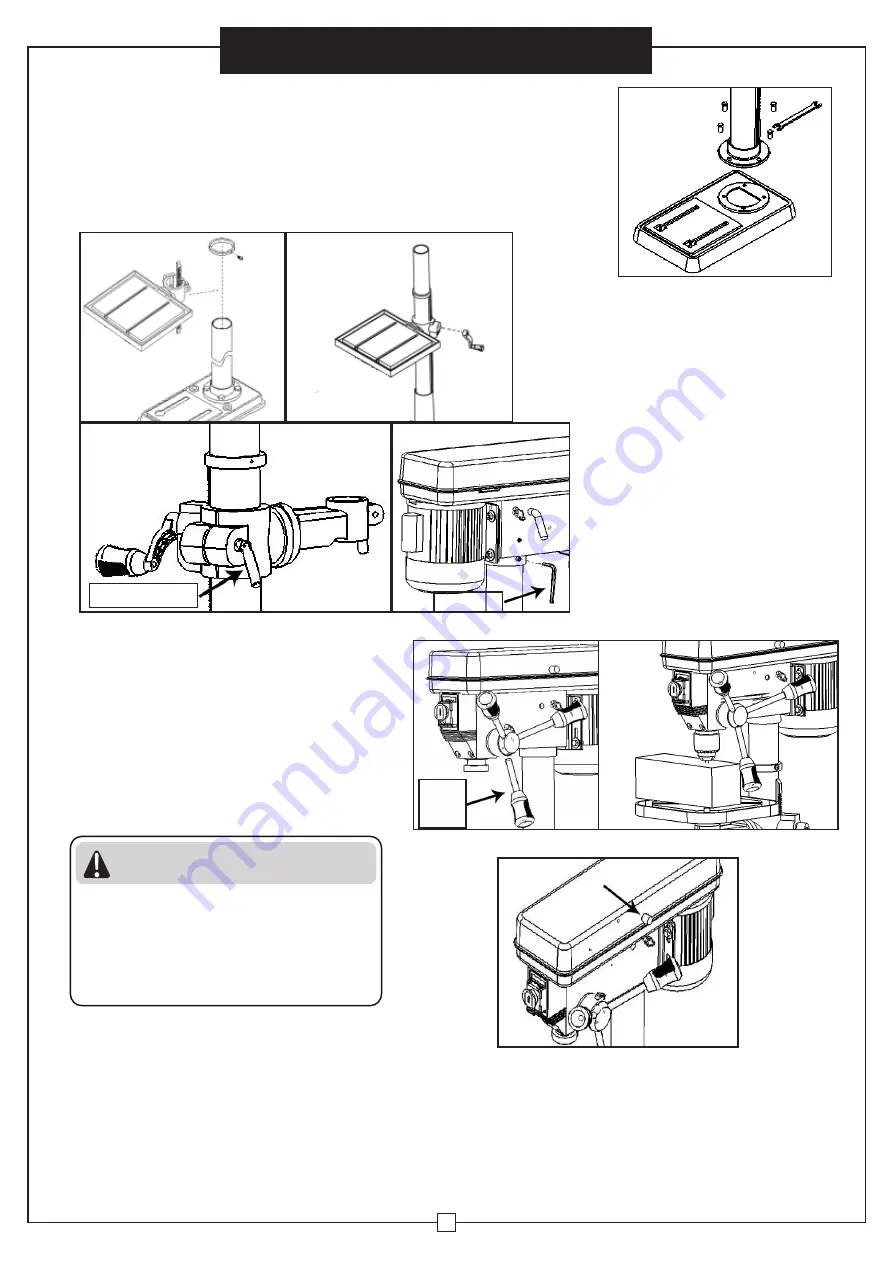
4. Set the Table to desired height then
tighten the table support clamp handle
to lock the table support in place.
1. Place the Base Platorm (9) on the bench top and attach the Column
Assembly (13) using four hex bolts.
2. Place the rack into the Table (10) and attach to the Column Assembly. Install
the Column Collar (14) above the lifting rack using the set screw it came
with.
3. Attach Cranks (12) to table support and vise. Secure with set screws.
6. Attach the Feed Handles (9) to the feed
crank hub and secure the hub to the Head
Assembly (1).
7. Rotate the chuck sleeve clockwise open the
jaws of the chuck. Make sure the chuck jaws
are fully opened and receded into the chuck.
8. Push the chuck into the spindle. Using a
wooden or rubber mallet, tap the chuck up to
secure it onto the spindle shaft.
WARNING
Product is shipped with protective
oil coating on metal surfaces. Mating
surfaces of spindle and chuck MUST be
cleaned before assembly to prevent parts
from coming loose during operation.
Clamp Handle
Hex Key
Feed
Crank
5. Lift the Head Assembly (1) on top
of the column and slide it down
as far as it will go. Align the Head
Assembly with the Base Platform
(9). Tighten the set screw to
secure the head.
9. Secure upper pulley cover of head assembly by
installing locking knob.
Floor Standing Drill Press
5


