D
C
B
A
H3
# 6
# 7
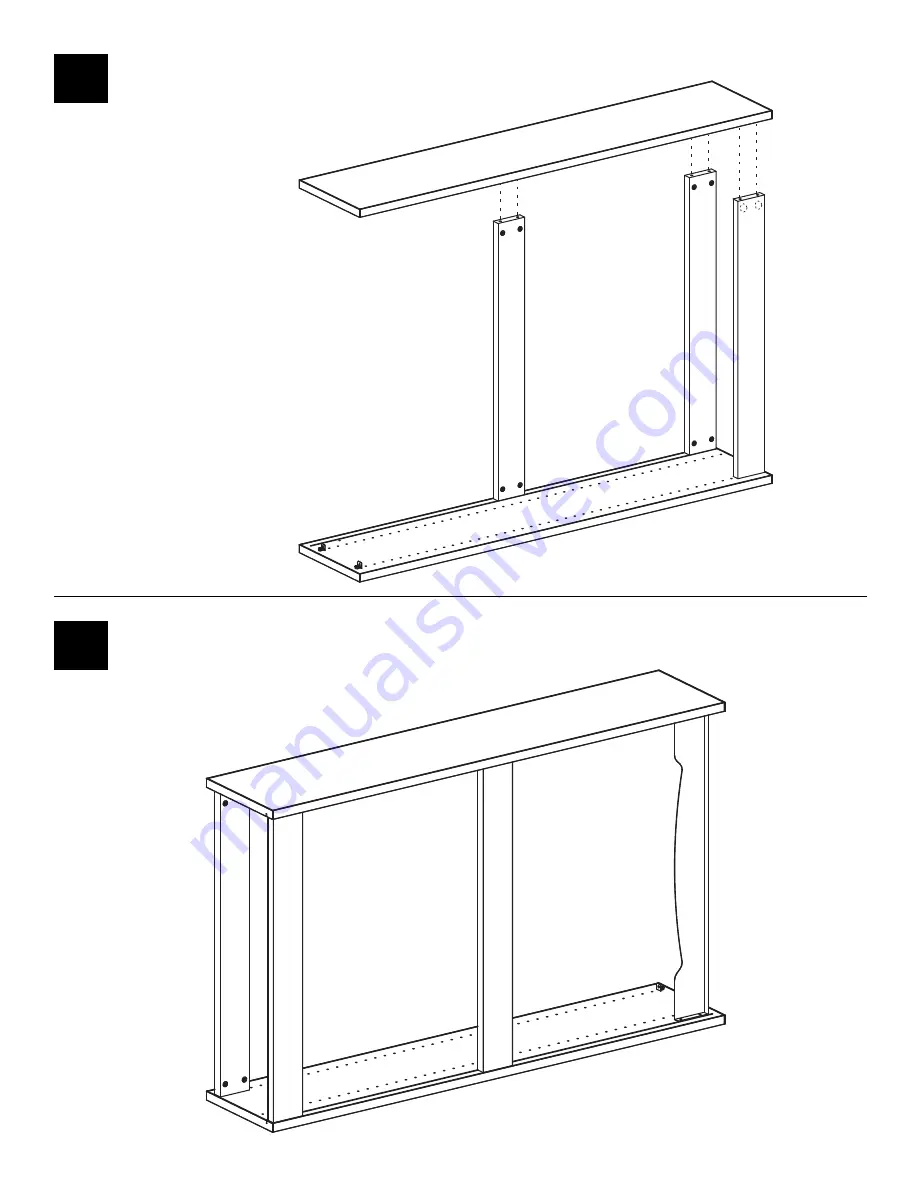
H1
H7
Insert Metal Spanner (H1) and secure with Varianta Screws.
Attach Right Panel (B) to the spanner and Toe Kick Panelsand secure by turning the Minifix Cams (H3).
Page 1: ...ewdriver or a plastic mallet To protect your new furniture from damage during assembly it is recommended to work on a carpeted surface CAUTION On assemblies requiring glue make sure the unit is assemb...
Page 2: ...ea 1 ea A Left Panel G42SB G48SB G60SB G72SB G84SB The diagram show one size for ease of viewing Any differences will be indicated in each part s description E Top Panel 01026001 1 ea D Toe Kick 0102...
Page 3: ...n before beginning It will be necessary to substitute a Divider J for a Right Side B during assembly NOTE The diagrams show one size for ease of viewing Any differences will be indicated in each step...
Page 4: ...or a Fixed Shelf or Top install the metal flange using a System Varianta Screw as shown DO NOT over tighten For an Adjustable Shelf use the Metal Shelf Clip Slide the shelf into place over the Metal F...
Page 5: ...locations Place Screw in Tab V H6 and secure by using Varianta Screw H7 1 Insert Tab V Housing H5 into the holes of the Top Panel E H5 H5 H5 H5 H5 2 Insert Minifix Cam H3 into the corresponding holes...
Page 6: ...A H3 H3 A C C H3 H3 H3 H3 4 5 Attach Spanner Panels C to the Left Panel A and secure by truning the Minifix Cams H3 Attach Toe Kick Panels D to the Left Panel A and secure by turning the Minicfix Cam...
Page 7: ...B A H3 H3 H3 H3 H3 H3 6 7 D C C H1 B A H7 H7 H7 H7 Insert Metal Spanner H1 and secure with Varianta Screws Attach Right Panel B to the spanner and Toe Kick Panels and secure by turning the Minifix Ca...
Page 8: ...using Tab V System 8 9 Slide in Back Panel H2 and hold in place by screwing in Panhead Screws H8 into the Bottom Spanner C B A E H2 D H1 10 Insert Shelf Clips and Insert Shelves See Shelving Assembly...