Glacier G42SB Assembly Manual Download Page 1

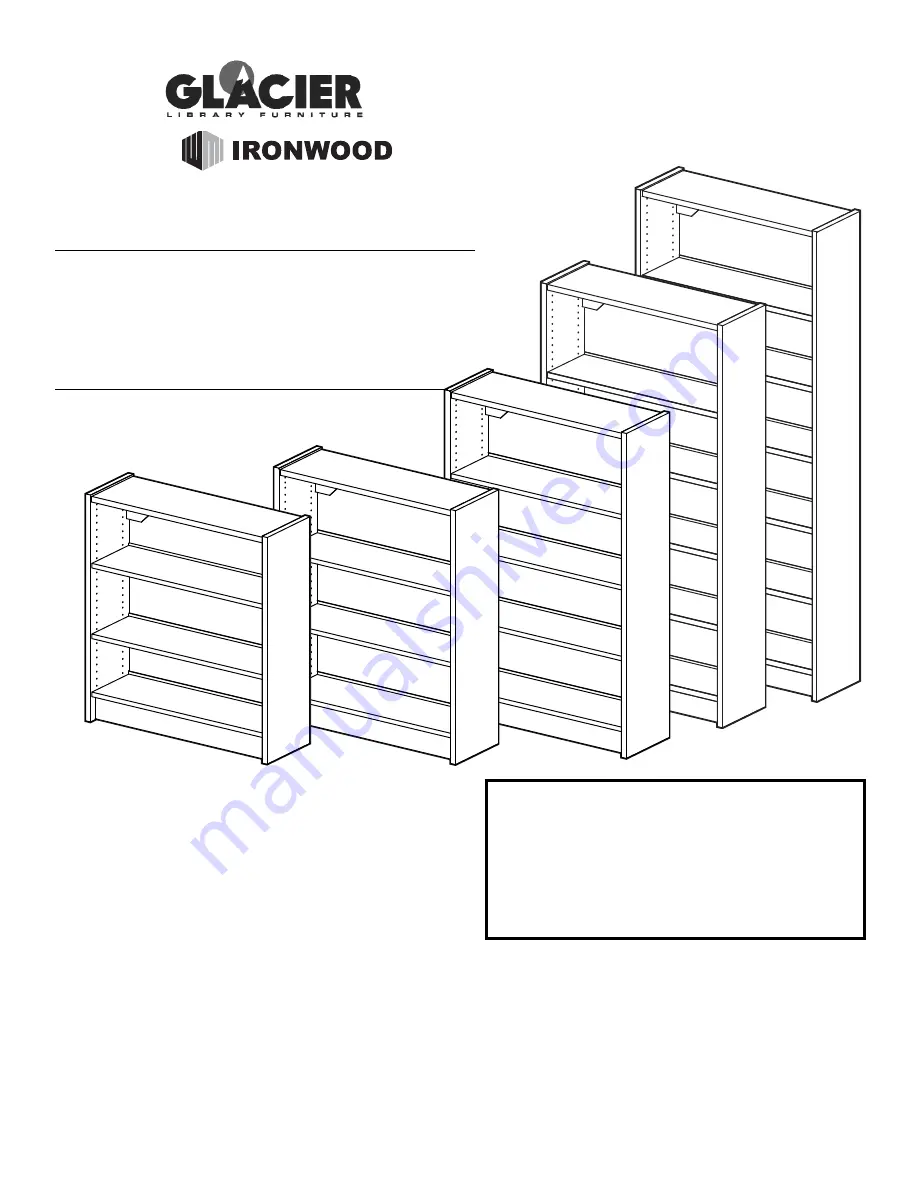
GLACIER ALPINE / TERRAIN

LIBRARY SHELVING UNIT

G42SB G48SB
G60SB G72SB

G84SB

SINGLE FACED UNIT

0709

BY

I M P O R TA N T !

Assembly may require the assistance of

another person.

Before you begin assembly:

READ THE DIRECTIONS 

all the way through one

time. This will speed up the process and help you
understand the sequence of steps. 

COUNT THE PARTS AND HARDWARE 

before

assembly. This ensures you have received all
necessary parts before you begin.

TOOLS: 

You may need a Phillips head screwdriver,

a medium slotted screwdriver or a plastic mallet. To
protect your new furniture from damage during
assembly, it is recommended to work on a
carpeted surface. 

CAUTION: 

On assemblies requiring glue, make

sure the unit is assembled correctly before gluing.
Once this unit is assembled with glue, the
manufacturer will not be responsible for damaged
parts. Keep a damp cloth or sponge handy to wipe
off excess glue.

To care for this furniture, simply wipe with a cloth
dampened with glass cleaner containing ammonia-D.

In the event any parts are missing from

this package, send your name, address,

telephone number, and a description of

the missing part(s) to: PARTS, Box 1420,

Missoula, MT 59806 or call:

1-800-769-5693 or FAX 1-800-445-5281.

Summary of Contents for G42SB

Page 1: ...ewdriver or a plastic mallet To protect your new furniture from damage during assembly it is recommended to work on a carpeted surface CAUTION On assemblies requiring glue make sure the unit is assemb...

Page 2: ...ea 1 ea A Left Panel G42SB G48SB G60SB G72SB G84SB The diagram show one size for ease of viewing Any differences will be indicated in each part s description E Top Panel 01026001 1 ea D Toe Kick 0102...

Page 3: ...n before beginning It will be necessary to substitute a Divider J for a Right Side B during assembly NOTE The diagrams show one size for ease of viewing Any differences will be indicated in each step...

Page 4: ...or a Fixed Shelf or Top install the metal flange using a System Varianta Screw as shown DO NOT over tighten For an Adjustable Shelf use the Metal Shelf Clip Slide the shelf into place over the Metal F...

Page 5: ...locations Place Screw in Tab V H6 and secure by using Varianta Screw H7 1 Insert Tab V Housing H5 into the holes of the Top Panel E H5 H5 H5 H5 H5 2 Insert Minifix Cam H3 into the corresponding holes...

Page 6: ...A H3 H3 A C C H3 H3 H3 H3 4 5 Attach Spanner Panels C to the Left Panel A and secure by truning the Minifix Cams H3 Attach Toe Kick Panels D to the Left Panel A and secure by turning the Minicfix Cam...

Page 7: ...B A H3 H3 H3 H3 H3 H3 6 7 D C C H1 B A H7 H7 H7 H7 Insert Metal Spanner H1 and secure with Varianta Screws Attach Right Panel B to the spanner and Toe Kick Panels and secure by turning the Minifix Ca...

Page 8: ...using Tab V System 8 9 Slide in Back Panel H2 and hold in place by screwing in Panhead Screws H8 into the Bottom Spanner C B A E H2 D H1 10 Insert Shelf Clips and Insert Shelves See Shelving Assembly...

Reviews: