background image

6

Installation (continued)

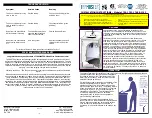
Installing the stopper and 
horizontal rod


Insert the stopper (J) into the drain hole in the 
sink.


Before installation, unscrew the protective cap 
(1) from the horizontal rod (P).

For easier removal and cleaning, rotate the 
stopper (J) 90 degrees so that the horizontal 
rod (P) does not go through the hole in the 
stopper (J). See insert 3.


Make sure the joint (O) on the horizontal rod (P) 
inserts into the drain body (N) completely, as 
shown (4). You can press the two sides of the 
joint (O) to remove the horizontal rod (P).

Insert the horizontal rod (P) into the drain body 
(N) and through the hole of the stopper (J). See 
insert 2.

2

3

Insert 3

Insert 2

2

N

1

J

O

P

N

O

4

1

P

6


Slide the lift rod (S) through the faucet (A). 


Slide the clip (R) upward, adjust the location of 
the lift rod strap (Q) to the appropriate height and 
insert the horizontal rod (P) with the correct hole 
of the lift rod strap (Q).


Move the lift rod strap (Q) in or out to choose an 
appropriate location.


Press the rod (P) down to ensure the stopper (J) 
is in the maximum open position.

Attaching the horizontal rod 
and strap

5

5

P

J

R

Q

Hole

2

3

4

4

P

J

R

Q

R

1

S

A

Summary of Contents for HD67530W-6201

Page 1: ...DEPOT COM TWO HANDLE LAVATORY FAUCET We appreciate the trust and confidence you have placed in Glacier Bay through the purchase of this lavatory faucet We strive to continually create quality products...

Page 2: ...chaser to be free of defects in materials or workmanship We will replace FREE OF CHARGE any product or parts that prove defective Simply return the product part to any of The Home Depot retail locatio...

Page 3: ...I Quick connecting hose 1 Faucet body D 2 E Nut 2 F Screw 4 Washer G 2 H Lock nut 1 Washer Part Description Quantity Faucet Assembly Drain Assembly NOTE Items J N come pre assembled J 1 Pop up stoppe...

Page 4: ...d cold faucet handles B and C Insert the hot faucet handle B to the left of the spout and cold faucet handle C to the right of the spout NOTE The hot water valve is identified with a label Shut off th...

Page 5: ...nderneath the sink screw the drain body N onto the drain flange K Ensure that the opening 1 for the ball rod on the drain body N faces towards the rear of the sink 3 Preparing the pop up assembly Remo...

Page 6: ...press the two sides of the joint O to remove the horizontal rod P Insert the horizontal rod P into the drain body N and through the hole of the stopper J See insert 2 2 3 Insert 3 Insert 2 2 N 1 J O...

Page 7: ...y Customer service for assistance S Q 1 S Q 2 P J R Q 8 Adjusting the length of lift rod strap If the pop up lift rod strap Q is interfering with your installation as shown in the Fig 1 the lift rod s...

Page 8: ...pens and closes correctly 10 Attaching the quick connecting hose Attach the quick connecting hose I connections to the hot faucet handle B connection faucet body A connection and cold faucet handle C...

Page 9: ...stallation continued 1 Flushing and checking for leaks IMPORTANT After installation is complete remove the aerator from the faucet A with the plastic wrench T to flush the water lines Ensure the fauce...

Page 10: ...nstalled The water will not shut off completely The cartridge is dirty or broken Remove the handle to check the cartridge Clean or replace The aerator is dirty or mis fitted NOTE Refer to the service...

Page 11: ...andle RP13304 5 Bonnet nut RP70193 6 Inverter RP64044 7 Cartridge H RP20067 8 Cartridge C RP20068 Bronze index 12 Aerator RP30191 19 ClickInstall drain assembly RP40228 20 Lift rod RP40255 21 White in...

Page 12: ...ms missing parts Before returning to the store call Glacier Bay Customer Service 8 a m 7 p m EST Monday Friday 9 a m 6 p m EST Saturday 1 855 HD GLACIER 1 855 434 5224 HOMEDEPOT COM Retain this manual...

Page 13: ...55 434 5224 HOMEDEPOT COM Modelo n m HD67530W 6201 HD67530W 6204 GRIFO PARA LAVAMANOS DE DOS LLAVES Agradecemos la confianza que has depositado en Glacier Bay al comprar este grifo para lavamanos Nos...

Page 14: ...os no presentan defectos materiales o de fabricaci n Reemplazaremos GRATIS cualquier producto o pieza defectuosos Simplemente devuelva el producto o pieza a cualquiera de las tiendas minoristas de The...

Page 15: ...E Tuerca 2 F Tornillo 4 Arandela G 2 H Tuerca de bloqueo 1 Arandela Pieza Descripci n Cantidad NOTA Los art culos J N vienen preensamblados Ensamblaje de la mezcladora Ensamblaje del drenaje J 1 Tap n...

Page 16: ...asta que los extremos de los tornillos F est n al ras de la cara de las tuercas E Asegura las llaves B y C del grifo bajo el lavamanos usando las arandelas D y las tuercas E Aprieta bien los tornillos...

Page 17: ...po del drenaje N en la brida del drenaje K Aseg rate de que la abertura 1 para la varilla de bola del cuerpo del drenaje N est frente a la parte posterior del lavabo 3 C mo preparar el ensamblaje emer...

Page 18: ...rar la varilla horizontal P Inserta la varilla horizontal P en el cuerpo del desag e N y a trav s del orificio del tap n J Consulta el folleto 2 Folleto 3 Folleto 2 2 3 2 N 1 J O P N O 4 1 P Desliza l...

Page 19: ...acier Bay para recibir ayuda S Q 1 S Q 2 P J R Q Q 1 2 Q Q R Fig 1 Fig 2 8 C mo ajustar el largo de la correa de la varilla de elevaci n Si la correa de la varilla de elevaci n Q sobresale tanto que i...

Page 20: ...correctamente 10 C mo montar la manguera de conexi n r pida Conecta las conexiones de la manguera de conexi n r pida I a la conexi n de la llave de agua caliente B la conexi n del cuerpo del grifo A...

Page 21: ...1 C mo purgar las tuber as y comprobar que no haya fugas IMPORTANTE Despu s de terminar la instalaci n retira el aireador del grifo A con la llave pl stica T para descargar las l neas de agua Aseg rat...

Page 22: ...nistro de agua no se corta completamente El cartucho est sucio o da ado Retira la llave para revisar el cartucho Limpia o reemplaza El aireador est sucio o mal instalado NOTA Consulta la secci n de pi...

Page 23: ...e pieza 1 RP80373 2 ndice de bronce RP80374 3 Tornillo RP50154 4 Llave RP13304 5 Tuerca del bonete RP70193 6 Invertidor RP64044 7 Cartucho H RP20067 8 Cartucho C RP20068 ndice de bronce 12 Aireador RP...

Page 24: ...de regresar a la tienda llama al servicio al cliente de Glacier Bay de lunes a viernes entre 8 a m y 7 p m y los s bados entre 9 a m y 6 p m hora est ndar del Este 1 855 HD GLACIER 1 855 434 5224 HOME...

Page 25: ...HOMEDEPOT COM Mod le n HD67530W 6201 HD67530W 6204 ROBINET DE LAVABO DEUX MANETTES Nous vous remercions d avoir fait confiance Glacier Bay en achetant ce robinet de salle de bains Nous effor ons en p...

Page 26: ...ux ses Tout simplement retournez le produit pi ce l un des magasins Home Depot ou composez le 1 855 HD GLACIER 1 855 434 5224 pour recevoir un article de remplacement Une preuve d achat facture origin...

Page 27: ...orps du robinet D 2 E crou 2 F Vis 4 Rondelle G 2 H Contre crou 1 Rondelle Pi ce Description Quantit REMARQUE Les articles J N sont fournis pr assembl s Robinet vacuation J 1 Bonde d vacuation m caniq...

Page 28: ...et C sous le lavabo au moyen des rondelles D et des crous E Serrez fermement les vis F sur les crous E Fixez solidement le robinet A sur le lavabo l aide du contre crou H fourni Retirez les contre cro...

Page 29: ...vissez le corps d vacuation N sur la bride d vacuation K Assurez vous que l ouverture 1 de la tige rotule du corps d vacuation N fait face l arri re de l vier 29 3 Pr paration de l vacuation m caniqu...

Page 30: ...les deux c t s du joint O pour retirer la tige horizontale P Ins rez la tige horizontale P dans le corps d vacuation N et dans le trou de la bonde J Reportez vous aux encarts 2 2 3 2 N 1 J O P N O 4 1...

Page 31: ...pouvez contacter le service la client le de Glacier Bay pour une assistance S Q 1 S Q 2 P J R Q 8 R gler la longueur de la sangle de la tige de levage Si la sangle de la tige de tirage Q g ne votre in...

Page 32: ...ccord de la manette du robinet d eau froide C Poussez jusqu ce que les raccords s embo tent ensemble Tirez mod r ment vers le bas pour vous assurer que le branchement est bien fait Installation suite...

Page 33: ...du robinet Ne serrez pas trop Installation suite 1 Purge et recherche de fuites IMPORTANT Une fois l installation termin e retirez l a rateur du robinet A l aide de la cl en plastique T pour rincer le...

Page 34: ...L eau ne se ferme pas compl tement La cartouche est sale ou endommag e Retirez la manette pour v rifier la cartouche Nettoyez ou remplacez L a rateur est sale ou mal adapt REMARQUE Consultez la secti...

Page 35: ...RP80373 2 Indicateur bronze RP80374 3 Vis RP50154 4 Manette RP13304 5 crou de chapeau RP70193 6 Inverseur RP64044 7 Cartouche H RP20067 8 Cartouche C RP20068 Indicateur bronze 12 A rateur RP30191 19...

Page 36: ...ant de retourner au magasin appelez le service la client le Glacier Bay entre 8 h et 19 h HNE du lundi au vendredi au entre 9 h et 18 h HNE le samedi au 1 855 HD GLACIER 1 855 434 5224 HOMEDEPOT COM C...

Reviews: