background image

48

 Gigaset 1054, GBR: A30852-X954-B101-1-7619

28.10.96

1054K06.FM

Operation with Standard Mobile Unit 

Switching Features

With your Gigaset 1054 system, you have the option of carrying on external as well as internal 

consultation calls if the second telephone line is free. This feature could be used, for example, to 

consult an external business partner.

b

You are engaged in an external call.

ü

Push the internal key. 

The line code 

is shown;


here, 1.

=

...

)

Enter the station number desired; here, 

2.

or Ring All Internal Stations:

*

Push the star key.

You will hear the internal ring tone, an 

internal station answers; here, station 2. 

You carry on the call with the internal 

station.

Call Transfer:

g

Push the connect key or replace the 

mobile unit in the charging unit.

Or Terminate Internal Consultation and Return to the External Call:

e

Push the signal key. 

You are reconnected to the external sta-

tion. You continue with the external call.

Note:

After dialing the internal telephone number, you can immediately transfer the external call to 

that number by “hanging up.” This can be done even before the internal station answers.

If the station to which you are transferring the call does not answer within 30 seconds, an 

automatic recall occurs.

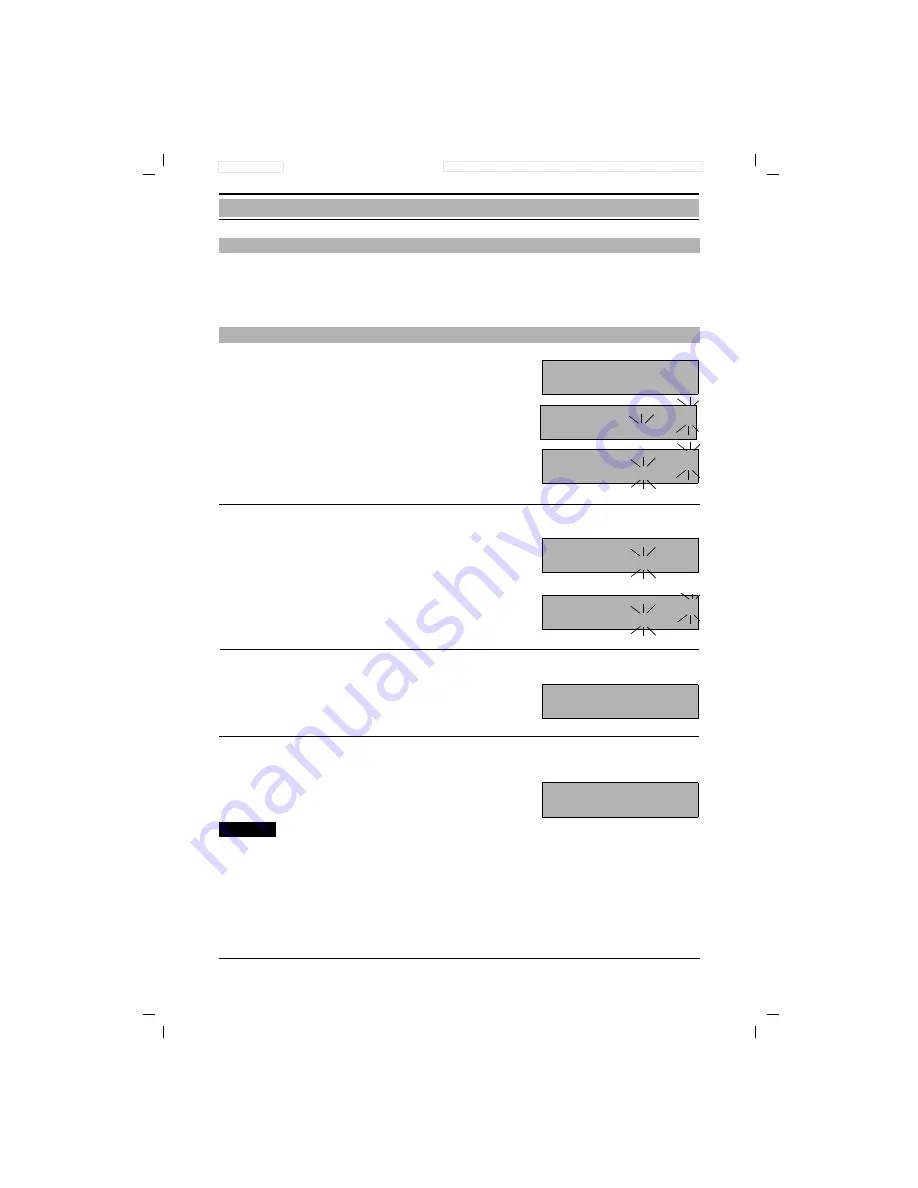
Consultation / Transfer Call

Internal Consultation

CD F

12345678

CD F G

1

CD F G

2

1

CD F G

0123

CD F G

2

1

C

CD F

12345678

Summary of Contents for Gigaset 1054

Page 1: ...10 96 s Operating Instructions 8 mobile units can be connected 2 non cordless terminals can be connected Cordless Digital DECT Telephone System Gigaset 1054 Note Please read these instructions with th...

Page 2: ...Gigaset 1054 A30852 X954 B101 1 7619 1054TIT FM 28 10 96 U5...

Page 3: ...or Individuals with Hearing Aids 14 Installing and Charging the Rechargeable Batteries 14 Mounting the Carrying Clip on the Mobile Unit 15 Important Tips for Using the Rechargeable Batteries 15 Standa...

Page 4: ...obile Unit or Auxiliary Device 41 Internal Dialing with Collective Call 41 Dialing Speed Dial Numbers 42 During the Call Placing a Call on Hold 43 Setting the Handset Volume 44 Mute Feature 44 Tempora...

Page 5: ...ation Enter or Change Number of Ring Cycles for Group Call 71 Ring Allocation for the Door Interphone 72 Cancel registration Mobile Unit 72 Resetting the Base Station to the Status at Initialization 7...

Page 6: ...ngth 107 Activate and Deactivate Call Length and Call Charge Display Set the Unit Cost 108 Lock Lock to Prevent Outgoing Calls Emergency Numbers 110 Enter View Delete Restricted Numbers Activate or De...

Page 7: ...tations 134 Base Stations Selection Automatic Manual Combined 136 Operation on Telephone Systems Standard Mobile Unit General Information 137 Enter Trunk Code AKZ 137 Enter Main Trunk Code HAKZ 138 Ch...

Page 8: ...6 1054K10 IVZ Table of Contents Gigaset 1054 GBR A30852 X954 B101 1 7619 28 10 96...

Page 9: ...xiliary devices on one base station No charge internal calls among 6 mobile units Simultaneous use of a maximum of 6 cordless devices Coding of transmissions between mobile unit and base station Opera...

Page 10: ...obile units blinks during registration C Non cordless auxiliary device with the telephone number 9 is lit when plug in power D Connection jack for supply is connected telephone line 1 Lamp is identica...

Page 11: ...ON OFF LOCK key 10 Seize key 11 Microphone 12 Star key 13 Pound key 14 Tone ringing loudspeaker 15 Battery compartment cover Front View Rear Carry clip 11 14 15 Legend 1 Handset 2 Screen illuminated...

Page 12: ...Siemens Use only the AC adapter delivered with your device bearing the number C 39280 Z4 C65 Connected non cordless auxiliary devices telephone fax door interphone which have exposed metal parts might...

Page 13: ...can be ordered from the German Telekom AG Use only original Siemens connection cables Other cables may have a different configuration Power Supply Unit The power supply unit included with the device...

Page 14: ...the system code be changed after registration of the first mobile unit see page 30 The system code blocks your system from being accessed by any unauthorized indi viduals Registration of additional mo...

Page 15: ...Plug in power supply unit Gigaset 1000S mobile units Gigaset 1000C comfort mobile units Rechargeable batteries for mobile units Gigaset 1000L charging units Cordless telephone connectors Gigaset 1000...

Page 16: ...TAE connec tor 2 A 220 230 V electrical outlet must be available at the installation site for supply of power to the base station 3 In order to prevent mutual interference the installation site should...

Page 17: ...of base station 3 Place the cable inside the molded channel If you want to mount the device on the wall follow the steps below after carrying out those above if it is not to be wall mounted proceed t...

Page 18: ...X954 B101 1 7619 1054K02 FM 28 11 96 Putting Into Service Base Station Gigaset 1054 120 mm 180 mm 170 mm 5 mm 5 mm Specifications for Wall Mounting Connections for Gigaset 1054 Telephone connection c...

Page 19: ...ce Telephone Ring allocation Collective call System code 0000 Dialing mode DTMF Signal key Flash 250 msec Connection Options at the Base Station Status of the Base Station Upon Delivery GH I M NO P QR...

Page 20: ...the polarity orientation of the batteries is correct The plus and minus signs are labeled in the battery compartment see figure below From the top slide the battery compartment cover into the slots se...

Page 21: ...replaced in the charging unit after use New rechargeable batteries generally do not attain their full operating capacity i e length of time that the charge is held for calls and standby status until...

Page 22: ...using the wkey B Battery symbol blinks about 5 10 minutes before the batteries are empty If the mobile unit is in the charging unit and is charging then this symbol appears C ON symbol Can be activate...

Page 23: ...charging unit then press the g key LOCK This protects the dialpad of the mobile unit against unintentional use for example when it is being carried in your pocket Incoming calls can be accepted just a...

Page 24: ...to ON status Push the key until the display appears on the screen You will hear the key acknowledg ment tone or Simply place the mobile unit in the charging unit You will hear the key acknowledg ment...

Page 25: ...on the screen o Enter the system code At the time of delivery the system code is set as 0000 Complete entry of the system code Please wait until the connection to the base station is established All o...

Page 26: ...Your Telephone Push the connect key and then dial any digit for example 2 If you then still hear the same dial tone you will have to switch the dialing mode w Push the memory key followed by the key T...

Page 27: ...ays are shown in clear text Some displays are illustrated with graphics these are explained in the tables below Graphic Explanation You are being called Set the ringer volume 6 levels Tone ringer off...

Page 28: ...CK This protects the dialpad of the mobile unit from unintentional use for example when it is being carried in your pocket Incoming calls can be accepted just as in ON status The mobile unit switches...

Page 29: ...ppears You will hear the key acknowledgment tone or Simply place the mobile unit in the charging unit You will hear the key acknowledgment tone Switching from LOCK Status u to ON status Push the key b...

Page 30: ...ntil Settings appears on the 1st line of the main menu Push this key to select Settings The next menu level appears Push this key repeatedly until Register appears on the 1st line of the main menu Pus...

Page 31: ...ure The Comfort mobile unit displays the inter nal number with which it is registered Note You can register your Comfort mobile unit on up to four base stations Up to 8 mobile units can be registered...

Page 32: ...enu 2 In the service menu select System Settings and enter the system code See also page 115 After the correct system code is entered the following display appears Scroll using NEXT until Line data ap...

Page 33: ...m The charge sums per station and per multiple subscriber number can be queried or dele ted from a registered mobile unit The settings necessary for the auxiliary device connection can be programmed u...

Page 34: ...ll button a2 b2 Connection points for the voice wires leading to the door interphone TS1 TS2 Power on contacts for the interphone amplifier UB1 UB2 Connection points for the doorbell transformer Note...

Page 35: ...bridge SIEDLE TLM 511 RITTO 5760 Grothe TS 6216 In addition for the individual door stations a variety of changes must be made Door Station Changes in the Door Station SIEDLE TLM 511 Open bridges 1 3...

Page 36: ...e dash thereafter 8 dashes appear o Enter the new system code be sure to note this Every digit entered replaces one of the first 4 dashes o Enter the new system code again Every digit entered replaces...

Page 37: ...e unit PIN o Every digit entered replaces one dash thereafter 8 dashes appear Enter new mobile unit PIN be sure to note this number o Every digit entered replaces one of the first 4 dashes Enter the n...

Page 38: ...unit rings and the volume level is shown here 2 o Push any of the number keys 1 to 6 New setting here 6 w Push the enter key again Pitch The pitch of the mobile unit can be set at 1 of 6 levels Level...

Page 39: ...egistered subscribers o The current settings are shown Select internal station i e push one number key between 1 and 8 here 2 or 1 To activate push the 1 key status at initialization To deactivate pus...

Page 40: ...the keys shown here in the sequence shown and then enter the system code Every digit entered replaces one dash on the screen 0 Push 0 for both telephone lines z Push these keys in sequence or 1 To ac...

Page 41: ...ternal call here from mobile unit 2 Display blinks To Pick Up a Call either pick up the mobile unit from the charging unit or push the connect key g if the mobile unit is not in the charging unit Scre...

Page 42: ...n if the call is not signalled on your mobile unit for example in the case of call forwarding see page 52 For this call pickup must be activated see page 34 g Push connect key we Push these keys in se...

Page 43: ...he tone ring sounds you can pick up the external call The call waiting tone signals during a call that an external call is waiting b You are currently engaged in an external call and hear the call wai...

Page 44: ...e line is shown Automatic line seizure is not pro grammed You will hear the internal dial tone Seize line 1 or line 2 specifically Seize available external telephone line o Enter the number to be dial...

Page 45: ...the first digit Automatic Line Seizure Not Programmed o Enter the number to be called preceded by the line code here for example 1 0 1 or 2 followed by the telephone number g Press the connect key Th...

Page 46: ...ed number After pushing the number redial key you can manually dial additional suffix digits These suf fix dialed digits are not stored in the number redial memory When using number redial as en bloc...

Page 47: ...mobile unit to the charging unit or press the connect key If the mobile unit is already engaged in an internal call when an external call arrives a so called camp on call waiting tone see page 37 is s...

Page 48: ...he desired tele phone number appears here for example memory location 8 o Enter the digit shown here 8 in order to dial the phone number or Direct Dial of Speed Dial Numbers o Enter the desired memory...

Page 49: ...ey in order to retrieve the call Placing an External Call on Hold b You are engaged in an external call Push the internal key EXT blinks on the screen e Push the signal key in order to retrieve the ca...

Page 50: ...lay after the handset loud setting Level 2 Display only in idle status Level 3 If you do not want your call partner to hear you for example if you want to consult with someone in the room you can temp...

Page 51: ...et up an external connection w Push the enter key Push the star key The dialing mode is changed to tone dialing You must dial at least one digit before you can temporarily change the dialing mode Afte...

Page 52: ...3 3 3 Confirm Stored Telephone Number w Push the enter key the current number stored at memory location 8 is confirmed Store New Telephone Number o Enter the new telephone number for example 1 2 3 4...

Page 53: ...d Mobile Unit Speed Dialing w Push the enter key Push the 8 and 2 keys o Enter the mobile unit PIN see Enter Mobile Unit PIN Every digit entered replaces one dash on the screen w Push the enter key ag...

Page 54: ...nternal station answers here station 2 You carry on the call with the internal station Call Transfer g Push the connect key or replace the mobile unit in the charging unit Or Terminate Internal Consul...

Page 55: ...ial 0 as the line code Push the internal key and the pound key o Enter the external phone number to be called You will hear the ring tone and the sta tion answers You carry on a consulta tion call wit...

Page 56: ...y combination Terminate the Internal Consultation Call e Push the signal key Toggle Between Two External Stations b You are engaged in an external call If no automatic line seizure is activated dial t...

Page 57: ...order to set up a 3 way conference Terminate 3 Way Conference e Push the signal key to terminate the 3 way conference the internal station is disconnected 3 Way Conference from Within an External Con...

Page 58: ...of the internal station to which the call is to be forwarded Use the digit keys to enter the number of rings after which the call is to be for warded w Press the enter key Note An activated call forwa...

Page 59: ...phone is signalled 3 short tones g Push the connect key This connects you with the door interphone Push these keys in sequence to activate the door opener The door opener is activated for 3 seconds Yo...

Page 60: ...en Select either external telephone line 1 or 2 z Push these keys in sequence After digits are entered the current setting is shown 1 or 0 To activate push the 1 key initialization status To deactivat...

Page 61: ...ephone line Total call charges or call charge units for the entire system Note If the call charge call charge units display is activated deactivated the call length display is deactivated w o Push the...

Page 62: ...y shows the units If you want to see the charge you must enter the charge factor The charge factor is valid for all ter minal devices connected to Gigaset 1054 w o Press these keys in the sequence sho...

Page 63: ...l number for which you want to view the call charges w Push the enter key again or Delete Charge Total 0 Enter the internal number desired The total charge for this station is shown 0 Push this key in...

Page 64: ...the enter key to complete the procedure Delete Charge Total 0 Select telephone line 1 2 or push 0 to select both This selects the individual telephone line or the total system charge 0 Push this key t...

Page 65: ...cked w o Press these keys in the sequence shown and enter the system code Every digit entered replaces one dash on the screen The current setting is displayed 1 or To activate push the 1 key To deacti...

Page 66: ...sh the repeat dial key repeat edly Here slot 2 is empty 0 Enter the emergency number for slot number 2 Already existing emergency numbers can be changed by overwriting them z To scroll further press t...

Page 67: ...in the sequence shown and enter the system code Every digit entered replaces one dash on the screen The registered stations are then dis played Pus these keys to select a station the first here empty...

Page 68: ...status w Push the enter key Note When a barred telephone number is entered you will first hear the negative acknowledgment tone and then the busy tone For more information on barred numbers see page 6...

Page 69: ...transfer an external call the call is returned in this case w o Press the keys shown in the sequence shown enter the system code Every digit entered replaces a dash on the screen Select external telep...

Page 70: ...ed replaces one dash on the screen w Push the enter key again The mobile unit is locked Example Display without hotline number Display with hotline number Note After locking the mobile unit the enter...

Page 71: ...sh on the screen View After the last digit is entered the hotline number which has been programmed is displayed here for example 0123 or delete z Press the number redial key or enter z Press the numbe...

Page 72: ...key The memory is opened Display without hotline number or with hotline number Push the 8 key within 3 seconds 0 Push the 0 key o Enter the mobile unit PIN Every digit entered replaces one dash w Pus...

Page 73: ...r the system code Every digit entered replaces one dash on the screen Push this key for both telephone lines z Push these keys in this sequence Internal station 0 with the telephone setting is display...

Page 74: ...lective Call At initialization collective call is set for all stations An incoming external call is signalled on all registered mobile units and auxiliary devices and can be picked up by any mobile un...

Page 75: ...replaces one dash on the screen Select external telephone line 1 or 2 z Push these keys in this sequence Push key 1 for the collective call group 0 Push the digit keys of the internal num bers desired...

Page 76: ...eys in this sequence Push 2 for call diversion pickup 0 Push the digit keys of the desired inter nal numbers This selects the stations for the call group 1 Push the pound key for the 2nd call group 0...

Page 77: ...quence shown here and then enter the system code Every digit entered replaces one dash on the screen Select either external telephone line 1 or 2 z Push these keys in this sequence Push the key for th...

Page 78: ...re Every mobile unit can be unregistered using that unit or any other mobile unit w o Push the keys shown in the sequence shown here and then enter the system code Every digit entered replaces one das...

Page 79: ...hes the following a Resets to initialization b Deletes c Does not change status Settings Units Charges System code Configuration Emergency numbers Registration of mobile units Barred numbers Ring allo...

Page 80: ...he tone is activated every erroneous entry is signalled acoustically w Push enter and keys 3 4 The current setting is shown or 1 Push the 1 to activate initialization status Push the 0 to deactivate w...

Page 81: ...ange limit is signalled w Push enter and digit keys 3 3 The current setting is shown or 1 Push the 1 to activate initialization status Push the 0 to deactivate w Press enter key If the tone is activat...

Page 82: ...and speed dial key Enter mobile unit PIN o Every digit entered replaces one dash on the screen w Press enter key The settings are reset deleted Note The mobile unit PIN is not deleted or reset Resetti...

Page 83: ...her in idle status or during a call The main menu is at the left of the display This appears after the F key is pressed in idle status Three lines of the menu appear on the display The entire menu app...

Page 84: ...key gonce or if necessary twice Your Comfort mobile unit initiates an automatic cancel after 30 seconds if you do not push any key within this time Example In order to program call forwarding for inst...

Page 85: ...n select appropriate functions with NEXT and then confirm with OK Example 2 External Consultation in External Call You are engaged in an external call Push this to set up an external consultation call...

Page 86: ...Change sys code appears in the 1st line and then select with OK Enter new system code please be sure to note this number Every digit entered replaces one dash if necessary correct with Complete the e...

Page 87: ...nu appears Scroll through main menu with NEXT until Settings is on the 1st line and select Settings with OK Select Tone ringing in the same manner from the next menu Menu appears entire menu at left U...

Page 88: ...until Change PIN appears in the 1st line of the menu and then select with OK Enter new PIN please note this number Every digit entered replaces one dash if necessary correct with Complete entry Repeat...

Page 89: ...In the service menu select System settings and enter the system code see also page 115 After the correct system code is entered the following display appears Scroll with NEXT until Equipment data app...

Page 90: ...age 115 After the correct system code is entered the following display appears Scroll with NEXT until Equipment data appears on the 1st line and then select with OK Select Autom seizure with OK A list...

Page 91: ...anner Display contrast Set display contrast 6 levels possible Register See Registering the Comfort Mobile Unit at a Base Station on page 24 Language Set the language 5 different languages can be set G...

Page 92: ...the screen Incoming internal call here mobile unit 2 Display blinks Accept the Call either by picking up the mobile unit from the charging unit or by pushing the connect key if the mobile unit is not...

Page 93: ...g page 105 In order to do this call pickup must be activated see page 83 Push the connect key Push this key to pick up the external call or if Automatic line seizure see page 84 is activated Push the...

Page 94: ...a call is waiting while you are engaged in another call The call waiting feature can be activated and deactivated You are engaged in an external call and hear the call waiting tone Push this to pick...

Page 95: ...line is automatically seized No Automatic Line Seizure Activated Internal dial tone can be heard Push EXT1 EXT2 or 1 2 key to seize specific line or Push this key first available line is seized then P...

Page 96: ...seconds the screen again shows the following Telephone Line is Busy If the telephone line is already being used by another Gigaset station you will hear a busy tone and see the display or for example...

Page 97: ...mber can be dialed The subscriber answers You carry on the external call No Automatic Line Seizure is Activated Enter the telephone number First enter the line code 0 1 or 2 here the 0 now enter the t...

Page 98: ...m of 22 characters Every new telephone number entered overwrites the previous one After pushing DIAL you can manually add suffix numbers The suffix digits are not stored in the number redial memory Th...

Page 99: ...devices are displayed and rung The other party answers having already seen on the screen which station is calling You carry on the internal call To Terminate the Call Push the connect key or return th...

Page 100: ...or Entering Letters By entering the letters for example The letter B Push the 2 twice or The letter C Push the 2 three times quickly or The letter D Push the 3 once Push this key to dial the number of...

Page 101: ...ll from hold Push this key Place External Call on Hold You are engaged in an external call Push internal key This places the external station on hold Push this to retrieve the call which was on hold P...

Page 102: ...example to query an answering machine or a voice mailbox or to take advantage of services offered by the German Telekom AG such as City Call and Scall At the time of initialization tone dialing is pre...

Page 103: ...vent your call partner from hearing you temporarily for example if you want to consult with someone in the room then you can switch the mobile unit temporarily to mute during an external call You are...

Page 104: ...etter of the name entry In addition you can enter the following Star and Pound Entering Digits 1 2 to Enter digits not as the first entry in a name by pressing the appropriate dialpad key four or five...

Page 105: ...g the Telephone Book Push the F key in idle state The main menu appears In the main menu select Telephone Book with OK The menu to edit the telephone book appears entire menu is at left Using NEXT OK...

Page 106: ...with reverse then the name Complete process with SAVE Delete entries individually Find select entries to be deleted using NEXT Push this key The entry is deleted Deletes all telephone book entries at...

Page 107: ...return the mobile unit to the charging unit or Terminate Consultation and Continue External Call Push F key Menu appears Select Resume with OK The external station is reconnected to you You continue...

Page 108: ...ted to the external station Terminate External Consultation and Continue First External Call Push this key menu appears Push this to retrieve the consultation call The first external station is now re...

Page 109: ...ll External consultation partner 2 is waiting Press this to switch back to the consultation call with external 2 etc Terminate Toggle Press this key menu appears Press this to terminate toggle The ext...

Page 110: ...gaged in an external consultation call the internal call partner is placed on hold Push this key to connect yourself the exter nal and the internal stations to a 3 way con ference External Call Parall...

Page 111: ...uld be carried out Push this key to set the number of tone rings here 3 status at initialization Deactivate Internal Call Forwarding Push the connect key Fnct set act means that a system func tion is...

Page 112: ...ing allocation list Tone ring is signalled by the door interphone 3 short tones Push the connect key You are connected to the door interphone Push this to open the door The door opener is activated fo...

Page 113: ...he call The charges per mobile unit or auxiliary device and the total call charges for all devices can also be deleted using the mobile unit Display of Units Unit cost 0 Display of units remains visib...

Page 114: ...code with OK Select Duration Units with OK The menu for setting call length display or charge data appears Entire menu at left Using NEXT OK you can select and edit the following options Activate deac...

Page 115: ...articularly useful for example in hotels or inns which wish to view a guest s call charges For resetting options for the call charges see Delete totals View or delete individually the call charges per...

Page 116: ...he 1st line select this with OK The menu for setting the system lock appears entire menu at left You can using NEXT OK select and edit the following options Activate deactivate lock View change emerge...

Page 117: ...OK Scroll through the menu with NEXT and then with OK select an internal station e g Lock Int0 for which the telephone number lock should be set up The menu for setting the restricted numbers appears...

Page 118: ...so page 115 After the correct system code is entered the following display appears In operating status proceed as described above until Call barring appears After the menu point Call barring is select...

Page 119: ...tatus push the key and select Service from the main menu 2 In the Service menu select System settings and enter the system code see also page 115 After the correct system code is entered the following...

Page 120: ...tline number is programmed this is dialed in lock status when any key on the Gigaset 1054 is pushed Delete hotline number For reasons of security any new mobile unit PIN must be entered twice In idle...

Page 121: ...e with OK Scroll through the menu with NEXT until System settings is on the 1st line and select System settings with OK Enter the 4 digit system code if necessary correct it with Complete the entry of...

Page 122: ...t Non cordless Station Lines a b lines Choose one of the two auxiliary devices using NEXT and select with OK here a b line 0 The menu for the selection of the device type appears entire menu at left U...

Page 123: ...stem settings and enter the system code see also page 115 After the corrected system code has been entered the following menu appears Entire menu at left Scroll through the menu with NEXT until Initia...

Page 124: ...itialization collective call is set for all stations An incoming external call is signalled at all registered mobile units and auxiliary devices and can be picked up by any mobile unit or auxiliary de...

Page 125: ...ne for which the ring allocation is to be set for example External 1 and select with OK Scroll with NEXT in order to select Call data and confirm with OK Select Ring allocation with OK The menu to edi...

Page 126: ...2 In the Service menu select System settings and enter the system code see page 115 After the correct system code is entered the following menu appears Scroll through the menu with NEXT After selecti...

Page 127: ...cel registr with OK Enter the 4 character system code if necessary correct with Complete entry of system code with OK The list of the registered mobile units and their internal numbers appears To deac...

Page 128: ...ctivate and activate The following settings are made in the same manner as the settings which are described above Rechargeable batteries are almost empty The radio range limit is reached Successful co...

Page 129: ...calls with any connected tele phone Pick up the handset c You will hear the internal dial tone 0 Push this key to seize a trunk line You will hear the trunk dial tone o Dial the external telephone num...

Page 130: ...tching the dialing mode from pulse to tone dialing you can use the dialpad of your tele phone to enter information during a call for instance to query an answering machine or voice mailbox or to use s...

Page 131: ...rnal call Call waiting signals an incoming external call during an ongoing call If you pick up the external call while engaged in an internal call then the internal call is terminated The call waiting...

Page 132: ...sequence to deactivate internal call for warding Hang up the handset a Internal call forwarding is deactivated You can place an existing call on hold for instance in order to consult with someone in...

Page 133: ...6 Push this key You will hear the internal ring tone a station answers You are connected to the internal station Transfer the Call a Hang up the handset if the transfer is not successful a recall occ...

Page 134: ...ngaged in a consultation call Switch back to the original call Push this key to switch back to the consultation call Push this key to switch to the original call etc a Hang up the handset to disconnec...

Page 135: ...all is signalled from the door interphone 3 short tones c Pick up the handset You are now connected with the door interphone Push these keys to activate the door opener The door opener is activated fo...

Page 136: ...t necessary in the case of the Comfort mobile unit see Activate Deactivate Display of the Base Station Number page 133 In addition when using a multicell system behind a PBX with different connections...

Page 137: ...key down until the display appears o Enter the system code At the time of initialization the system code is set at 0000 Complete the entry of the system code Please wait until the connection to the ba...

Page 138: ...ting is recommended particularly in cases where radio cells overlap w Push these keys to initiate the procedure Push the number of the base station you wish to select The number entered will blink her...

Page 139: ...w Press these keys in sequence The previous setting is displayed 0or Push the 1 to activate push the 0 to deactivate Status at initialization w Push the enter key again Display of the base station her...

Page 140: ...he mobile unit searches for the base stations where the mobile unit can be registered Enter the 4 character system code set at 0000 at initialization if necessary correct with Confirm that your want t...

Page 141: ...tered Note You can register your Comfort mobile unit on up to 4 base stations Up to 8 mobile units can be registered on one base station If 8 mobile units are already reg istered the text No free int...

Page 142: ...The Comfort mobile unit is in idle state Push the F key main menu appears Scroll through the main menu with NEXT and select Station selec with OK The menu for setting the station appears entire menu a...

Page 143: ...omatic dialing timeout of 3 seconds Please also follow the operating instructions for your telephone system The 0 9 keys as well as the star pound and signal keys can be used for the AKZ For setting t...

Page 144: ...he 0 o Enter the system code Every digit entered replaces one dash on the display Select external telephone line 1 or 2 z Push the number redial key z Push the numbr redial key again o Enter the HAKZ...

Page 145: ...setting as follows w Push the enter key and the key 1 Push the 1 o Enter the system code Every digit entered replaces one dash on the display 1 Select external telephone line 1 or 1 z Push the number...

Page 146: ...s in the sequence shown and enter the system code Every digit entered replaces one dash on the display 0 Push 0 for both telephone lines z Push these keys in the sequence shown to return to the status...

Page 147: ...u can change it as follows w Push the enter key and the key 1 Push the 1 o Enter the system code Every digit entered replaces one dash on the screen 0 Select external line 1 or 2 or push 0 for both z...

Page 148: ...ar pound and signal keys can be used for the trunk code AKZ To set the different timeout lengths see Change Length of Timeout after AKZ HAKZ on page 139 1 In idle state push the key and select Service...

Page 149: ...e Unit You can set up a consultation call to another station within the telephone system during a call For more information on this see also the operating instructions for your telephone system b You...

Page 150: ...e telephone number of the extension you wish to call e g 1 2 3 4 5 You are engaged in a consultation call Terminate Consultation Push this key menu appears Push this key to retrieve the consulta tion...

Page 151: ...ne Note For information about setting activation or deactivation of tones see page 74 or page 122 Signal Tones ring 5 sec tone 5 sec tone 8 sec pause 4 2 sec pause 8 sec tone 2 sec pause 3 x 2 sec ton...

Page 152: ...mperature 10 C to 60 C Trunk line Connection technol Miniwestern Dialing mode DTMF DPS Internal a b connections Connection technol Miniwestern Dialing mode DTMF DPS automatic Range ca 200 m Data trans...

Page 153: ...of connecting cable improperly plugged Plug of power pack cable improperly plugged Check the plugs at the base station and telephone jack try unplugging and replugging them Check the plugs at the base...

Page 154: ...onsumable materials nor does it include defects which have no significant effect on the value of the device or its ability to function The product which you have purchased from Siemens conforms to the...

Page 155: ...atic changeover switch Auxiliary terminals can however be directly connected or connected via an automatic changeover switch to the Miniwestern connection jack on the base station The automatic change...

Page 156: ...nference simultane ously Consultation You can interrupt a call while you are telephoning the connection remains in order to make a call to another station for instance to carry on a consultation call...

Page 157: ...ification Number in mobile unit This is used to lock the mobile unit or protect its settings Station All stations connected to Gigaset 1054isdn via mobile units or non cordless devices System Code Ide...

Page 158: ...call 56 109 total per station 57 109 total per telephone line 58 109 unit 56 108 109 Charge length of call 54 107 Charging the batteries 14 Class of Service 63 113 150 Cleaning 146 Collective call in...

Page 159: ...using the 77 Mobile unit cancel registration 72 121 PIN 31 82 151 putting into service 14 registration 19 24 134 settings 74 122 Mounting the base station 11 Multiple base stations 130 Mute 44 97 N Ne...

Page 160: ...81 W Warranty 148 Register mobile unit 19 24 131 134 on multiple base stations 131 134 Registration key 19 24 131 134 Reset to initialization status base station 73 117 mobile unit 76 85 Ring allocat...

Page 161: ...in lock status If mobile unit is OFF Push and hold Mobile unit on Registering Mobile Unit page 19 and u o o Push registra tion key on the base station Hold down the 1 key while pushing ON key Enter s...

Page 162: ...ernal Telephone Number page 38 g o Press connect key Enter telephone number Dialing an Internal Telephone Number page 41 o Push internal key Enter telephone number Repeat Dial last external telephone...

Page 163: ...he external telephone num ber Carry on the consultation call Push the signal key You are reconnected to the first call again Forwarding an External Call to an Internal Station page 48 o g Push the int...

Page 164: ...Push and hold Mobile unit off Push briefly Mobile unit in lock status If mobile unit is OFF Push and hold Mobile unit on Registering Mobile Unit page 24 Push registra tion key on the base station Push...

Page 165: ...t in Operation Accepting a Call page 86 g or c Push the connect key or pick up the mobile unit from the charging unit Dialing an External Telephone Number page 89 g o Push the connect key Enter the ex...

Page 166: ...nnected to the external call External Consultation during an External Call page 102 o e Push dialog key Dial external telephone num ber Carry on the consultation call Push the signal key You are recon...

Page 167: ...hone Number page 123 c 9 o Pick up the handset Prepare to dial the inter nal telephone number Enter the internal telephone number Internal Line Hunting page 123 c 6 Pick up the handset All internal st...

Page 168: ...waiting call Toggle page 128 Telephone with Pulse Dialing 5 5 To toggle between two ongoing calls push this key if necessary it can be pushed repeatedly Toggle page 128 Telephone with Tone Dialing 5...

Page 169: ...ring Plant for Telephone Devices Kaiser Wilhelm Stra e 56 46395 Bocholt Siemens Aktiengesellschaft Siemens AG 1996 Terms of delivery and the right to make technical changes reserved Document No A30852...

Reviews: