background image

44

Te

mplat

e

 G

o

, V

e

rs

ion 1

, 01.

07

.2

014

 / M

odu

leV

e

rs

ion 1

.0

Setting the handset

Gigaset CL660HX / LHSG IE-UK en / A31008-M2862-L101-1-7619 / settings_HS_HX.fm / 10/26/16

Availability and operation of the functions 

  may differ on your telephone.


Assigning handsets to a connection (line)

(only on a CAT-iq router)

Multiple handsets can be assigned to a connection. Incoming calls to the number designated to 
a connection will be forwarded to all handsets assigned to the connection. 

¤

      . . . use 

 to select 


Settings


OK


 Telephony


OK


Connections


OK

      . . . use 

 to select connection     

OK


Assigned Handsets

  . . . 

all registered handsets are displayed      . . . use 

 to select handset     

Change

 (

 = handset is assigned)

Permit/prevent multiple calls

(only on a CAT-iq router)

If the function is activated, multiple calls can be made in parallel.

¤

      . . . use 

 to select 


Settings


OK


 Telephony


OK


Connections


OK

      . . . use 

 to select connection     

OK


Multiple Calls    


Change


(


=  on)

Permit/prevent internal listening in

(only on a CAT-iq router)

If the function is enabled, an internal party can listen in to an external call and take part in the 
conversation (conference). 

¤

      . . . use 

 to select 


Settings


OK


 Telephony


OK


Connections


OK

      . . . use 

 to select connection     

OK


Listening In


OK


Change


(


=  on)

Handset update

The handset supports firmware updating via the DECT radio link to the base/router 
(SUOTA = Software Update Over The Air). 

If new firmware is available for the handset a message to this effect will be displayed.

¤

Start the firmware update with 

Yes

.

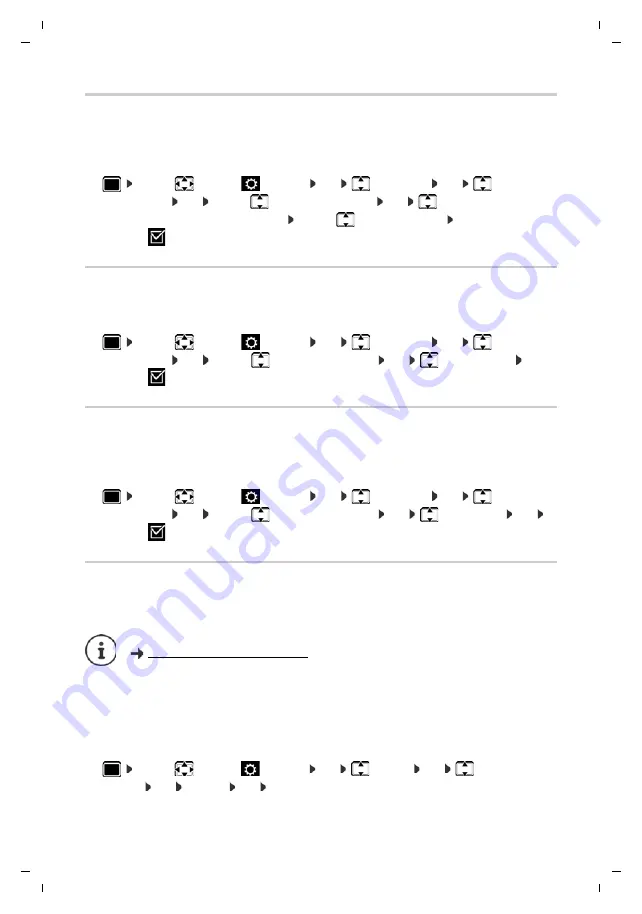
Start the firmware update manually:

¤


  . . . use 


to select


Settings 


OK    


 System    


OK    


 Handset 

Update    


OK    


Update    


OK    


OK  

 . . . if there is new firmware, the update will start

The base/router to which the handset is registered must also support this function 
(

  www.gigaset.com/compatibility

If your base/router does not support this function, you can also update the firmware 
via a USB cable and 

Gigaset Quick Sync

.

Summary of Contents for CL660HX

Page 1: ..._front_c_LHSG_HX fm 10 26 16 CL660HX Detailed information on the telephone system User guide of your Gigaset telephone www gigaset com manuals Documentation relating to your base router User guide online on your smartphone or tablet Download the Gigaset Help app ...

Page 2: ...elp app from or On a DECT GAP telephone or router from another manufacturer The handset also functions with DECT GAP telephones from other manufacturers of course as well as DECT routers Additional information can be found at www gigaset com compatibility On DECT routers with CAT iq 2 0 Your GigasetHX handsetiscertifiedin accordance with the DECT CAT iq 2 0 standard As a result operation with a DE...

Page 3: ...r case and digits when inputting text Press briefly Insert a dialling pause Press and hold 6 Recall key Consultation call flash Press and hold 7 USB connection socket For data exchange between the handset and PC 8 Microphone 9 Star key Open special characters table when inputting text Press briefly Switch from pulse dialling to tone dialling for an existing connection Press briefly 10 Key 1 Select...

Page 4: ...g the PC interface 35 Setting the handset 37 Appendix 46 Service Customer Care United Kingdom and Ireland 46 Manufacturer s advice 48 Technical data 50 Display icons 52 Index 54 Additional information Not all functions described in the user guide are available in all countries or from all network providers Regarding the telephone system if the handset is connected to a Gigaset base User guide for ...

Page 5: ...e for being able to carry out the following action Additional helpful information or Talk key or Handsfree key End call key to Number letter keys Control key rim centre Message key Recall key Star key Hash key OK Back Select Change Save Display keys Step Follow this procedure When in idle status press the centre of the control key The main menu opens OK Navigate to the icon using the control key S...

Page 6: ...icant health risks and personal injury Rechargeable batteries which are noticeably damaged must be replaced Remove faulty devices from use or have them repaired by our Service team as these could interfere with other wireless services Do notusethedeviceif the displayiscracked orbroken Brokenglass or plasticcancause injury to hands and face Send the device to our Service department to be repaired D...

Page 7: ...he mains unit into your power socket To remove the plug from the charging cradle again Disconnect the power adapter from the mains power supply Press the release button Pull out the plug The charging cradle is designed for use in enclosed dry rooms within a temperature range of 5 C to 45 C The device s feet do not usually leave any marks on surfaces However due to the mul titude of different varni...

Page 8: ...appears from the display Only use rechargeable batteries as this could otherwise result in significant health risks and personal injury For example the outer casing of the batteries could be destroyed or the batteries could explode The device could also malfunction or be damaged as a result of using batteries that are not of the recommended type Insert the batteries for correct direction see diagr...

Page 9: ... required enter system PIN default setting on Gigaset bases 0000 OK Once registration is complete the handset returns to idle status The internal number of the handset appears in the display e g INT 1 If not repeat the procedure A handset can be registered to up to four base stations Deutsch English Francais Registration must be initiated on the base station and on the handset Both must be carried...

Page 10: ...rsor position flashes change cursor position with switch between cursor positions with Enter date using enter the day month and year in 8 digit format e g for 15 08 2016 Enter time using enter hours and minutes in 4 digit format e g for 07 15 Save settings Press the display key Save Saved is shown in the display and a confirmation tone sounds Return to idle status Press and hold the End call key T...

Page 11: ...ing the headset Remove cover from the left side of the handset Connect headset with 2 5 mm headphone jack Replace cover after use The headset volume corresponds to the setting for the receiver volume Connecting the USB data cable For data exchange between the handset and PC Connect the USB data cable with micro USB plug into the USB socket at the bottom of the handset Connect the handset directly ...

Page 12: ...ss the centre of the control key In idle status In submenus selection and entry fields Switch on When the handset is switched off press and hold the End call key Switch off When the handset is in idle status press and hold the End call key If a call is indicated on the handset the keypad automatically unlocks and you can accept the call It then locks again when the call is finished It is not possi...

Page 13: ... iq base Press and hold Mute the microphone Initiate an internal consultation call Adjust the loudspeaker volume for receiver and handsfree mode The menu guidance depends on the base Depending on the number and type of available functions these may be provided in different menus e g at top level or in a submenu Examples Audio Settings may be in the top level menu or in the Settings submenu while C...

Page 14: ...ghted in colour and the name of the associated function appears in the display header Submenus The functions in the submenus are displayed as lists To access a function use the control key to select a function OK Return to the previous menu level Press the display key Back or Press the End call key briefly Returning to idle status Press and hold the End call key If a key is not pressed after 2 min...

Page 15: ...tters and numbers are assigned to each key between and and the key As soon as a key is pressed the possible characters are displayed at the bottom of the display The selected character is highlighted Selecting letters numbers Press the key briefly several times in succession Switch between lower case upper case and number entry mode Press the hash key When editing a directory entry the first lette...

Page 16: ...and hold the Talk key use to select the line Dial use to enter the number the number is dialled approximately 3 seconds after the last digit is entered Dialling a number from the local directory use to open the directory use to select an entry press the Talk key If multiple numbers are entered use to select the number press the Talk key the number is dialled Dialling from a public central director...

Page 17: ...OK use to select a list OK use to select an entry press the Talk key Incoming calls An incoming call is indicated by ringing by a display on the screen and by the flashing Talk key Accepting a call Press the Talk key If Auto Answer is activated Remove the handset from the charging cradle Forward to the answer machine Accept a call on the headset Switch off ringtone Silence the call can be accepted...

Page 18: ...n listening to the answer machine Press the handsfree key Call volume Applies to the current mode handsfree receiver or headset Muting the microphone When the microphone is switched off callers will no longer hear you Switch the microphone on off during a call Press Placing the handset in the charging cradle during a call Press and hold down the handsfree key Place the handset in the charging crad...

Page 19: ...l Change use to select On or Off Save Playing back messages Press the Message key use to select an answer machine if there are messages for several answer machines OK Recording a personal announcement advisory message use to select Answer Machine OK Announcements OK use to select Record Announcem or Rec Advisory Msg OK use to select an answer machine if there are several OK OK record an announceme...

Page 20: ...iversary use to activate deactivate Anniversary use to enter date and time use to select type of alert Visual only or a ringtone Caller Melody VIP use to select the ringtone that will indicate a call from the participant if a Caller Melody VIP has been assigned the entry will appear in the directory with the icon Save entry Save Information about online directories e g on a Gigaset GO Box 100 or c...

Page 21: ...y use to select entry View use to select the field to be changed Edit or use to select an entry Options Edit entry OK Deleting entries Delete the selected entry use to select an entry Options Delete entry OK Delete all entries Options Delete all OK Yes Setting the order of the directory entries Directory entries can be sorted by first name or surname Options Sort by Surname Sort by First Name If n...

Page 22: ...y OK to Internal OK use to select the receiving handset OK the entry is copied Copy the next entry after successful transfer Press Yes or No The sending and receiving handset must both be registered to the same base station The other handset and the base station are able to send and receive directory entries An external call interrupts the transfer Caller pictures and sounds are not transferred On...

Page 23: ...phone 23 Copying the entire directory Options Copy All OK to Internal OK use to select the receiving handset OK the entries are copied one after the other Synchronising the phonebook with the PC address book Gigaset QuickSync Free download and further information at www gigaset com quicksync The Gigaset QuickSync programme has been installed on the computer The handset is connected via a USB data ...

Page 24: ...swer machine network mailbox in the missed calls list in the missed alarms list Display messages Press the Message key Messages lists that contain messages are displayed Mailbox is always displayed An entry is marked in bold new messages are available The number of new messages is shown in brackets An entry is not marked in bold no new messages The number of old messages is shown in brackets use t...

Page 25: ...y which the call was received made Date and time of call if set Opening the call list Calling back a caller from the call list use to select Call Lists OK use to select list OK use to select entry Press the Talk key Additional options use to select Call Lists OK use to select list OK possible options The base router to which the handset is registered provides information on call numbers Detailed i...

Page 26: ...the handset is registered The following description applies to a Gigaset GO Box 100 The procedure required for your telephone may differ from the procedures described here Additional information Regarding the telephone system if the handset is connected to a Gigaset base User guide for your Gigaset telephone Regarding the telephone system if the handset is connected to another base router Document...

Page 27: ...n idle status and the selected ringtone plays for 60 seconds as a notification Acknowledge and stop the reminder Press the display key OFF Date and time have been set Switch on off Activation use to select On or Off Enter date Date the selected day has been pre set use to enter new date Enter time Time use to enter hours and minutes of the appointment Set name Text use to enter a description of th...

Page 28: ...Opening the list Press the Message key Missed Alarms OK use to browse through the list of any appointments or Each entry is displayed with the number or name date and time The most recent entry appears at the top of the list Delete an appointment anniversary Delete Displaying changing deleting stored appointments use to select Organizer OK Calendar OK use to select day OK the appointment list is d...

Page 29: ...utes After the second repetition the alarm call is deactivated for 24 hours Switching off repeating the alarm after an interval snooze mode Deactivate the alarm OFF Repeat the alarm snooze mode Press Snooze or any key the alarm is switched off and repeated after 5 minutes Date and time have been set Switch on off Activation use to select On or Off Setting the wake up time Time use to enter hours a...

Page 30: ... activated The baby monitor mode is not deactivated by switching the handset off and on again Activating and setting the baby monitor use to select Additional Features OK Baby Monitor OK then The destination number is displayed in idle display when the baby monitor is activated The handset should be positioned 1 to 2 metres away from the baby The microphone must point towards the baby Activating t...

Page 31: ...arm call Press keys The baby monitor is deactivated and the handset is in idle status The baby monitor settings on the handset e g no ringtone will remain activated until you press the display key OFF Reactivate baby monitor with the same number Activation to switch back on p 30 Save Deactivate the baby monitor In idle status press the display key OFF Cancel the alarm Press the End call key during...

Page 32: ...on the call is only signalled on the display For all handsets only on some Gigaset bases use to select Settings OK Telephony OK Anonymous Calls Edit on use to select Protection Mode Save settings Save Date and time have been set Switch on off use to select On or Off Enter time use to switch between Suspend ring from and Suspend ring until use to enter start and end in 4 digit format Save Save The ...

Page 33: ...tions Copy to Blacklist OK Setting the protection mode use to select Settings OK Telephony OK Black List Edit Protection Mode OK use to select desired protection Save settings Save Switch off ringtone when in charging cradle The handset will not ring when placed in the charging cradle The call is only indicated on the display use to select Settings OK Audio Settings OK Ringtones Handset OK SilentC...

Page 34: ...memory Display the available memory for screensavers and CLIP pictures use to select Additional Features OK Resource Directory OK Capacity OK the percentage of available memory is displayed Type Format Sound Ringtones Monophonic Polyphonic Imported sounds Internal Internal Internal WMA MP3 WAV Picture CLIP picture Screensaver BMP JPG GIF 240 x 172 pixels 240 x 320 pixels View CLIP picture Caller P...

Page 35: ...between the handset and PC During this time it is not possible to enter any data using the keypad and incoming calls are ignored Carrying out a firmware update Connect the telephone and the PC using a USB data cable Launch Gigaset QuickSync Establish connection to the handset Start firmware update in Gigaset QuickSync Information about this can be found in Gigaset QuickSync help feature The update...

Page 36: ... from the telephone Remove the battery Replace the battery Carry out the firmware update again as described above If the update procedure fails more than once or it is no longer possible to connect to the PC carry out the Emergency Update End the Gigaset QuickSync program on the PC Remove the USB data cable from the telephone Remove the bat tery Press and hold keys and at the same time with the fo...

Page 37: ...ad OK Screensaver Edit on then The screensaver is activated approx 10 seconds after the display has changed to idle status End screensaver Press the End call key briefly the display changes to idle status Notes on displaying Info Services only on a Gigaset GO Box 100 or other Gigaset IP base Switch on off Activation use to select On or Off Select screensaver Selection use to select a screensaver D...

Page 38: ...ility Only one entry is shown in the display and names are abbreviated if necessary use to select Settings OK Display Keypad OK Large Font Change on Colour scheme You can choose from a range of colour combinations for the display use to select Settings OK Display Keypad OK Colour Schemes OK use to select the desired colour scheme Select selected Display backlight The display backlight always illum...

Page 39: ... the handset accepts an incoming call as soon as it is removed from the charging cradle use to select Settings OK Telephony OK Auto Answer Change on Regardless of the Auto Answer setting the connection ends as soon as you place the handset back in the charging cradle Exception Press and hold the handsfree key for a further 2 seconds while placing the handset in the charging cradle Changing the ear...

Page 40: ... volume use to select Settings OK Audio Settings OK Ringtones Handset OK Volume OK use to select For internal calls and alarms or External Calls use to set volume in 5 levels or in crescendo mode increasing volume Save Ringtone melody Set a variety of ringtones for internal and external calls for every available send receive connection of the telephone Landline IP1 or set the same ringtone for All...

Page 41: ...andset notifies acoustically about different activities and statuses These advisory tones can be switched on off independently of each other use to select Settings OK Audio Settings OK Advisory Tones OK then Tone when keys are pressed Key Tones use to select On or Off Confirmation error tone after making entries advisory tone when a new message has been received Confirmation use to select On or Of...

Page 42: ...he digit key or Briefly press the digit key Press the display key QuickDial The directory opens use to select an entry OK use to select a number if necessary OK the entry is saved to the digit key Dialling a number Press and hold the digit key the number is dialled immediately or Briefly press the digit key the number name possibly in abbreviated form is shown on the left display key press the dis...

Page 43: ...nnection OK Connection Name OK use to change the name of the connection Save Baby Monitor Set and activate deactivate baby monitor Alarm Clock Set and activate deactivate the alarm clock Calendar Open calendar One Touch Call Set up one touch call Redial Show redial list eMail Open the e mail submenu for receiving and reading e mail notifications More Functions OK use to select other function Send ...

Page 44: ...y OK Connections OK use to select connection OK Multiple Calls Change on Permit prevent internal listening in only on a CAT iq router If the function is enabled an internal party can listen in to an external call and take part in the conversation conference use to select Settings OK Telephony OK Connections OK use to select connection OK Listening In OK Change on Handset update The handset support...

Page 45: ...ng the handset to the default settings Reset any individual settings and changes that you have made use to select Settings OK System OK Handset Reset OK Yes the handset s settings are reset The following settings are not affected by a reset Registration of the handset to the base station Date and time Directory entries and call lists The update process may take up to 30 minutes During this time on...

Page 46: ...for which country countries the equipment has been developed If the equipment is used in a manner inconsistent with this advice or with the instructions of the manual and on the product itself this may have implications on the conditions for warranty or guarantee claims repair or exchange of product In order to make use of the warranty the product purchaser is asked to submit a receipt which prove...

Page 47: ...wnership of devices or components replaced by and returned to Gigaset Communications shall vest in Gigaset Communications This Guarantee shall apply to new devices purchased in the European Union For Products sold in the United Kingdom and in the Republic of Ireland the Guarantee is issued by Gigaset Communications UK Limited 2 White Friars Chester CH1 1NZ Any other claims resulting out of or in c...

Page 48: ...rvice GmbH Disposal Batteries should not be disposed of in general household waste Observe the local waste disposal regulations details of which can be obtained from your local authority All electrical and electronic products should be disposed of separately from the municipal waste stream via designated collection facilities appointed by the government or the local authorities This crossed out wh...

Page 49: ...ct the power supply 2 Remove the batteries and leave the battery compartment open 3 Allow the liquid to drain from the device 4 Pat all parts dry 5 Place the device in a dry warm place for at least 72 hours not in a microwave oven etc with the battery compartment open and the keypad facing down if applicable 6 Do not switch on the device again until it is completely dry When it has fully dried out...

Page 50: ... cradle hours 9 5 No Radiation deactivated activated without display backlight in idle status When charging approx 4 5 W To maintain the charge status approx 0 30 W DECT standard Supported CAT iq standard Certified in accordance with standard CAT iq 2 0 with HD Voice www dect org cat iq certification aspx GAP standard Supported No of channels 60 duplex channels Radio frequency range 1880 1900 MHz ...

Page 51: ... 07 2014 ModuleVersion 1 0 Technical data Character charts Standard characters Press the relevant key the number of times indicated 1 Space 2 Line break 1x 2x 3x 4x 5x 6x 7x 8x 9x 10x 1 a b c 2 ä á à â ã ç d e f 3 ë é è ê g h i 4 ï í ì î j k l 5 m n o 6 ö ñ ó ò ô õ p q r s 7 ß t u v 8 ü ú ù û w x y z 9 ÿ ý æ ø å 0 1 2 ...

Page 52: ...ase station No Radiation activated white if Maximum Range on green if Maximum Range off Answer machine activated indicator flashes Answer machine is recording a message or is being operated by another internal participant Ringtone switched off Beep ringtone activated Keypad lock activated Battery charge status White between 11 and 100 charged Red less than 11 charged Flashes red battery almost emp...

Page 53: ...xternal call Internal call Establishing a call outgoing call Connection established No connection established connection terminated Reminder for appointment Reminder for anniversary Alarm call Countdown timer Answer machine is recording Icon Meaning Icon Meaning Alarm clock is activated display with alarm time Action complete green Action failed red Information Security prompt Please wait Icon Mea...

Page 54: ...el the alarm baby monitor 31 Care 48 Care of the device 48 Changing display language 37 earpiece volume 39 handsfree volume 39 Character charts 51 Charge status of the batteries 52 Charging cradle handset connecting 7 Charging time of handset 50 CLIP picture view in Resource Directory 34 Colour scheme 38 Connecting the USB data cable 11 Connection assigning handset 44 changing name 43 Contact with...

Page 55: ...switch on off 12 update 44 use as a baby monitor 30 Handsfree key 18 Handsfree mode 18 Handsfree profile 40 Hash key 3 Headset connection 3 8 Headset socket 11 Hearing aids 6 I Icons alarm clock 29 displaying new messages 24 indications 53 on display keys 52 status bar 52 Idle status returning to 14 Illumination keypad 39 Indications icons 53 Internal listening in 44 K Key 1 fast access 3 Key assi...

Page 56: ...al external calls 40 switch off when in charging cradle 33 time control 32 volume 40 S Safety precautions 6 Screensaver 37 Searching in directory 21 Sending entire directory to handset 22 Service 46 Setting the date 10 Setting the time 10 Setting up handset 8 Show new messages 24 Signal strength 52 Signal tone see Advisory tones Snooze mode alarm 29 Sound delete 34 formats 34 playback 34 rename 34...

Page 57: ...r 2a D 46395 Bocholt Gigaset Communications GmbH 2016 Subject to availability All rights reserved Rights of modification reserved www gigaset com Apple the Apple logo and iPhone are trademarks of Apple Inc registered in the U S and other countries App Store is a service mark of Apple Inc Google Android Google Play and other brands are trademarks of Google Inc ...

Reviews: