background image

  7


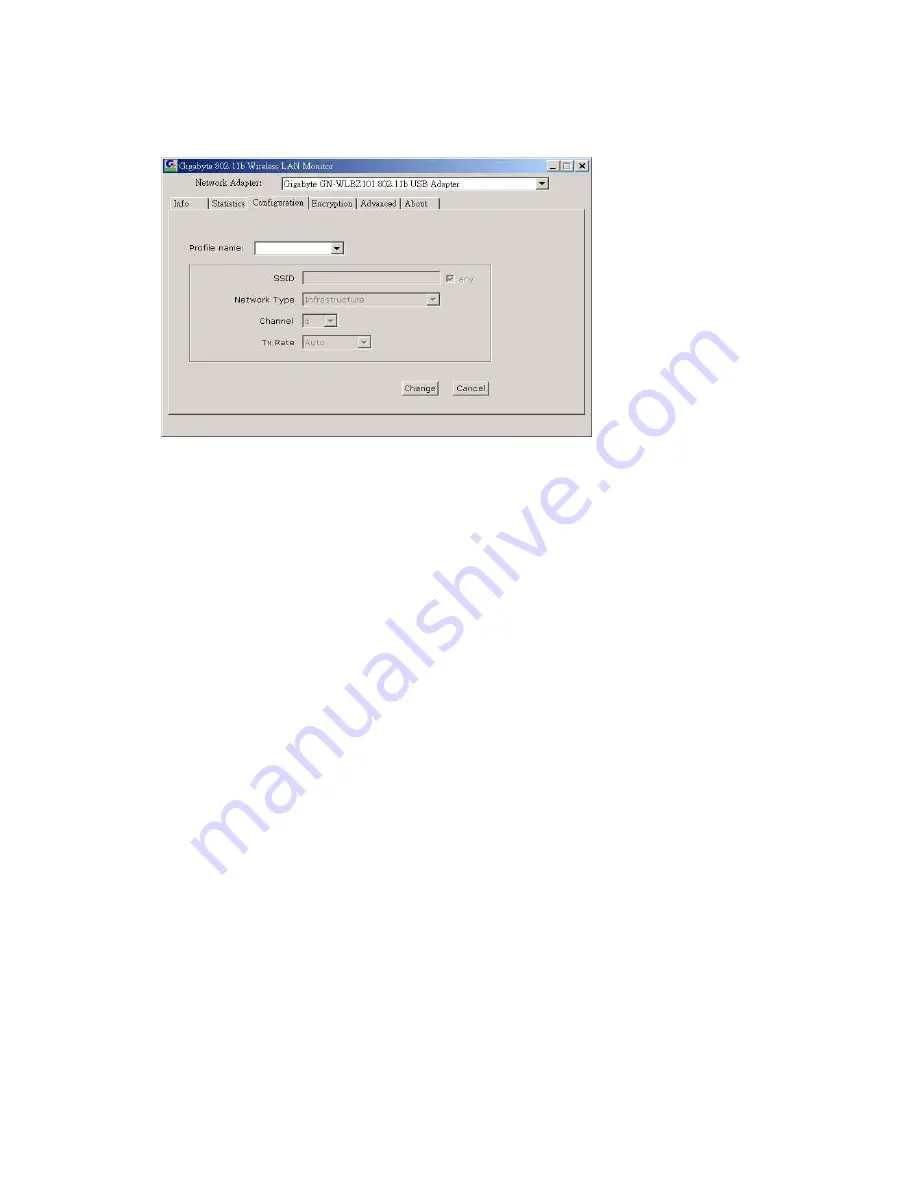
The Configuration Tab contains several fields where operating parameters of the driver 
can be viewed or changed. Changes to any of the parameters in this panel can be applied 
to the driver without resetting the wireless LAN card(

see 

Figure 3-4

).   


Figure 3-4.   

Configuration 


Profile:

 You can save various wireless settings for different environments. 

 
Change

: Press this button to set the configuration in each field of the panel. The “Apply” 

button should be pressed before the default values are saved to the driver and 
registry. 

 
Cancel:

 Press this button to restore the default value in each field of the panel. 


SSID:

 It is the unique name shared among all access points (

Infrastructure

) or 

Ad Hoc


(wireless LAN card) in the wireless network. The SSID must be identical for all points 
in the network for sharing information and communication. It is case sensitive and 
must not exceed 32 characters


Network Type:

 This field allows you to select the network type from a list of supported 

Network “Modes”. The modes displayed have two values:“Ad Hoc”(Peer-to-Peer)and 
“Infrastructure”(Access Point). 


Ad Hoc:

 This is the 802.11 peer-to-peer mode of operation. All communications are done 

from Client to Client without using the base station. Peer-to-Peer networking uses the 
same SSID for establishing the wireless connection. 


Infrastructure:

 This mode of operation requires the presence of an 802.11 Base Station. 

All communications are done via the Base Station, which relay packets to other 
wireless Clients in the BSS as well as the nodes on a connected network such as 
Ethernet. 


Channel:

 This specifies the channel used in wireless communication and should be set to 

the same channel as the other points in the wireless network. This setting can only be 
adjusted in Ad Hod mode. 


TX Rate:

 The transmission rate for transmitting data packets at the user end. You may set 

the transmission rate to 1Mb, 2 Mb, 5.5 Mb, 11 Mb, or Fully Automatic. 


Summary of Contents for GN-WLBZ101

Page 1: ...GN WLBZ101 IEEE 802 11b USB STICK Wireless LAN Card User s Manual http www gigabyte com tw Rev 1 0 First Edition...

Page 2: ...iving antenna Increase the separation between the equipment and receiver Connect the equipment into an outlet on a circuit different from that to which the receiver is connected Consult the dealer or...

Page 3: ...2 CHAPTER 2 INSTALLING THE WIRELESS LAN CARD 3 2 1 INSTALLING THE DRIVER UTILITY FOR PC 3 CHAPTER 3 USING THE UTILITY ON PC 5 3 1 INFO 5 3 2 STATISTICS 6 3 3 CONFIGURATION 6 3 4 ENCRYPTION 8 3 5 ADVAN...

Page 4: ...rate up to the maximum speed of 11Mbps Dynamically scales the data rate to 11 5 5 2 and 1Mbps Host Interface USB Built in diversity antenna Supports 64 bit 128 bit WEP encryption Driver supports Windo...

Page 5: ...ted received LED Light Condition of the Receiver Power Link Intensity of received signals This LED specifies the four conditions of POOR FAIR GOOD and EXCELLENT LED Light Condition of the Receiver POO...

Page 6: ...e sure that you don t plug your card yet Step 2 Execute the setup exe on our CD and then the following window will pop up Click Install Wireless LAN Driver Step 3 Click Yes Step 4 Please plug in your...

Page 7: ...4...

Page 8: ...on Figure 3 1 The icon of the Configuration Monitor Utility WLAN Mode AP Mode 3 1 Info The Info tab shows you the current Link States of the Wireless LAN Card and the Reachable Assess Points and the W...

Page 9: ...ntensity of the currently connected base station Signal Quality It is which represents the quality of communication between the Wireless LAN Card and Access Point Refresh After this button is clicked...

Page 10: ...d must not exceed 32 characters Network Type This field allows you to select the network type from a list of supported Network Modes The modes displayed have two values Ad Hoc Peer to Peer and Infrast...

Page 11: ...LAN card to encrypt data with the 28 Bit encryption algorithm The Encryption tab enables you to identify up to 4 different encryption passwords and select one of them to encrypt your transmission data...

Page 12: ...se the right and left arrow keys of your keyboard in order to select an exact number Figure 3 6 Advanced settings 3 6 About By choosing this option you can view basic information about the utility lik...

Page 13: ...P Wired Equivalent Privacy by clicking on this button Figure 3 9 configuration of the Access Point Mode Change Press this button to setting the default value in each field of the panel The Apply butto...

Page 14: ...y clicking on this button Figure 3 10 MAC Address Filter Filter Type There are three status of a Access Point 1 Disable The Filter MAC Address function disable 2 Accept The Filter MAC Address wireless...

Page 15: ...o cancel the schedule and Click OK Figure 3 12 Wireless Networks Step 4 Select the network connections to be bridged Press the Ctrl key while clicking the network connection icons to select Right clic...

Page 16: ...etup OK Show Network Bridge windows see Figure 3 15 and then your setup is ok Figure 3 15 Network Bridge Enabled 3 9 IP Sharing Supported under Windows 2000 Step 1 Change to AP mode see Figure 3 8 Ste...

Page 17: ...N card see Figure 3 17 Click Enable Internet Connection Sharing for this connection and Click OK Figure 3 17 Local Area Connection Properties Step 4 Show Local Network see Figure 3 18 Click OK and the...

Page 18: ...Bm Nominal Temp Range Receive Sensitivity 80dBm 11 Mbps date rate 8 PER Antenna one built in Chip antennas Regulatory and Environmental Compliance FCC part 15 USA DGT Taiwan EMC certification CE Europ...

Reviews: