background image

- 37 -

Chapter 3  Drivers Installation

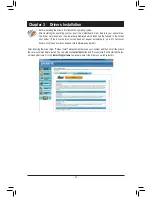
Before installing the drivers, first install the operating system.


After installing the operating system, insert the motherboard driver disk into your optical drive. 


The driver Autorun screen is automatically displayed which looks like that shown in the screen 

shot below. (If the driver Autorun screen does not appear automatically, go to My Computer, 

double-click the optical drive and execute the 

Run

.exe program.)

After inserting the driver disk, "Xpress Install" will automatically scan your system and then list all the drivers 

that are recommended to install. You can click the 

Install All

 button and "Xpress Install" will install all the rec-

ommended drivers. Or click 

Install Single Items

 to manually select the drivers you wish to install.

Summary of Contents for GA-G41MT-S2PT

Page 1: ...GA G41MT S2PT User s Manual Rev 2101 12ME 41MT2PT 2101R ...

Page 2: ...Motherboard GA G41MT S2PT Dec 8 2011 Dec 8 2011 Motherboard GA G41MT S2PT ...

Page 3: ...l may be reproduced copied translated transmitted or published in any form or by any means without GIGABYTE s prior written permission In order to assist in the use of this product carefully read the User s Manual For product related information check on our website at http www gigabyte com Identifying Your Motherboard Revision The revision number on your motherboard looks like this REV X X For ex...

Page 4: ...ctors 13 Chapter 2 BIOS Setup 20 2 1 Startup Screen 20 2 2 The Main Menu 20 2 3 MB Intelligent Tweaker M I T 21 2 4 Standard CMOS Features 26 2 5 Advanced BIOS Features 27 2 6 Advanced Chipset Features 29 2 7 Integrated Peripherals 30 2 8 Power Management Setup 31 2 9 PnP PCI Configurations 33 2 10 PC Health Status 33 2 11 Load Fail Safe Defaults 34 2 12 Load Optimized Defaults 35 2 13 Set Supervi...

Page 5: ...re for reference only and the actual items shall depend on the product package you obtain KB_MS CPU_FAN LGA775 ATX IDE GA G41MT S2PT F_AUDIO AUDIO B_BIOS DDR3_1 DDR3_2 BAT F_PANEL ATX_12V Intel ICH7 Intel G41 R_USB CODEC CLR_CMOS M_BIOS VGA COM LPT USB_LAN PCIEX1 PCIEX16 PCI1 PCI2 F_USB1 F_USB2 SYS_FAN Realtek Atheros GbE LAN iTE IT8720 IT8718 SATA2 SATA2 3 2 1 0 ...

Page 6: ...us Dual Channel Memory PCI CLK 33 MHz IT8720 IT8718 LPT Port CPU CLK 333 266 200 MHz 1 PCI Express x1 PCI Express Bus PCIe CLK 100 MHz x1 x1 4 SATA 3Gb s ATA 100 66 33 IDE Channel Dual BIOS COM Port PCI Express x16 PCIe CLK 100 MHz x16 1 PCI Express x16 Line Out Front Speaker Out MIC Center Subwoofer Speaker Out Line In Rear Speaker Out CODEC D Sub LAN RJ45 Realtek Atheros GbE LAN ...

Page 7: ...st strap keep your hands dry and first touch a metal object to eliminate static electricity Prior to installing the motherboard please have it on top of an antistatic pad or within an electrostatic shielding container Before unplugging the power supply cable from the motherboard make sure the power sup ply has been turned off Before turning on the power make sure the power supply voltage has been ...

Page 8: ...memory modules Onboard Graphics North Bridge 1 x D Sub port Audio Realtek VIA HD audio codec High Definition Audio 2 4 5 1 7 1 channel To configure 7 1 channel audio you have to use an HD front panel audio module and enable the multi channel audio feature through the audio driver LAN 1 x Realtek Atheros GbE LAN chip 10 100 1000 Mbit Expansion Slots 1 x PCI Express x16 slot running at x16 1 x PCI E...

Page 9: ...for BIOS Support for Q Flash Support for Xpress BIOS Rescue Support for Download Center Support for Xpress Install Support for Xpress Recovery2 Support for EasyTune Available functions in EasyTune may differ by motherboard model Support for Easy Energy Saver Due to the hardware limitation you must install the Intel Core 2 Extreme Core 2 Quad Core 2 Duo Pentium Dual Core Celeron Dual Core Celeron 4...

Page 10: ...nd alignment keys on the CPU socket Apply an even and thin layer of thermal grease on the surface of the CPU Do not turn on the computer if the CPU cooler is not installed otherwise overheating and dam age of the CPU may occur Set the CPU host frequency in accordance with the CPU specifications It is not recommended that the system bus frequency be set beyond hardware specifications since it does ...

Page 11: ...s following Channel A DDR3_1 Channel B DDR3_2 Read the following guidelines before you begin to install the memory Make sure that the motherboard supports the memory It is recommended that memory of the same capacity brand speed and chips be used Go to GIGABYTE s website for the latest supported memory speeds and memory modules Always turn off the computer and unplug the power cord from the power ...

Page 12: ...rt Activity LED Connection Speed LED State Description Orange 1 Gbps data rate Green 100 Mbps data rate Off 10 Mbps data rate State Description Blinking Data transmission or receiving is occurring Off No data transmission or receiving is occurring When removing the cable connected to a back panel connector first remove the cable from your device and then remove it from the motherboard When removin...

Page 13: ...ure to turn off the devices and your computer Unplug the power cord from the power outlet to prevent damage to the devices After installing the device and before turning on the computer make sure the device cable has been securely attached to the connector on the motherboard 1 2 5 8 6 3 9 4 7 11 10 1 ATX_12V 2 ATX 3 CPU_FAN 4 SYS_FAN 5 IDE 6 SATA2 0 1 2 3 7 BAT 8 F_PANEL 9 F_AUDIO 10 F_USB1 F_USB2...

Page 14: ... to the CPU If the 12V power connector is not connected the computer will not start To meet expansion requirements it is recommended that a power supply that can withstand high power consumption be used 500W or greater If a power supply is used that does not provide the required power the result can lead to an unstable or unbootable system ATX_12V Pin No Definition 1 GND 2 GND 3 12V 4 12V Pin No D...

Page 15: ...eating Over heating may result in damage to the CPU or the system may hang These fan headers are not configuration jumper blocks Do not place a jumper cap on the headers CPU_FAN SYS_FAN Pin No Definition 1 GND 2 12V 3 Sense 4 Speed Control CPU_FAN 1 1 SYS_FAN Pin No Definition 1 GND 2 12V 3 Sense 5 IDE IDE Connector The IDE connector supports up to two IDE devices such as hard drives and optical d...

Page 16: ...remove the battery from the battery holder and wait for one minute 222 Or use a metal object like a screwdriver to touch the positive and negative terminals of the battery holder making them short for 5 seconds Replace the battery 333 Plug in the power cord and restart your computer 444 Always turn off your computer and unplug the power cord before replacing the battery Replace the battery with an...

Page 17: ...ted at system startup If a problem is detected the BIOS may issue beeps in different patterns to indicate the problem HD Hard Drive Activity LED Connects to the hard drive activity LED on the chassis front panel The LED is on when the hard drive is reading or writing data RES Reset Switch Connects to the reset switch on the chassis front panel Press the reset switch to restart the computer if the ...

Page 18: ...ting the front panel audio module that has different wire assignments please contact the chassis manufacturer For HD Front Panel Audio ForAC 97 Front PanelAudio Pin No Definition 1 MIC2_L 2 GND 3 MIC2_R 4 ACZ_DET 5 LINE2_R 6 GND 7 FAUDIO_JD 8 No Pin 9 LINE2_L 10 GND Pin No Definition 1 MIC 2 GND 3 MIC Power 4 NC 5 Line Out R 6 NC 7 NC 8 No Pin 9 Line Out L 10 NC 10 F_USB1 F_USB2 USB 2 0 1 1 Header...

Page 19: ...l object like a screwdriver to touch the two pins for a few seconds Always turn off your computer and unplug the power cord from the power outlet before clear ing the CMOS values After system restart go to BIOS Setup to load factory defaults select Load Optimized De faults or manually configure the BIOS settings refer to Chapter 2 BIOS Setup for BIOS configurations Open Normal Short Clear CMOS Val...

Page 20: ...lear the CMOS values and reset the board to default values Refer to the Load Optimized Defaults section in this chapter or introductions of the battery clearing CMOS jumper in Chapter 1 for how to clear the CMOS values 2 1 Startup Screen The following screens may appear when the computer boots Motherboard Model BIOS Version Function Keys Award Modular BIOS v6 00PG Copyright C 1984 2011 Award Softw...

Page 21: ... to load the BIOS settings from a profile created before without the hassles of reconfiguring the BIOS settings First select the profile you wish to load then press Enter to complete 2 3 MB Intelligent Tweaker M I T Note This item is present only when you install a CPU that supports this feature CMOS Setup Utility Copyright C 1984 2011 Award Software MB Intelligent Tweaker M I T Robust Graphics Bo...

Page 22: ...item is present only when a CPU with unlocked clock ratio is installed Fine CPU Clock Ratio Note Allows you to increase clock ratio by 0 5 for the installed CPU The item is present only when a CPU with unlocked clock ratio is installed CPU Frequency Displays the current operating CPU frequency Clock Chip Control Standard Clock Control CPU Host Clock Control Enables or disables the control of CPU h...

Page 23: ...te at its good performance level Extreme Lets the system operate at its best performance level G MCH Frequency Latch Allows you to fix the chipset frequency at system bootup Options for adjusting memory multiplier below may differ according to the fixed frequency Options are Auto default 200MHz 266MHz 333MHz System Memory Multiplier SPD Allows you to set the system memory multiplier Options are de...

Page 24: ...ions are Auto default 1 255 tRTP Options are Auto default 1 15 Command Rate CMD Options are Auto default 1 3 Advanced Timing Control Advanced Timing Control Channel A B Channel A B Timing Settings CMOS Setup Utility Copyright C 1984 2011 Award Software Channel A B Timing Settings Move Enter Select PU PD Value F10 Save ESC Exit F1 General Help F5 Previous Values F6 Fail Safe Defaults F7 Optimized D...

Page 25: ...S decide whether to enable this function Default Disabled Disables this function Enabled Enables this function to enhance memory compatibility DDR Write Training Allows you to determine whether to fine tune memory parameters to enhance memory compatibility Auto Lets the BIOS decide whether to enable this function Default Disabled Disables this function Enabled Enables this function to enhance memo...

Page 26: ...uto default 8 7 Mother Board Voltage Control CPU CPU Vcore The default is Auto CPU Termination The default is Auto DRAM DRAM Voltage The default is Auto 2 4 Standard CMOS Features CMOS Setup Utility Copyright C 1984 2011 Award Software Standard CMOS Features Date mm dd yy Wed Dec 7 2011 Time hh mm ss 22 31 24 IDE Channel 0 Master None IDE Channel 0 Slave None IDE Channel 2 Master None IDE Channel ...

Page 27: ...Halt On Allows you to determine whether the system will stop for an error during the POST Options are All Errors No Errors All But Keyboard Default All But Diskette All But Disk Key Memory These fields are read only and are determined by the BIOS POST 2 5 Advanced BIOS Features CMOS Setup Utility Copyright C 1984 2011 Award Software Advanced BIOS Features Hard Disk Boot Priority Press Enter Quick ...

Page 28: ...sword item in the BIOS Main Menu Setup A password is only required for entering the BIOS Setup program Default System A password is required for booting the system and for entering the BIOS Setup program HDD S M A R T Capability Enables or disables the S M A R T Self Monitoring and Reporting Technology capability of your hard drive This feature allows your system to report read write errors of the...

Page 29: ...ion Technology Note Enables or disables Intel Virtualization Technology Virtualization enhanced by Intel Virtualization Technology will allow a platform to run multiple operating systems and applications in independent partitions With virtualization one computer system can function as multiple virtual systems Default Enabled Delay For HDD Secs Allows you to set a delay time for the BIOS to initial...

Page 30: ...Mode This item is configurable only if the PAVP Mode option is set to PAVP Lite Mode Options are 32MB default 48MB 64MB 128MB and 256MB Paranoid PAVP Mode This item is configurable only if the PAVP Mode option is set to Paranoid PAVP Options are 32 96 128MB default 48 96 Round to 160MB 64 96 160MB 128 96 224MB and 256 96 352MB The table below shows the supported features of the PAVP Lite and Paran...

Page 31: ...ontroller Default Enabled Disabled will turn off all of the USB functionalities below USB 2 0 Controller Enables or disables the integrated USB 2 0 controller Default Enabled USB Keyboard Function Allows USB keyboard to be used in MS DOS Default Disabled USB Mouse Function Allows USB mouse to be used in MS DOS Default Disabled USB Storage Function Determines whether to detect USB storage devices i...

Page 32: ... Default Enabled Resume by Alarm Determines whether to power on the system at a desired time Default Disabled If enabled set the date and time as following Date of Month Alarm Turn on the system at a specific time on each day or on a specific day in a month Time hh mm ss Alarm Set the time at which the system will be powered on automatically Note When using this function avoid inadequate shutdown ...

Page 33: ...navailable PME event wake up power on by mouse power on by keyboard and wake on LAN PCI1 2 IRQ Assignment Auto BIOS auto assigns IRQ to the first second PCI slot Default 3 4 5 7 9 10 11 12 14 15 Assigns IRQ 3 4 5 7 9 10 11 12 14 15 to the first second PCI slot 2 9 PnP PCI Configurations CMOS Setup Utility Copyright C 1984 2011 Award Software PnP PCI Configurations PCI1 IRQ Assignment Auto PCI2 IRQ...

Page 34: ...llows the system to emit warning sound if the CPU system fan is not connected or fails Check the fan condition or fan connection when this occurs Default Disabled CPU Smart FAN Control Enables or disables the CPU fan speed control function Enabled allows the CPU fan to run at different speed according to the CPU temperature You can adjust the fan speed with EasyTune based on system requirements If...

Page 35: ...d BIOS Features is set to Setup you must enter the supervisor password for entering BIOS Setup and making BIOS changes When the Password Check item is set to System you must enter the supervisor password or user password at system startup and when entering BIOS Setup User Password When the Password Check item is set to System you must enter the supervisor password or user password at system startu...

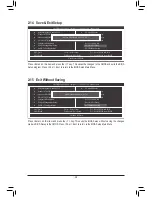
Page 36: ...sor Password Set User Password Save Exit Setup Exit Without Saving Save to CMOS and EXIT Y N Y Press Enter on this item and press the Y key This exits the BIOS Setup without saving the changes made in BIOS Setup to the CMOS Press N or Esc to return to the BIOS Setup Main Menu 2 15 Exit Without Saving CMOS Setup Utility Copyright C 1984 2011 Award Software Abandon all Data MB Intelligent Tweaker M ...

Page 37: ...he screen shot below If the driver Autorun screen does not appear automatically go to My Computer double click the optical drive and execute the Run exe program After inserting the driver disk Xpress Install will automatically scan your system and then list all the drivers that are recommended to install You can click the Install All button and Xpress Install will install all the rec ommended driv...

Page 38: ...reatment collection recycling and disposal of electric and electronic devices and their components Under the Directive used equipment must be marked collected separately and disposed of properly WEEE Symbol Statement The symbol shown below is on the product or on its packaging which indicates that this product must not be disposed of with other waste Instead the device should be taken to the waste...

Page 39: ... 39 ...

Page 40: ...ggts gigabyte com tw WEB address English http www gigabyte com WEB address Chinese http www gigabyte tw You may go to the GIGABYTE website select your language in the language list on the top right corner of the website GIGABYTE Global Service System To submit a technical or non technical Sales Market ing question please link to http ggts gigabyte com tw Then select your language to enter the syst...

Reviews: