


Appendix
- 105 -
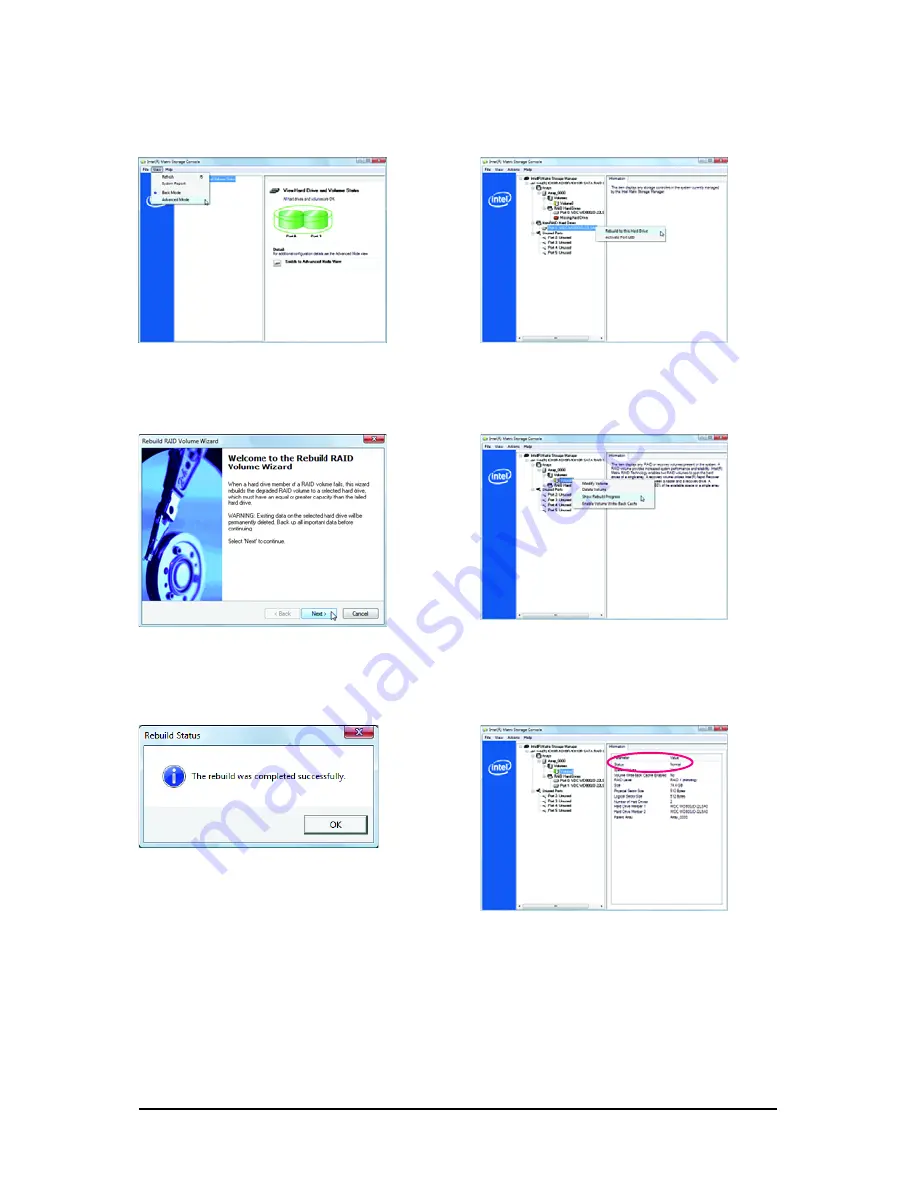
Step 1:
On the
View
menu of the Intel Matrix Storage
Console, select
Advanced Mode
for a more
detailed view of the storage device information.
Step 2:
The new hard drive appears under
Non-RAID
Hard Drive
. Right-click on the new hard drive
and select
Rebuild to this Hard Drive
.
Step 3:
Click
Next
when the
Rebuild RAID Volume
Wizard
appears. Follow the on-screen instruc-
tions to proceed.
Step 4:
To check the rebuild status during the rebuild
process, right-click on the rebuild volume and
select
Show Rebuild Progress
.
Step 5:
When the message "The rebuild was completed
successfully," appears, click
OK
to complete.
Step 6:
After the RAID 1 volume rebuilding, click the
volume and its status in the information pane
will display as
Normal
.
While in the operating system, make sure the chipset driver has been installed from the motherboard
driver disk. Then launch the Intel
®
Matrix Storage Console from
Programs
in the
Start Menu
.
Performing the Rebuild in the Operating System
Summary of Contents for GA-EX58-UD5
Page 40: ...GA EX58 UD5P UD5 Motherboard 40...
Page 72: ...GA EX58 UD5P UD5 Motherboard 72...
Page 124: ...GA EX58 UD5P UD5 Motherboard 124...
Page 125: ...Appendix 125...
Page 126: ...GA EX58 UD5P UD5 Motherboard 126...


