


- 12 -
GA-8IPE1000 Series Motherboard
English
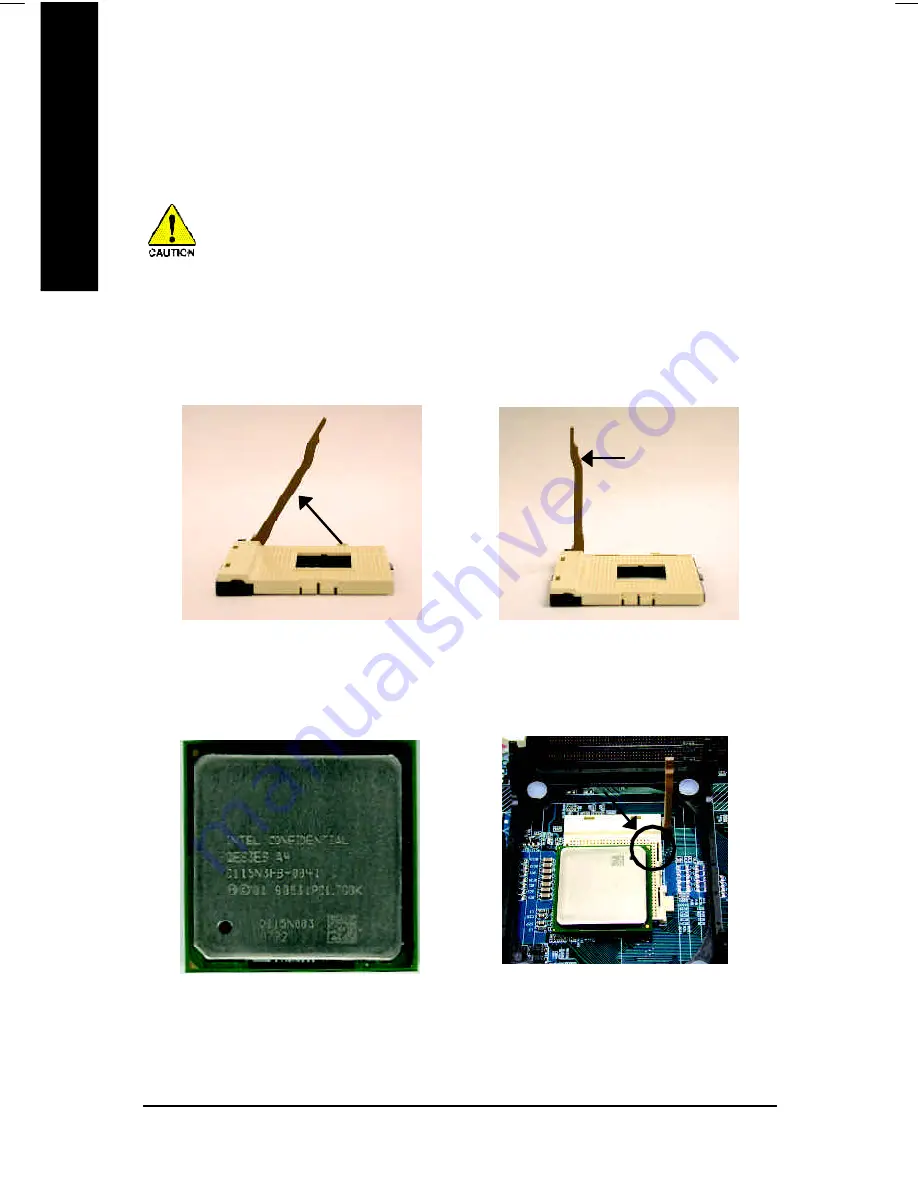
Step 1: Install the Central Processing Unit (CPU)
Step 1-1: CPU Installation
Pin1 indicator
3. CPU Top View
2. Pull the rod to the 90-degree directly.
4. Locate Pin 1 in the socket and look
for a (golden) cut edge on the CPU
upper corner. Then insert the CPU
into the socket.
Angling the
rod to 65
0
Socket
Actuation
Lever
Pin1 indicator
1. Angling the rod to 65-degree maybe feel a
kind of tight, and then continue pull the rod
to 90-degree when a noise "cough" made.
Before installing the processor, adhere to the following warning:
If you do not match the CPU socket Pin 1 and CPU cut edge well, it will
cause improper installation. Please change the insert orientation.
Please make sure the CPU type is supported by the motherboard.
Summary of Contents for GA-8IPE1000 Pro
Page 14: ...10 GA 8IPE1000 Series Motherboard English...
Page 39: ...35 Hardware Installation Process English...
Page 40: ...36 GA 8IPE1000 Series Motherboard English...
Page 69: ...65 BIOS Setup English...
Page 70: ...66 GA 8IPE1000 Series Motherboard English...
Page 94: ...90 GA 8IPE1000 Series Motherboard English...
Page 108: ...104 GA 8IPE1000 Series Motherboard English...
Page 109: ...105 English Memo...
Page 110: ...106 GA 8IPE1000 Series Motherboard English...
Page 111: ...107 English Memo...


