Gigabyte D2432 User Manual Download Page 7

English

6

Specification

Appendix

5

6

■ Warranty & Service

Warranty and service and related information please refer to the warranty card 
or GIGABYTE service website as the below link: 
http://www.gigabyte.com/support-downloads/technical-support.aspx

■ FAQ

FAQ (Frequent Asked Questions) please refer to the below link:
http://www.gigabyte.com/support-downloads/faq.aspx

Item

Specification

Compatibility

GIGABYTE M2432 series Notebook

Video Graphics

NVIDIA

®

 GeForce

®

 VGA Card

I/O Port

Docking Port Connector / DC-In Jack / RJ45 / USB Port x6 / 
D-sub / HDMI / DVI / Mic-in Jack / Audio Jack

Button

Un-Docking Button / Power Button

* This specification is for users’ reference only. The final configuration depends on 

the Docking Station users’ point of purchase.

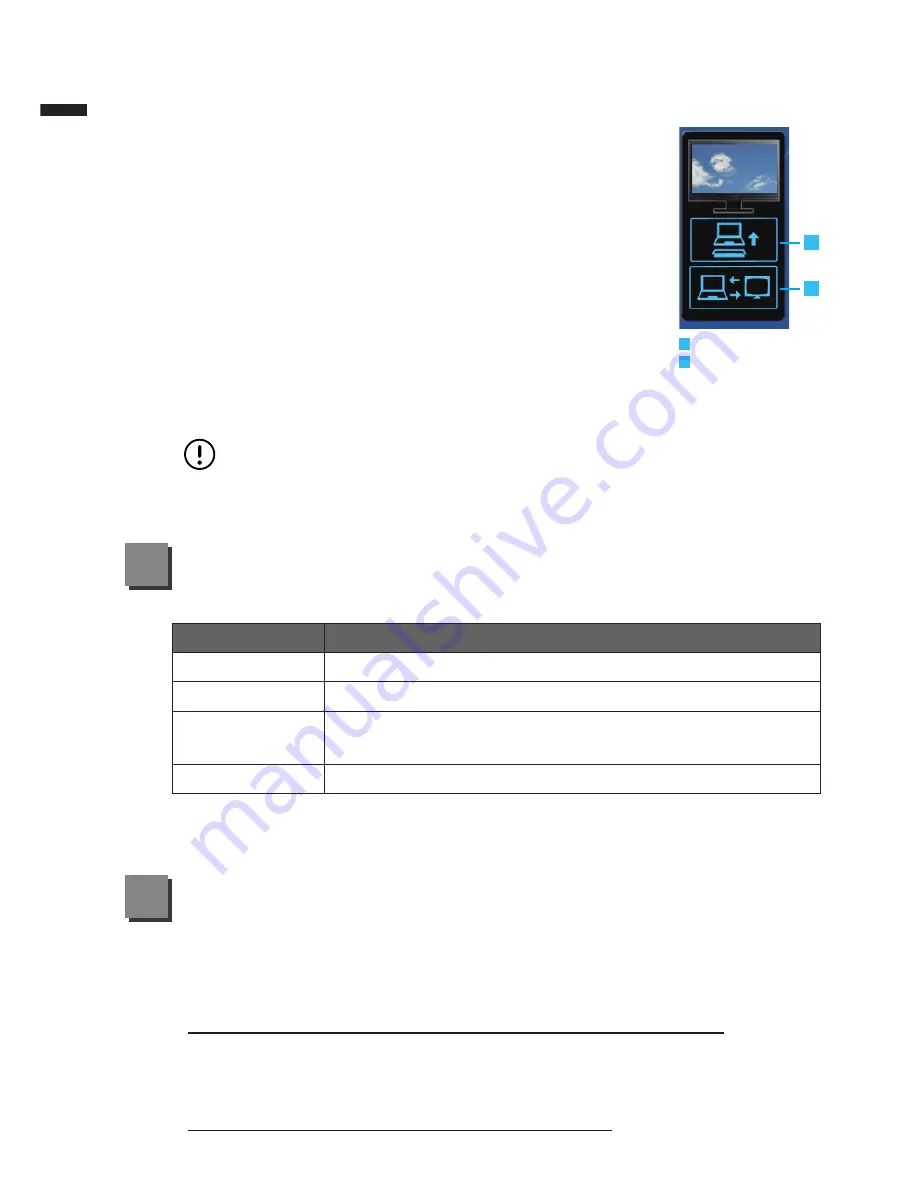
1.  If  the  docked  computer  is  on,  you  can  initiate  the 

undocking process by 1) Pressing the “Un-Docking” 

button  on  the  Docking  Station.  2)  Clicking  the  “Un-

Docking” icon in the Docking Control Gadget.

2.  Pull the Ejector Level out and back until the notebook 

unclips from the docking station.

3.  Lift the notebook off of the docking station from the 

back of the notebook so as not to damage the docking 

connector.

An  alternate  option  to  step  one  is  to  Shut  Down  the 

notebook first and the follow steps 2 and 3.

WARNING:
To avoid system crash or data loss, make sure to follow the above 

instruction to safely remove the computer from the Docking Station.

Un-Docking

Monitor Setup

A

B

A
B

Summary of Contents for D2432

Page 1: ......

Page 2: ...t must be installed and operated in accordance with provided instructions and must not be co located or operating in conjunction with any other antenna or transmitter End users and installers must be provided with antenna installation instructions and transmitter operating conditions for satisfying RF exposure compliance CE Notice European Union This symbol indicates this D2432 Docking Station com...

Page 3: ...rence will not occur in a particular installation If this equipment does cause harmful interference to radio or television reception which can be determined by turning the equipment off and on the user is encouraged to try to correct the interference by one or more of the following measures Reorient or relocate the receiving antenna Increase the separation between the equipment and receiver Connec...

Page 4: ...r Cord Manual Driver CD The illustrations in this document may appear different from your model Congratulations on your purchase of the GIGABYTE Docking Station This manual will help you to get started with setting up your Docking Station The final product configuration depends on the model at the point of your purchase GIGABYTE reserves the right to amend without prior notice For more detailed in...

Page 5: ...n the notebook and the docking station 3 Un Docking Button If the docked computer is on press Un Docking button to initiate the un docking process 4 Power Button 5 LED Indicator The LED indicator lights on when the docking station is connected to AC power source and the docked Notebook is on 1 Air Vent 2 DC In Jack 3 RJ 45 LAN Port 4 USB Ports 5 VGA D Sub Port ...

Page 6: ... Release Arm this is pulled to undock the notebook from the docking station 1 HDMI Port 2 DVI Port 3 Audio Jack 4 Mic In Jack Undocking GIGABYTE Notebook 4 Follow the guide below to undock the notebook from the docking station Please follow the instructions to learn how to remove the notebook 3 1 2 Pressing the Un Docking button ...

Page 7: ... This specification is for users reference only The final configuration depends on the Docking Station users point of purchase 1 If the docked computer is on you can initiate the undocking process by 1 Pressing the Un Docking button on the Docking Station 2 Clicking the Un Docking icon in the Docking Control Gadget 2 Pull the Ejector Level out and back until the notebook unclips from the docking s...

Page 8: ......

Reviews: