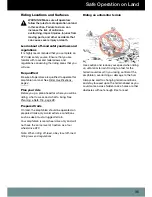

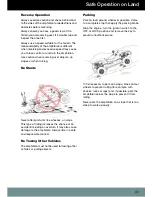


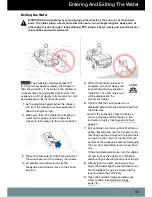


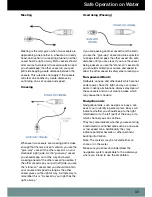


Entering And Exiting The Water
45
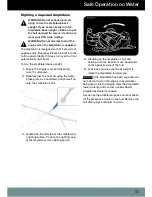
Exiting the Water
WARNING! Keep people away when deploying the wheels as they can cut or crush body
parts. The intake grate, wheels and other drive parts can entangle long hair, body parts, or
other objects (such as ropes, loose clothing, PFD straps). The jet nozzle and rear wheels can
throw debris and water rearward.
NOTICE
The amphibian requires at least 3 ft
(0.9 m) of water depth to deploy the wheels to
their Land position. If the water is too shallow or
a wheel strikes an underwater obstruction, the
suspension will not deploy fully and an error will
be displayed on the instrument cluster.
1.
As the amphibian approaches the chosen
exit from the waterway, reduce speed and
allow the engine to idle.
2.
Make sure that the amphibian is floating in
water that is deep enough to allow the
wheels to fully deploy to their Land position.
3.
Press and momentarily hold the lower half of
the suspension switch to deploy the wheels.
4.
An audible tone will sound while the
suspension and wheels move to their Land
position.
5.
When the transition process is
complete, two short beeps will
sound indicating a successful
transition. The Land mode icon
will be displayed in the
instrument cluster.
6.
Confirm that the Land mode icon is
displayed before riding towards the exit from
the waterway.
Note: If the suspension fails to deploy, a
warning message will be display in the
instrument cluster. See Suspension fault,
page 23
7.
Exit carefully and under control. Maintain a
speed that will allow the front wheels to ride
far enough up the exit way so the rear wheels
can gain traction, but not too fast that you
compress the suspension and risk damaging
the hull. Your amphibian is rear wheel drive
only.
If the amphibian gets stuck, turn the engine
off and remove the engine cut-off before
dismounting or allowing anyone near to help.
8.
After exiting the water, drive slowly and
apply the brakes lightly several times to dry.
Test the brakes by quickly squeezing the
lever to check their efficiency.
9.
Open the hull drain plugs and allow any
water to drain (see Hull Drain Plugs,
page 75).
Summary of Contents for quadski
Page 2: ......
Page 13: ...Safety Labels 9 Label 7 Europe Label 8 Label 9 Label 10 Label 11 Label 12 Label 13 ...
Page 14: ...Safety Labels 10 Safety Labels Label 14 Label 15 Label 16 ...
Page 15: ...Safety Labels 11 Label 17 Label 18 Label 19 Label 20 ...
Page 96: ......
Page 97: ......