background image

Using the Mixer

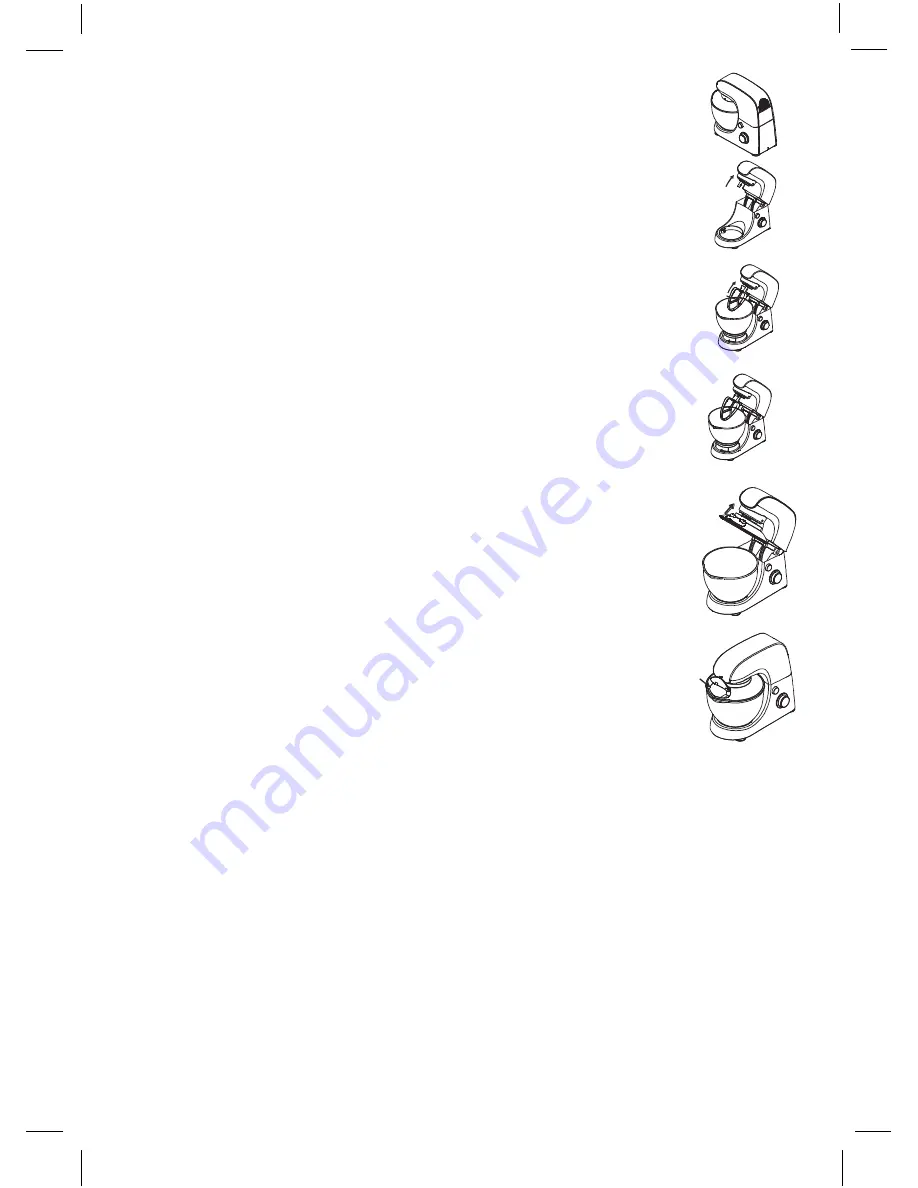
1.  To raise the mixer head - Lift the head by pressing the release
     button and at the same time lift the head until it locks in
     the raised position.
2.  To attach the accessories - Place the mixing tool (Beater/Whisk/
     Dough hook) onto the accessory socket. Turn anti-clockwise until
     it locks. Turn clockwise to remove.
3.  To place the bowl on the base - Press down and turn clockwise to 
     lock.
4.  To lower the mixer head - Press the release button again and fully
     lower the mixer head.

To fit and use your splashguard and mixing accessories:

1.  Raise the mixer head until it locks.
2.  Fit the bowl onto the base.
3.  Push the splashguard onto the underside of the mixer head until
     fully located. The hinged section should be positioned as shown.
4.  Insert the required tool.
5.  Lower the mixer head.
     - During mixing, ingredients can be added directly to the bowl via
        the hinged section of the splashguard.
     - You do not need to remove the splashguard to change tools.
6.  Remove the splashguard by raising the mixer head and sliding it
     down off the rim.

Hints/Tips:

Switch off and scrape the bowl with a spatula when necessary.
Eggs at room temperature are best for whisking.
Before whisking egg whites, make sure there's no grease or egg yolk on the whisk or 
bowl.
Use cold ingredients for pastry unless your recipe states otherwise.
When creaming fat and sugar for cake mixes, always use the fat at room temperature 
or soften it first.

4

Summary of Contents for Cucina GCKF106

Page 1: ...Instruction Manual Model Reference GCKF106 IM GCKF10627042015 3L Stand Mixer...

Page 2: ...It gives important instructions about safety use and maintenance of your appliance Please keep for future reference Index Important Information Assembly Instructions Using the Mixer Functions Accesso...

Page 3: ...cleaning Do not leave the appliance unattended when connected to the mains supply Always unplug from the mains supply before carrying out any cleaning performing user maintenance or changing accessor...

Page 4: ...Assembly Instructions 1 Mixer head 2 Bowl 3 Accessory socket 4 On off and speed dial 5 Mixer body 6 Head release button 7 Y beater 8 Whisk 9 Dough hook 10 Spatula 11 Splashguard 3...

Page 5: ...3 Push the splashguard onto the underside of the mixer head until fully located The hinged section should be positioned as shown 4 Insert the required tool 5 Lower the mixer head During mixing ingredi...

Page 6: ...nctions Accessories Attachments Here are some examples of use Y Beater For making cakes biscuits pastry icing fillings eclairs and mashed potato Whisk For eggs cream batters sponges meringues cheeseca...

Page 7: ...tput Power 400W Care and Cleaning Always switch off and unplug before cleaning Mixer body Wipe with a damp cloth then dry Never use abrasives or immerse in water Bowl Wash by hand then dry thoroughly...

Page 8: ...Blue must be connected to the terminal which is marked N or coloured Black The wire which is coloured Brown must be connected to the terminal which is marked L or coloured Red The wire which is colou...

Page 9: ...pliance was purchased 2011 65 EU IMPORTANT INFORMATION FOR CORRECT DISPOSAL OF THE APPLIANCE IN ACCORDANCE WITH EC DIRECTIVE 2002 96 EC At the end of its working life the appliance must NOT be dispose...

Page 10: ...2011 65 EU...

Reviews: