background image


19 


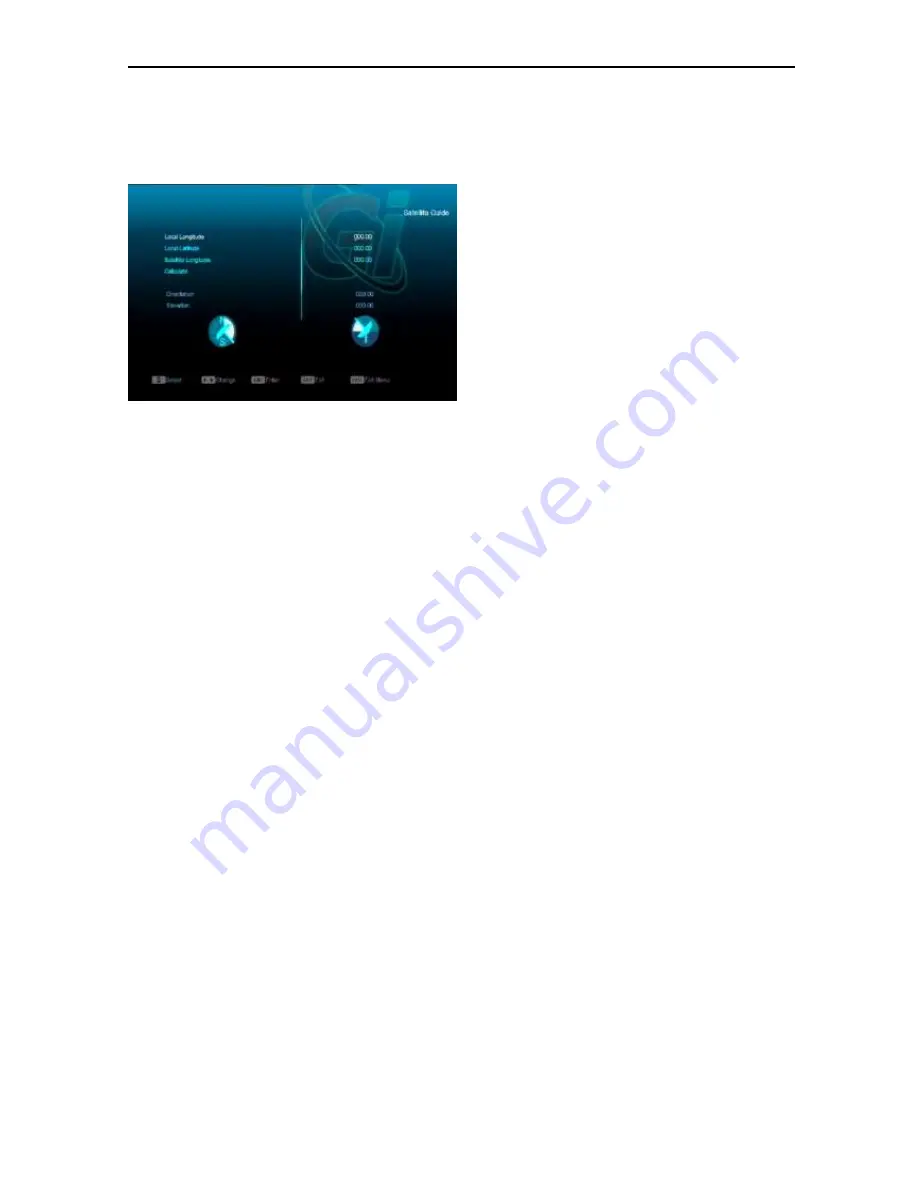
10.4  Satellite Guide 

When you enter to 

“Satellite Guide” menu, you 

will see the screen like below: 


“Satellite Guide” is use for user to enter local 

longitude; local latitude and satellite longitude. 

By the evaluation from the receiver evaluate the 

antenna azimuth and antenna elevation; user 

can follow this guidance to adjust antenna. 

You can use number keys to input 

parameters in 

“Local Longitude”, “Local 

Latitude

” and “Satellite Longitude”. 


You can use [Left/Right] key to select east 

or west in 

“Local Longitude” and “Satellite 

Longitude

”, select north and south in   

“Local Latitude”.


Moving highlight to 

“Start” item and press 

[OK] key. The lower column on the screen 

will calculate the corresponding value 

automatically. 

Orientation means the angle between 

south and satellite. 

Press [MENU] key to draw back to 

“Main” 

Menu. 


Summary of Contents for Mini

Page 1: ... CHANNEL LIST 10 8 15 SLEEP 11 8 16 PAGE UP PAGE DOWN 11 8 17 TEXT 11 8 18 SUBTITLE 11 8 19 FIND 11 8 20 ZOOM 11 8 21 TV STB 12 8 22 MENU 12 8 23 VIDEO FORMAT 12 8 24 EXIT 12 9 SERVICE 13 9 1 ORGANIZING SERVICE 13 9 2 ORGANIZING FAVOURITES 15 10 INSTALLATION 16 10 1 SATELLITE INSTALLATION 16 10 2 FAST SCAN SATELLITE 18 10 3 AUTO INSTALLATION 18 10 4 SATELLITE GUIDE 19 11 PREFERENCE 20 11 1 LANGUAG...

Page 2: ...les 29 14 1 3 Image Files 30 14 1 4 Software 32 14 1 5 All 32 14 2 STORAGE INFORMATION 32 14 3 PVR SETTING 33 14 4 USB SPEED TEST 33 14 5 REMOVE USB DEVICE SAFELY 34 15 INTERNET OPTIONAL 35 15 1 NETWORK LOCAL SETTING 35 15 2 HTTP UPGRADE 35 15 3 FTP UPGRADE 36 15 4 FTP 36 15 5 WEATHER FORECAST 36 15 6 RSS READER 37 16 GAME 39 16 1 TETRIS 39 16 2 SNAKE 39 16 3 OTHELLO 39 17 NEW FEATURES 40 17 1 EQU...

Page 3: ...overed to allow proper airflow to the unit Do not stand the HD Receiver on soft furnishings or carpets Do not expose the HD Receiver to direct sunlight or do not place it near a heater Do not stack electronic equipments on top of the HD Receiver ATTACHMENTS Do not use any attachments that are not recommended as these may cause hazard or damage the HD Receiver CONNECTION TO THE SATELLITE DISH LNB D...

Page 4: ...sy to use and adaptable for future advances Please be aware that new software may change the functions of the HD Receiver If you have any difficulties concerning the operation of your HD Receiver please refer to the relevant section of this manual including the Troubleshooting This Manual will provide you with useful information on using the HD Receiver 3 FEATURES MPEG Fully DVB S DVB S2 H 264 HD ...

Page 5: ...option or to updated on entry KEY To adjust volume level or to move cursor left or right in the menu v KEY To change channels or to move cursor up or down in the menu P P To move up the cursor to the next or previous page in the menu or channel list Red Key Have different functions per menu Teletext GREEN KEY Shows teletext information of the current channel supports Subtitle YELLOW KEY Subtitle D...

Page 6: ...the unit to the mains socket until all other connections have been made and checked Your configuration can vary depending on model DC 12V Connect the supplied external power supply like LNB IN 13 18V 500mA MAX This port is to connect the coaxial cable from LNB of your Dish AV OUT This port is used to connect the television with a RCA AV connector line HDMI Audio and Video output socket for TV set ...

Page 7: ...d System DiSEqC 1 2 Connect one end of your coaxial cable to the LNB IN connector on the receiver and the other end to the REC or Receiver connector on the DiSEqC 1 2 motor Connect the coaxial cable from the LNB to the LNB connector on the DiSEqC 1 2 motor All our receivers are designed to be DiSEqC 1 0 and DiSEqC 1 2 compatible This allows multiple antennas to be connected to the receiver at the ...

Page 8: ...er 1 Press Power Key can enter the Standby state 2 In Standby state press Power Key again can call back the unit and go on play the previous channel 3 User can also disconnect the device s main power to end the Standby state 8 3 Channel Up Channel Down In full screen press CH CH to change channel 8 4 Volume Up Volume Down In full screen press VOL VOL to adjust volume 8 5 Number In full screen use ...

Page 9: ...ight Stereo Mono 8 11 Information In full screen press INFO key press INFO key and RED key can open information screen in the window shows the parameters of current channel 8 12 EPG 1 The STB has an Electronic Program Guide EPG to help you navigate channels through all the possible viewing options The EPG supplies information such as channel listings and starting and ending times for all available...

Page 10: ...ode press TV RADIO key to switch to TV mode 8 14 Channel List 1 In full screen press OK key can enter Channel List 2 Press Red key to change the different group which you can watch like below 3 Press Green key to display details information for EPG Now 4 Press Yellow key you can change the current channel s property such as FAV Lock Skip Delete Rename 5 Press Blue key can open the Sort window like...

Page 11: ...nd page down the channel list 8 17 TEXT 1 Press green key in full screen you can open teletext page on the channel which has teletext information 2 If the channel has no teletext information it will show No Teletext Data on the screen 8 18 Subtitle 1 Press Yellow key in full screen you can switch subtitle on or off 8 19 Find 1 Press Find key in full screen can open the Find window like above You c...

Page 12: ... 8 23 Video Format 1 Press P N white key under Full Screen playback for 1st it will show the current system outputting video resolution continuously press this key system will switch its outputting video resolution by sequence by source by native TV 480i 480P 576i 576p 720P 1080i 1080p 8 24 Exit 1 Press EXIT key can exit the current menu to last menu or close the window ...

Page 13: ...nel Down key and OK key to select the programs which you want to edit 2 You can press Page Up Page Down key to implement the Page Up Page Down function 3 You can use Red key to switch different Group 4 You can press Green key to select the programs by different select mode 5 Press color key can implement the corresponding function in Organizing Services Groups 1 Press Red key can open the Groups w...

Page 14: ...ck icon by press Channel Up Channel Down key and OK key 4 Lock the channel by press OK key Like the following picture Delete a Select the channels which you want to edit in channel list by press OK key or other select mode b Then press Right key to move the high light to right toolbar c Select Delete icon by press Channel Up Channel Down key and OK key d Delete the channel by press OK key Skip and...

Page 15: ... Add To add services into favorites Mark the desired services by press OK button in Service List press to choose Add mode and press OK button 3 Remove To remove services from favorites Mark the desired services by press OK button in Favorite List press to choose Remove mode and press OK button 4 Move You can reorder and move the service to the preferred position in Favorite List 5 Rename Select th...

Page 16: ... In this box press Up Down key to switch among Standard User Unicable and Universal mode For Example If you use the Unicable LNB then you should select Unicable option in LNB type and press OK button to display the submenu for Unicable settings like the following picture you can select the SCIF Channel SCIF Frequency and Satellite Position according your installation DiSEqC1 0 DiSEqC1 1 DiSEqC You...

Page 17: ...nder but also can use Add and Delete functions When you press Green key it will display New TP in TP Index item You should set the parameters of TP Frequency and Symbol Rate for this new transponder The parameters of TP Frequency and Symbol Rate can set by number keys The available range are 3000 13450 MHz and 1000 45000Ks s When you press Yellow key there will show up a warning message for remind...

Page 18: ... satellites and press red button it will show up a dialog to ask you scan mode program type scan type and NIT Search on off After you set up press OK key to start scanning 2 Press green button to edit the name and longitude of the select satellite 3 Press yellow button to add a new satellite 4 Press blue button to delete one or more satellites that you selected 5 Press white button to move the sel...

Page 19: ...s guidance to adjust antenna 1 You can use number keys to input parameters in Local Longitude Local Latitude and Satellite Longitude 2 You can use Left Right key to select east or west in Local Longitude and Satellite Longitude select north and south in Local Latitude 3 Moving highlight to Start item and press OK key The lower column on the screen will calculate the corresponding value automatical...

Page 20: ...olish and Italian 3 Second Audio If the channel has no correspond audio with First Audio but have corresponded audio with Second Audio system will play the second audio language as default If no audio language corresponds with the Second Audio then the default language of current channel will be played automatically The selections of audio languages include English French German Russian Arabic Por...

Page 21: ...to draw back from the Parental Lock menu 11 3 Time Setting When you enter to Local Time Setting menu you will see the screen like below GMT Usage This item is use for open the usage of GMT You can press Volume Up Volume Down keys to switch On Off The GMT Offset item is valid only when the setting of GMT Usage is Yes You can press Volume Up Volume Down keys to switch GMT Offset value and the range ...

Page 22: ...e channel you want and start to play iv Duration After you set a time for Duration item once the time s up the system will automatically switch to standby mode If you want not work this function set the duration is 00 00 When you select Message reminding message option in Timer Service the screen will display like below v Wakeup Message press Volume Up Volume Down key to select reminding message a...

Page 23: ...VBS Digital Audio Out is for setting the both SPDIF and HDMI s digital audio output mode it has options LPCM Out Auto You can press Left Right Key to select each mode circularity LPCM Out means system will decode no matter AC3 or PCM audio track data to be LPCM digital audio decoder or HDMI TV will get LPCM digital audio data Auto means system will detect which the connected HDMI TV can decode and...

Page 24: ...D Transparency Besides the setting of OSD Menu Style you also can set the transparency of OSD You can press Volume Up Volume Down key to select the values There are 5 levels of transparency 10 20 30 and 40 and NO means no transparency function 4 Brightness Contrast Saturation You can adjust the parameter about the Video image by using the OK button or press Volume Up Volume Down key the default va...

Page 25: ...D CHIP ID 2 Press MENU key to draw back to Information menu 12 2 Default Setting 12 2 1 Default Value When you press OK key In the Default Setting item 1 There will pop a dialogue for you to enter the password and the default password is 0000 2 After you input the correct password there will show a warning message to inquiry you The operation will load default and erase all the channels that user ...

Page 26: ...rent data as default data 12 3 Software Upgrade Upgrade by RS232 1 We offer the functions for user to connecting receiver Master to the other receiver Slave via serial interface Connect master receiver to slave receiver via serial interface Enter Software Upgrade menu in master receiver and press Volume Up Volume Down keys to switch upgrade mode All SW bootloader All SW Channel list Software no ch...

Page 27: ...n this menu you can select the Upgrade Mode among Software No channel list Channel list All SW bootloader and All SW Channel list and you can select the appropriate upgrade file on Upgrade File item After you select the Upgrade Mode and Upgrade File press OK button on Start item the receiver can upgrade automaticlly NOTE You must put the upgrade file on the ROOT DIRECTORY of the USB storage 12 5 B...

Page 28: ...from inserted card In case if anything is wrong it could be card problem After inserting the card correctly at any time a message box will show on the screen with message about detecting the card in card info menu all available information will be displayed You can press left right key to setting the message display time 14 USB if you enter to the USB Menu you will see the picture like the below N...

Page 29: ...can setting the play list Red key Show play list as the picture bellow Red Key Move the selected file by press Red key and UP DOWN key Green Key Delete the selected file by press Green key Yellow Key Delete all the file by Yellow Key but there is one remind Delete All before practical operation if select Yes all file will be deleted and close the Play list window Press OK button to play file Green...

Page 30: ...n to stop and time return to 00 00 Press PREV button to jump to the beginning of file list if play is over 3 seconds or jump to previous file if play less than 3 seconds Press NEXT button to go to the next file Press FORWARD button to forward 4S Press BACKWARD button to back 4S Jump to beginning or end if less than 4S to the beginning or end of music file Switch to the next file or stop playing by...

Page 31: ...ew operation Please see the below image operation menu if Image function is selected Red Key Move the selected file by press Red key and UP DOWN key Green Key Delete the selected file by press Green key Yellow Key Press Yellow Key will delete all image files in play list but system will remind you Delete All before practical operation if you select Yes all file will be deleted and Play list window...

Page 32: ...0 key to sort the file list and press to enable or disable the audio Yellow key To edit the files or folders Include rename copy delete and create folder function You can press Left Right key to previous menu 14 1 4 Software If has software in current directory you can press Green key to upgrade like below 14 1 5 All You can preview all files in this menu 14 2 Storage Information Press OK button t...

Page 33: ...Means when you record the program it just start when you press button not include the Timeshift files Record as Scrambled NO Means you can play the record file as free without the card YES Means when you play the record file as scrambled so you must insert the smart card Record Type You can select the record type by press left right key HDD Sleep Time You can select the HDD sleep time by press lef...

Page 34: ...34 14 5 Remove USB Device safely Use this menu you can remove the USB Device safely ...

Page 35: ...ress ok button at last input password c Press OK button on Connect item to start connecting 2 In this menu you may assign a dynamic IP address to the digital receiver To do so select the DHCP On 3 If you have a static IP address unselect the DHCP Enable then the IP Address Subnet Mask Gateway and DNS options become enabled You have to set these options according to your IP address 15 2 Http Upgrad...

Page 36: ...download some files such as software MP3 or Image files from FTP server Note This function depends on connection with external server In case of no any files on server this function will not work 15 5 Weather Forecast In this menu you can see the weather forecast press Green key to add city Red key To update the weather forecast to the newest Green key To add new city use this menu you can add 5 c...

Page 37: ...URL Press ok button to see the detail information like the below 15 7 YouTube This menu is some internet applications youtube can play stream media in www youtube com When you enter to this menu you will see a screen like below 1 Press up down key to move highlight 2 Press ENTER key on one item it will be play pertinent video The video will show on top left corner Press ENTER again it only has vid...

Page 38: ... on Duration has all time this week and this month and so on 7 Press yellow key to switch group These are game news tech move and so on 8 Press blue key to display the top video These are top favorites top rated most views most recent and so on 9 Press FIND key in full screen can open the Find window You can press keys to move highlight and press ENTER key to input the letters Then press red key t...

Page 39: ...press Volume Up Volume Down key to select the game level speed b Moving highlight to Start and press OK key to start the game c Moving highlight to Cancel keys and press OK key to draw back from the game d Start on the game Volume Up Volume Down Channel UP Channel Down use these arrow keys to guide the snake OK Pause Play game Exit Quit game and draw back to Game menu 16 3 Othello a Moving highlig...

Page 40: ...o Fast Backward or Fast Forward 3 You can press or button to Slow Backward or Slow Forward 4 Press left or right button to jump to different position then press OK button to confirm 5 Press button to exit the playback 17 3 Record Connect the USB HDD You can press button to start record function as following picture Press button to display the record info bar when you recording Press button again t...

Page 41: ...s incorrectly Connected short circuit or open circuit The position of dish is aligned incorrectly Receiver is on but no picture or sound except the following messages NO TV program Channel is not available Channel is scramble Receiver not responding to remote control unit RCU batteries are dead or inserted incorrectly The RCU is pointing toward wrong direction Poor picture Quality The level of Sig...

Page 42: ...SK 8PSK Input Symbol Rate 2 45 Mbps Convolution Code Rate 1 2 2 3 3 4 5 6 7 8 and Auto POWER SUPPLY Input Voltage Free Voltage 100 240V AC 50 60Hz Power Consumption 20W MAX MPEG TS A V Decoding Transport Stream MPEG 2 H 264 Input Rate Max 120Mbit s Aspect Radio 4 3 16 9 Letter Box Video Decoding MPEG 2 MP ML MPEG 4 part 10 H264 Video Resolution 720 480P I 720 576P I 1280 720p 1920 1080i 1920 1080P...

Page 43: ...43 RJ 45 10M 100M HDMI VER1 2 Type A PHYSICAL SPECIFICATION Size W H D 145mmX33mmX110mm Net Weight 0 23KG Operation Temperature 0 45 Storage Temperature 10 70 Storage Humidity 5 95 RH Non Condensing ...

Reviews: