6
Assembly Instructions
3
Position the subwoofer speakers approximately 30” (76cm)
apart with the speakers facing outward. With the help of
another person carefully lift and position the main console
on top of the subwoofer speakers making sure the connecting
pins located on the underside of the console are aligned with
the matching key-hole openings (slots) located on top of the
subwoofer speakers.
Lower the connecting pins into the key-hole openings and
carefully slide the console forward until it comes to a complete
stop. The main console should now be properly aligned with
the subwoofer speakers.
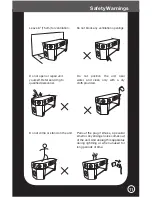
WARNING: TO AVOID PERSONAL INJURY AND/
OR EQUIPMENT DAMAGE, NEVER ATTEMPT TO
LIFT THE FULLY ASSEMBLED ENTERTAINMENT
CENTER COMPLETELY OFF THE GROUND, AS THE
SUBWOOFER
SPEAKERS
MAY
BECOME
ACCIDENTALLY UNHOOKED AND FALL.
2. Carefully slide the glass shelf onto the 4 support pins located
on the inside of the subwoofer speakers making sure the
shelf is firmly positioned and level.
3. Remove the protective covers (usually grey) from the
speakers located on the main console. Keep these covers for
future use in the event the system has to be moved to another
location.
4. Optional: Assemble the 6 mesh speaker covers by lining up the
pins on the main console with the holes on the speaker cover
gently pressing them into place.
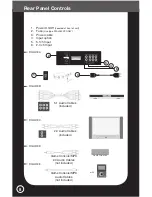
5. Make sure all audio/video equipment is “disconnected” before
connecting to the Entertainment & Gaming Center. Position
your DVD player on the glass shelf. Connect one end of the
6 pin audio surround sound cables (included) to the 5.1
channel outputs on the DVD player, (consult DVD manual) and
the other end to the 5.1 channel inputs on the Entertainment
and Gaming Center. If your DVD player does not have 5.1
channel outputs, simply connect one end of the twin audio
WARNING:
L I F T I N G H A Z A R D
Single perSon
lift could
cauSe injury.
use
assistance
when
moving
or
lifting
.


