


1 7
UNIT OPERATION
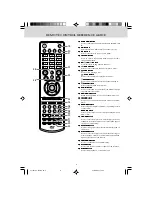
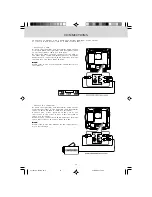
TURNING THE UNIT ON
When the AC power cord is connected, press the STANDBY/ON
STANDBY/ON
STANDBY/ON
STANDBY/ON
STANDBY/ON button on the unit to turn it on. Press
the FUNCTION
FUNCTION
FUNCTION
FUNCTION
FUNCTION button to select the desired mode (TV/AV IN/YUV IN/DVD/PC IN). If you select DVD, the
DVD logo will appear on the screen.
N o t e :
N o t e :
N o t e :
N o t e :
N o t e :
When the unit is not going to be used for a long time, disconnect the AC power cord from AC power
o u t l e t .
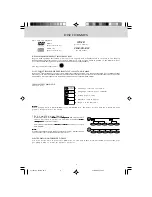
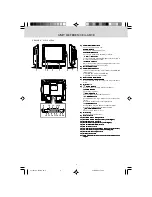
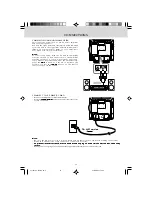
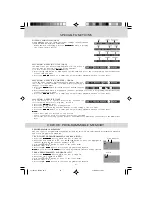
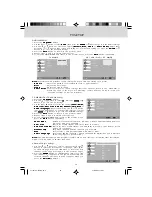
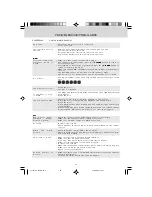
QUICK CHANNEL LIST FUNCTION
1 . Press the T V
T V
T V
T V
T V button to select TV mode.
2 . Press the E N T E R
E N T E R
E N T E R
E N T E R
E N T E R button to enable Channel List.
3 . Use the
or
button to select a channel from the searched
channels. (Press the
button to review the previous page
of the list. Press the
to review the next page.)
4 . Press the E N T E R
E N T E R
E N T E R
E N T E R
E N T E R button to confirm the selection and switch
to the selected channel.
Press the E N T E R
E N T E R
E N T E R
E N T E R
E N T E R button again to view the channel details if
there are channel details broadcasted.
Channel List
Channel Details
xxxxxxxxxxxxxxxxxxxxxxxxxxxxxxxxxxx
xxxxxxxxxxxxxxxxxxxxxxxxxxxxx
2
3
4
6 - 2
8
1 2 - 1
6 - 1
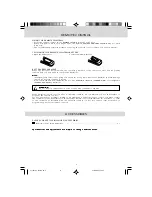
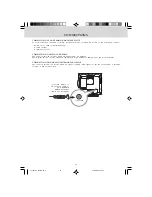
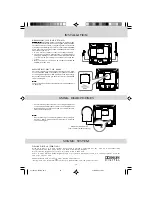
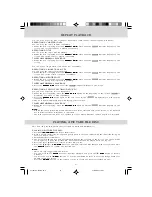
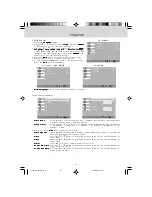
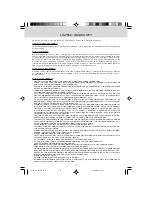
TURNING THE UNIT ON FOR THE FIRST TIME
The first time for you turning on the unit, the unit will enter Virgin mode. You can easily follow up
prompt message on screen to finish basic settings of the system.
Welcome to the Setup Wizard.
Please press [ENTER] to proceed.
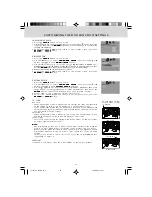
Initial Setup
Welcome
Please select your language:
EXIT
Exit
Select
Back
Next
Initial Setup
Language
English
Español
Français
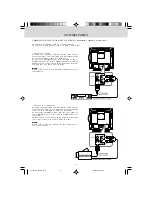
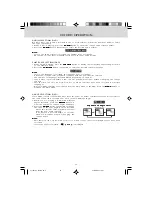
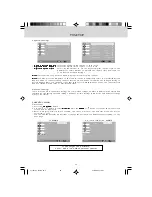
Please select your input source:
EXIT
Exit
Select
Back
Next
Initial Setup
Tuner
Antenna
Cable
Please make sure your input source
is connected to the Cable and/or
Antenna jack, then press [ENTER] to
scan for channels.
EXIT
Exit
Select
Back
Next
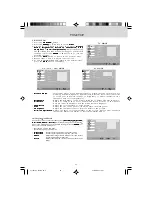
Initial Setup
Channel Scan
Scan
Skip Scan
0%
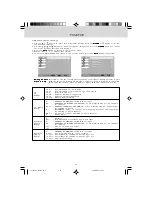
5 . After scaning finished, “Initial setup is Complete.” will appear on the screen. Press the E N T E R
E N T E R
E N T E R
E N T E R
E N T E R button
to finish Initial Setup
Initial Setup
Initial Setup
Initial Setup
Initial Setup.
After finishing above settings, the system will return to the first TV channel scaned just now.
1 . Press the E N T E R
E N T E R
E N T E R
E N T E R
E N T E R button to proceed the Initial
I n i t i a l
I n i t i a l
I n i t i a l
I n i t i a l
S e t u p
S e t u p
S e t u p
S e t u p
S e t u p.
2 . Use the
/
button to select your OSD
language, and press the
button to the next
s t e p .
3 . Use the
/
button to select your TV tuner
source (Antenna or Cable), and press the
button to the next step.
4 . Make sure RF aerial has been connected
properly to T V A N T E N N A
T V A N T E N N A
T V A N T E N N A
T V A N T E N N A
T V A N T E N N A input jack on the
rear of the system, press the E N T E R
E N T E R
E N T E R
E N T E R
E N T E R or
button.
The system will automatically start to scan and
preset all available TV channels.
211501S9 - GFM-1.pmd
01/06/2007, 18:31
17