background image

AUX

VOLUME

20

C        C        C        C        C    C        

C        C        C        C        C        C        C        C        C        C        

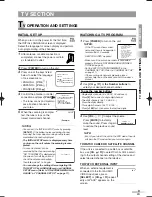
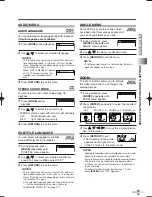
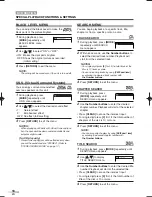
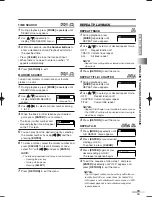
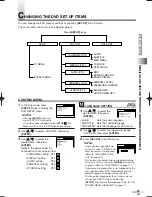
WATCHING A TV PROGRAM

TV

TV

1

Press 

[POWER]

to turn on the unit.

NOTES:

If the TV screen shows snow

noise and there is no operation
for more than 10 seconds, 

“HELPFUL HINTS” appears.

• Make sure if the antenna or cable is connected 

properly. (Refer to “ANTENNA/CABLE CONNEC-
TIONS on page 6.)

• Set the“AUTO CH PROGRAMMING” in the 

CHANNEL SET UP. (Refer to “CHANNEL SET UP”
on page 11.)

• If those setting do not work properly, please

call our help line on the back cover of this owner’s
manual.

2

Use 

[CH.

K

L

]

or 

the Number buttons

to

select your desired channel number.

3

Use 

[VOL.

X

Y

to adjust the volume.

Press 

[MUTE]

to instantly

mute the sound. Press it again
to restore the previous sound
level.

NOTE:

• Even if you turn off the unit in the DVD mode, the unit

will be in the TV mode when you turn it on again.

TO WATCH CABLE OR SATELLITE CHANNEL

If the unit is connected to a cable box or satellite
box, use 

[CH.

K

L

]

to select CH3 or CH4 accord-

ing to the output channel setting of the device and
select desired channel on that device.

TO WATCH EXTERNAL INPUT

When an external equipment is
connected to the front AUDIO/
VIDEO input jacks, press

[SELECT]

or 

[CH.

K

L

]

repeat-

edly until "AUX" appears on the
screen.

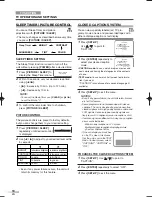
SELECT LANGUAGE

ENGLISH

NEXT:PRESS VOL

Y

H

ESPAÑOL

DESPUÉS:PRESIONE VOL

X

H

FRANÇAIS

APRÈS:PRESSEZ CH.

K

H

– INITIAL SETUP –

PLEASE CONNECT ANTENNA
OR CABLE OR SATELLITE
TO THIS UNIT.
THEN PRESS PLAY,
IN ORDER TO PERFORM
“AUTO CH PROGRAMMING”

CH 15

(Example)

INITIAL SET UP

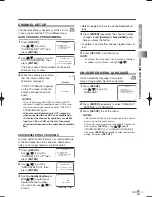
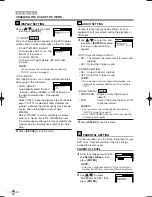
When you turn on the power for the first time,
the INITIAL LANGUAGE screen is displayed.
Select the language for screen display and perform
auto programming of the channels.

1

After antenna or cable connection is 
completed, connect the power cord into 
a standard AC outlet.

2

Press 

[POWER]

to turn on the unit.

3

Press one of the keys listed 
below to select the language 
of on-screen menu.

• ENGLISH:

[VOL.

Y

]

• ESPAÑOL:

[VOL.

X

]

• FRANÇAIS:

[CH.

K

]

4

Confirm the antenna (or cable) 
connection and press 

[PLAY 

B

B

]

.

• The tuner scans and memori-

zes all active channels in 
your area.

5

When the scanning is comple-
ted, the tuner stops on the 
lowest memorized channel.

NOTES:

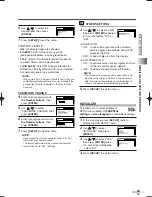
• You can exit the INITIAL SETUP menu by pressing

[SET-UP]

. If the button is pressed during channel

scanning, the tuner stops scanning and the lowest
memorized channel is displayed.

The INITIAL SETUP menu is displayed every time
you turn on the unit unless the scanning is com-
pleted.

• In case no channel can be

received by the channel scanning,
"NO TV SIGNALS" is displayed on
the screen. Turn off the unit and
check the antenna connection,
then follow steps 1 to 5 again.

You can change the setting after completing INI-
TIAL SET UP by LANGUAGE menu or CHANNEL
SET UP menu. (Refer to "ON-SCREEN MENU LAN-
GUAGE" or "CHANNEL SET UP" on page 11).

EN

9

T

V OPERATION AND SETTINGS

TV SECTION

TV OPERA

TION AND SETTINGS

TV SECTION

To use the number buttons

•Single digit channels: (Ex. 02, 03, 04 and so on)

Press 

[0]

first to select a single digit channel.

•Two digit channels: (Ex. 12, 38, 95 ...)

Press two digits directly.

•Three digit channels: (Ex. 115, 125 ...)

Press 

[+100]

first, then press the last two digits.

TV

TV

NO TV SIGNALS

- HELPFUL HINTS -

1.PLEASE CHECK TO SEE IF

THE ANTENNA/CABLE/

SATELLITE IS 

PROPERLY CONNECTED.

2.DID YOU PERFORM

“AUTO CH PROGRAMMING”?

3.PLEASE REFER TO FRONT

PAGE OF THE OWNER’S

MANUAL OR REAR PANEL

FOR SUPPORT LINE

INFORMATION.

T9205UF(EN).QX3  06.3.8  1:41 PM  Page 9

Summary of Contents for MJ520FDG

Page 1: ...ental Lock Resume Play Closed Caption Decoder Virtual Surround PLEASE READ BEFORE USING THIS EQUIPMENT P Owner s Manual 1EMN21785 P Remote Control NF100UD P AA batteries x 2 Owner s Manual SUPPLIED AC...

Page 2: ...arr t brusque l utilisation d une force excessive et des sur faces irr guli res risquent de d stabiliser l ensemble et de le renverser 9 Ventilation Slots and openings in the cabinet and the back or b...

Page 3: ...the antenna or cable system This will prevent damage to the unit due to lightning and power line surges 15 Power Lines An outside antenna system should not be located in the vicinity of overhead power...

Page 4: ...he outlet before carrying the unit TO AVOID THE HAZARDS OF ELECTRICAL SHOCK AND FIRE Do not handle the power cord with wet hands Do not pull on the power cord when disconnecting it from an AC wall out...

Page 5: ...GS 16 FUNCTION TABLE 16 AUDIO MENU 17 SUBTITLE LANGUAGE 17 ANGLE MENU 17 ZOOM 17 BLACK LEVEL MENU 18 V S S Virtual Surround System 18 SEARCH MENU 18 REPEAT PLAYBACK 19 PROGRAMMED PLAYBACK 20 RANDOM PL...

Page 6: ...m recorded on another source VCR or video camera use the AUDIO VIDEO input jacks on the front of the unit Connect the Audio Video output jacks of another source to the AUDIO L R and VIDEO jacks of thi...

Page 7: ...ices to be connected to the unit To connect to a MD or DAT deck set DOLBY DIGITAL to PCM for the audio output in the setup mode and to con nect to a Dolby Digital decoder set to BITSTREAM Refer to AUD...

Page 8: ...REV E Button DVD P 15 FWD D Button DVD P 15 29 STOP C Button DVD P 15 30 DISC MENU Button DVD P 15 31 ENTER Button TV P 10 DVD P 17 32 K L B Buttons TV P 10 DVD P 15 33 RETURN Button DVD P 17 NOTES We...

Page 9: ...ayed Select the language for screen display and perform auto programming of the channels 1 After antenna or cable connection is completed connect the power cord into a standard AC outlet 2 Press POWER...

Page 10: ...dialogue caption or text display 1 Press SET UP Use K K L L to point to CAPTION 2 Press ENTER repeatedly to select your desired caption mode CAPTION mode You can watch dramas movies and news while ca...

Page 11: ...o confirm that channel s has have been deleted or added select it them using CH K K L L CHANNEL SET UP Channel presetting is necessary at the start or in case you moved the TV to a different area TV T...

Page 12: ...you wish to block Press ENTER repeatedly to set it to BLOCK or VIEW NOTES When you select a rating and set it to BLOCK the higher ratings will be blocked automatically The lower ratings will be avail...

Page 13: ...you turn off the power using a wall switch If you forget the code unplug the power cord for 10 seconds to restore the access code to 0000 C NEW CODE X X X X CONFIRM CODE _ _ _ _ MPAA RATING SET UP 4 U...

Page 14: ...the recording status of a disc the disc may not be played back at all or normally the picture or sound may not be smooth etc 9 If there is too much recording space left on a disc the used portion is l...

Page 15: ...avigate the disc and access special features 1 Press DISC MENU or TITLE The DVD main menu the title menu will appear You can call up the menu even during playback 2 Use K K L L s s B B to select an it...

Page 16: ...UDIO STREAM 8 ANGLE 1 ANGLE 8 OFF SUBTITLE STREAM 1 SUBTITLE STREAM 32 OFF ON OFF 1 2 CHAPTER SEARCH TITLE SEARCH TIME SEARCH MARKER SEARCH OFF CHAPTER TITLE OFF A A B OFF ZOOM 1 1 3 ZOOM 2 2 0 ZOOM 3...

Page 17: ...e TV screen it means this function is not available on the disc 3 Press RETURN to exit the menu STEREO SOUND MODE You can select sound output mode during CD playback 1 Press MODE during playback 2 Use...

Page 18: ...on a disc TRACK SEARCH 1 During playback press MODE repeatedly until SEARCH menu appears 2 Within 60 seconds use the Number buttons to select the desired track number Playback will start from the sele...

Page 19: ...04 23 TOTAL REPEAT PLAYBACK REPEAT TRACK 1 During playback press MODE repeatedly until REPEAT menu appears 2 Use K K L L to select your desired repeat mode OFF Repeat function off TRACK Current track...

Page 20: ...DISPLAY again to show current Title The elapsed and remaining playing time of the current title will be displayed 3 Press DISPLAY again The bit rate and the current repeat setting will be displayed I...

Page 21: ...AUDIO P 22 PARENTAL P 22 OTHERS P 23 CUSTOM QUICK INITIALIZE Press SET UP twice LANGUAGE SETTING 4 Use K K L L to select the desired item then press ENTER AUDIO Sets the audio language SUBTITLE Sets...

Page 22: ...ack of DVD discs 4 Use K K L L to select an item then press ENTER repeated ly until your desired setting appears DRC Dynamic Range Control ON To compress the range of soft to loud sound default OFF Ou...

Page 23: ...with parental lock Be sure to check if the parental lock function operates in the way that you have set PASSWORD CHANGE 4 Enter current password with the Number buttons then press ENTER 5 Use K K L L...

Page 24: ...rared signal Select the correct mode to operate by pressing SELECT The operable range from the unit is 10 feet 3 m within 15 Check if antenna or cable is connected properly Check for the broken pin or...

Page 25: ...his unit does not support DTS audio This is not a malfunc tion During the playback of a 2 layered disc pictures may stop for a moment This happens while the 1st layer is being switched to the 2nd laye...

Page 26: ...al the laser optical pickup unit may be dirty Consult your dealer or an Authorized Service Center for inspection and cleaning of the laser optical pickup unit CABINET CLEANING Wipe the front panel and...

Page 27: ...Greenlandic 5758 Guarani 5360 Gujarati 5367 Hausa 5447 Hebrew 5569 Hindi 5455 Hungarian HUN 5467 I K Icelandic ICE 5565 Indonesian 5560 Interlingua 5547 Interlingue 5551 Inupiak 5557 Irish IRI 5347 I...

Page 28: ...minals Antenna input VHF UHF CATV 75 ohm unbalanced F type Video input RCA connector 1 Audio L R input RCA connector 2 Headphone 1 8 stereo 3 5 mm Coaxial digital audio output One pin jack 500 m Vpp 7...

Page 29: ...MEMO 29...

Page 30: ...30 MEMO...

Page 31: ...31 MEMO...

Page 32: ...CHARGES REMOVAL OR REINSTALLATION OF THE COVERED PRODUCT EXCEPT AS PROVIDED HEREIN ACCESSORIES USED IN CONJUNCTION WITH A COVERED PRODUCT ANY LOSS OTHER THAN A COVERED BREAKDOWN OF THE COVERED PRODUC...

Reviews: