gfm BL300-1 User Manual Download Page 8


8

Place the handset in the base station to charge for 16 hours prior for first use. If you don’t 

properly charge the phone, battery performance will be compromised. 


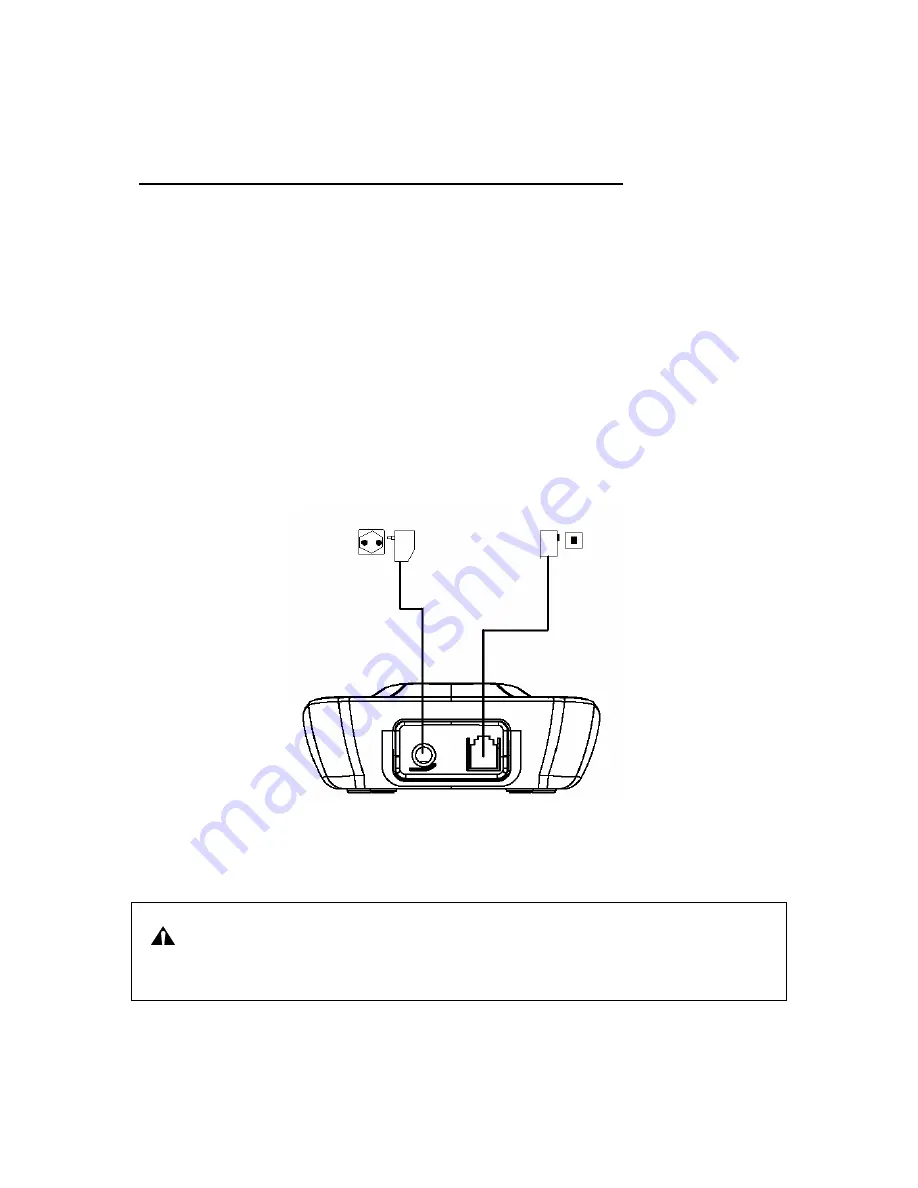
Connecting the Base Station and Power Plug 

Connecting the plugs to the corresponding sockets in the base station (they can not be 
connected incorrectly because the sockets and plugs are designed prevent reverse poling). Lay 
the cable under the telephone to the rear. Plug the telephone line in the telephone connection 
socket. Insert the power plug at the other end in the power outlet. The base station is now ready 
to operate. 

Only use the connection cable supplied. 


 AC power outlet          Phone jack 


CAUTION: 
Plug the adapter to the socket outlet that near the equipment and shall be easily 

accessible. Use only the power supply that came with this unit. Using other power supplies 
may damage the unit. 


Summary of Contents for BL300-1

Page 1: ...Digital Cordless Phone User Manual Model BL300 1 BL300 2...

Page 2: ...ng from the Phone Book 13 Muting the Microphone 13 Muting the Ringer volume 13 Call Transfer Forwarding 13 Three Party Conference 14 Changing the Earpiece Volume 14 Paging the Handset 14 Handset Speak...

Page 3: ...power company 8 Do not allow anything to rest on the power cord Do not locate this product where the cord will be damaged by persons walking on it 9 Do not overload wall outlet extension cords as this...

Page 4: ...s Risk of explosion if battery is replaced by an Incorrect type Dispose of used batteries according to the instructions Use only with GPI GP60AAAH2BMJZR 2 4V 600mAH NiMH rechargeable battery LEXEL LH0...

Page 5: ...key down key Left soft key SKL Menu OK key Right soft key SKR Intercom key Right key Phonebook key Left key Mute key External Call key Flash key Speaker phone key End call key Asterisk Ringer off key...

Page 6: ...6 Base layouts Charger suitable for Model BL300 2 Paging CID...

Page 7: ...Icon Date Time icon Calls List icon Display Setup icon Base Setup icon Phone Book icon HS Settings icon Getting Started Install and Charge the Battery Pack 1 Open the battery compartment by sliding t...

Page 8: ...sockets and plugs are designed prevent reverse poling Lay the cable under the telephone to the rear Plug the telephone line in the telephone connection socket Insert the power plug at the other end i...

Page 9: ...50 entries 10 Extended redialing for 10 call numbers 11 Caller ID function with 30 name number call list 12 Microphone and ringer muting function 13 Low battery and out of range indicators 14 Key lock...

Page 10: ...e dialing z Press key and wait for a dialing tone Dial the telephone number as required It will start counting when the call is connected the call timer format is HH MM SS After the connection is esta...

Page 11: ...dset is lifted up from the base Press key to terminate the call Receiving Internal Call When an internal call arrives the handset will ring and show the caller s handset number and flashes in the hand...

Page 12: ...Press or key to select the desired record Press SKL key to enter Redial menu Press or key to select Delete Entry and press SKL key the LCD will display Delete press SKL key to confirm Delete all Sing...

Page 13: ...or off during a call Muting the Ringer Volume Press and hold key in idle mode to activate or deactivate the handset Ringer The icon turns on or off Call Transfer Forwarding It is possible to put exter...

Page 14: ...ter conference the second handset off hook will also enter conference Changing the Earpiece Volume Press or key as often as necessary to change the earpiece volume during a call Paging the Handset If...

Page 15: ...ne Book menu Press or key to select New Entry and press SKL key Enter number max 24 digits and press SKL key when finished Enter name max 15 characters and press SKL key when finished Press or key to...

Page 16: ...to select caller groups Press SKL key to confirm Note Press SKR key to delete any incorrect input Delete All Press SKL button to enter the main menu Press or key to select phone Book Press SKL button...

Page 17: ...ress SKL button to enter the main menu Press or key to select Call List Press SKL button to enter Call List Note If there is no record in call log empty information will display Press or key to find t...

Page 18: ...Display Setup Press SKL button Press or key to select the desired wallpaper or Wallpaper off Press SKL button to confirm the selection Handset Name Press or key to choose the selection Handset Name t...

Page 19: ...to choose the selection Ringer through the submenu Base Setup Press SKL button Ringer Volume Press or key to choose the selection Ringer Volume rough the submenu Ringer Press SKL button Press or key...

Page 20: ...essage Waiting Indication VMWI off Press or key to choose the selection MW Indication through the submenu Base Setup Press SKL button You will be prompted VMWI OFF Press SKL button to confirm the sett...

Page 21: ...olume 4 Ringer Volume 5 or Off Press SKL button to confirm Ext Ringtone Press or key to choose the selection Ext Ringtone through the submenu Ringer Setup Press SKL button Press or key to select one t...

Page 22: ...odies Press SKL button to confirm Set Alarm Press or key to choose the selection Set Alarm through the submenu HS Settings Press SKL button Press or key to choose Set Alarm or Alarm Tone Press SKL but...

Page 23: ...select Base1 Base2 Base3 or Base4 Press SKL button Handset display shows Searching Press and hold Page key on the base station for 10 seconds until acknowledgement signal is heard Note 1 Once the reg...

Page 24: ...to choose the selection Tones on off through the submenu HS Settings Press SKL button Press or key to choose Key tone Battery Low and Out of Range Press SKL button Press or key to select Off or On Pr...

Page 25: ...03 is a REN of 0 3 The REN is separately shown on the label too 5 If this equipment causes harm to the telephone network the telephone company will notify you in advance that temporary discontinuance...

Page 26: ...elines place the base unit at least 20 cm from nearby persons NOTE This equipment has been tested and found to comply with the limits for a Class B digital device pursuant to Part 15 of the FCC Rules...

Page 27: ...n it to any Meijer store for a full refund within 6 months 180days of purchase when accompanied by a receipt For customer support please call 866 845 9436 or go to www gfmproducts com Dist by wholesal...

Reviews: