

100-167 Rev. B
Release Date: 10/29/18
Page
4
of
9
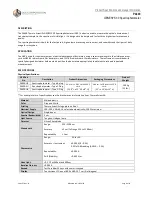
Product Specifications and Usage Information
P4400
GENESYS 30 Spectrophotometer
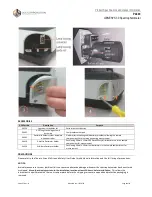
FIGURE 2
Dosimeter Holders:
Install the holder system according
GEX Doc# 100-168 - GENESYS 30 Dosimeter Holder System
. Once the holder system is
properly installed, the dosimeters can be inserted and the sample compartment lid of the GENESYS 30 should remain open
during measurements. The lid should be closed when not in use or during Performance Verification (P.V).
INSTRUMENT CALIBRATION / PERFORMANCE VERIFICATION (P.V.)
The instrument is not provided by Thermo Scientific with a Calibration Certificate because of a change in technical terminology.
The instrument can be tuned so that it performs within a given list of specifications but technically cannot be ‘calibrated’.
Therefore, it is tested at the factory for proper performance, but it is the user’s responsibility to ultimatiley verify the
instrument performance after the instrument is installed at the user’s site.
The term ‘Performance Verification’ replaces the older term ‘Calibration Verification’ but the intent of either is the same; to
determine if the instrument is performing within the manufacturer specifications. See
GEX Doc# 100-270 - GENESYS 30
Performance Verification
for complete details.
STAND-ALONE MEASUREMENTS
The instrument can be used when disconnected from a PC to make measurements. For most users, this will never be a
necessity, but some users may find it useful despite the limitations from using the instrument in this manner. For more
information on making fixed or scanning measurements, see the Thermo Scientific GENESYS 30 User Guide.
Fixed Wavelength Measurements:
The protocol below must be followed to make fixed wavelength dosimeter measurements:
1.
Insert the appropriate dosimeter holder according to GEX Doc
#100-168, GENESYS 30 Dosimeter Holder System
-
Product Specifications and Usage (PSU)
.
2.
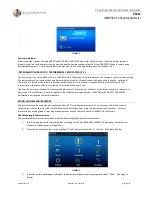
From the instrument home screen, highlight “Fixed” and press the enter (
) button. See Figure 3 below.
FIGURE 3
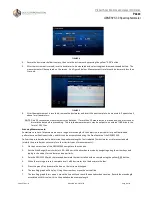
3.
Input the correct wavelength setting for the dosimeter type you are measuring and select “Done”. See Figure 4
below.


