

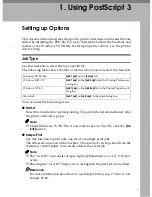


Setting up Options
3
1
DDDD
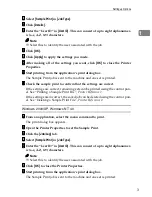
Select
[
Sample Print
]
in
[
Job Type
]
.
EEEE
Click
[
Details
]
.
FFFF
Enter the “User ID” in
[
User ID
]
. This can consist of up to eight alphanumer-
ic (a-z, A-Z, 0-9) characters.
Note
❒
Select this to identify the user associated with the job.
GGGG
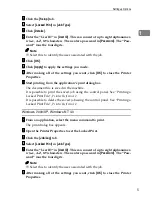
Click
[
OK
]
.
HHHH
Click
[
Apply
]
to apply the settings you made.
IIII
After making all of the settings you want, click
[
OK
]
to close the Printer
Properties.
JJJJ
Start printing from the application's print dialog box.
The Sample Print job is sent to the machine and one set is printed.
KKKK
Check the sample print to confirm that the settings are correct.
If the settings are correct, remaining sets can be printed using the control pan-
el. See “Printing a Sample Print File”,
Printer Reference 2
.
If the settings are incorrect, the saved job can be deleted using the control pan-
el. See “Deleting a Sample Print File”,
Printer Reference 2
.
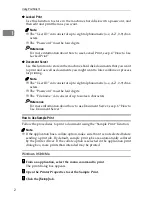
Windows 2000/XP, Windows NT 4.0
AAAA
From an application, select the menu command to print.
The print dialog box appears.
BBBB
Open the Printer Properties to set the Sample Print.
CCCC
Click the
[
Job/Log
]
tab.
DDDD
Select
[
Sample Print
]
in
[
Job Type
]
.
EEEE
Enter the “User ID” in
[
User ID
]
. This can consist of up to eight alphanumer-
ic (a-z, A-Z, 0-9) characters.
Note
❒
Select this to identify the user associated with the job.
FFFF
Click
[
OK
]
to close the Printer Properties.
GGGG
Start printing from the application's print dialog box.
The Sample Print job is sent to the machine and one set is printed.
Summary of Contents for DSc224
Page 4: ...ii...
Page 24: ...Using PostScript 3 20 1...
Page 37: ...Copyright 2002...
Page 38: ...PostScript 3 Board Type 1232 Operating Instructions Supplement EE GB UE USA B463 8680...


