06951013.02
18
G3P
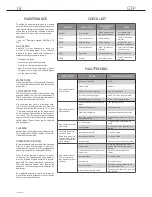
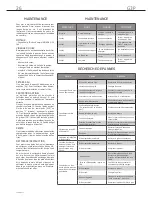
MAINTENANCE
To obtain the optimum return and the longest
possible life for your high pressure cleaner, it is
important to maintain the machine. We recom-
mend that you follow the following directions
and refer to the check list on the next page.
MOTOR
- see the ”Operation manual HONDA GCV
160”.
OIL CHANGE
Normally, it is not necessary to check the
oil level of the pump again. If it is, however,
wished to be more careful with the pump, oil
replacement can proceed as follows:
- dismount the body
- unscrew the oil plug of the pump
- drain the oil by turning the machine
- add oil in level with the lower edge of the oil
filling hole (for oil type and quantity please
see the technical data).
WATER FILTER
Clean the water filter (2.4) as needed. Dismount
the hose screwed connection and remove the
water filter.
FROST PROTECTION
The best frost protection is to place your high
pressure cleaner in a frost free environment. If
this is not possible, the high pressure cleaner
must be frost protected as follows:
Dip the water inlet hose in a container hold-
ing 5 litres of antifreeze/water mix. Start the
machine by pressing the switch (2.17) to pos.
“I”, activate the pistol and let the machine run
at low pressure until anti-freeze comes out of
the nozzle (2.8). Release the pistol trigger a
couple of times to frost protect the by-pass and
safety valves. The anti-freeze can be collected
and used again.
CLEANING
Always keep your high pressure cleaner clean.
This increases the life and function of the indi-
vidual parts considerably.
DISASSEMBLY/DISPOSAL
All replaced parts such as water filter, fine sand
filter, as well as contaminated oil and anti-
freeze must be handed in to the local approved
authority/institution for deposit/destruction.
When the high pressure cleaner is no longer
to be used, the detergent as well as pump oil
must be drained off and delivered in accord-
ance with the above mentioned instructions.
The high pressure cleaner must likewise be
handed in to the local, approved institution for
destruction.
Any replaced parts from service visits may be
given to the service personnel who will deliver
them to the proper authority.
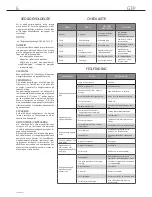
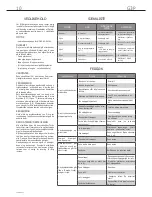
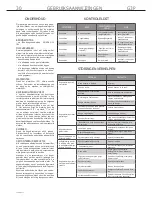
CHECK LIST
ACTION
WHAT/WHO
WHEN/HOW
OFTEN
HOW
Instruct
New operator
Before operator uses
high pressure cleaner
Let operator read
instruction guide
Check
High pressure hose
During daily use
Leaks? - call service
engineer
Check
Pressure gauge
During daily use
Too high/too low? -
call service engineer
Check
Detergent suction
Daily - by means of
detergent
Lack of suction/leaks?
-call service engi
Clean
Water filter
Weekly/as needed
See maintenance
Check
Gaskets
Every other month
Leaks? - call service
engineer
FAULTFINDING
SYMPTOMS
CAUSE
CORRECTIVE ACTION
High pressure cleaner
does not start.
No petrol in the tank.
Refill
Petrol too old.
Replace
Petrol cock not in vertical pos.
Turn cock to vertical.
Too much fuel in the engine.
Wait 5 min., then restart as usual.
On spark plug worn/ defective.
Check electrode gap/ replace.
High pressure cleaner
stops suddenly.
Check points under preceding para-
graph.
Take necessary action.
Carbonised spark plug.
Clean spark plug.
Petrol filter clogged up.
Empty petrol tank and clean filter.
Operating pressure too high (nozzle
dirty, wrong nozzle).
Clean/change nozzle (see technical
data).
High pressure hose and
pistol shake.
Air in the pump.
Tighten suction hose. Bleed the
pump.
Lack of water.
Clean suction filter. Open tap com-
ple-tely.
The pump “hammers”
with open pistol.
Nozzle partly blocked.
Clean the nozzle.
Safety valve starts func-
tioning or high pressure
cleaner operates at too
high a pressure.
Nozzle partly blocked.
Clean the nozzle.
Wrong nozzle.
Change nozzle (see technical data).
High pressure cleaner
does not operate at
max. pressure/pressure
oscillates.
Lacks water.
Open the tap completely. Clean
suction filter. Inlet water pressure
too low.
The suction side of the pump leaks
(takes in air).
Check for leaks, tighten hose
clamps.
Nozzle blocked.
Clean the nozzle.
Nozzle worn.
Mount new lance.
Air in the system.
Bleed the cleaner. Please see sec-
tion “start”, point 3+4.
Wrong nozzle/defective nozzle.
Change nozzle. Note the type (see
technical data).

