background image

10

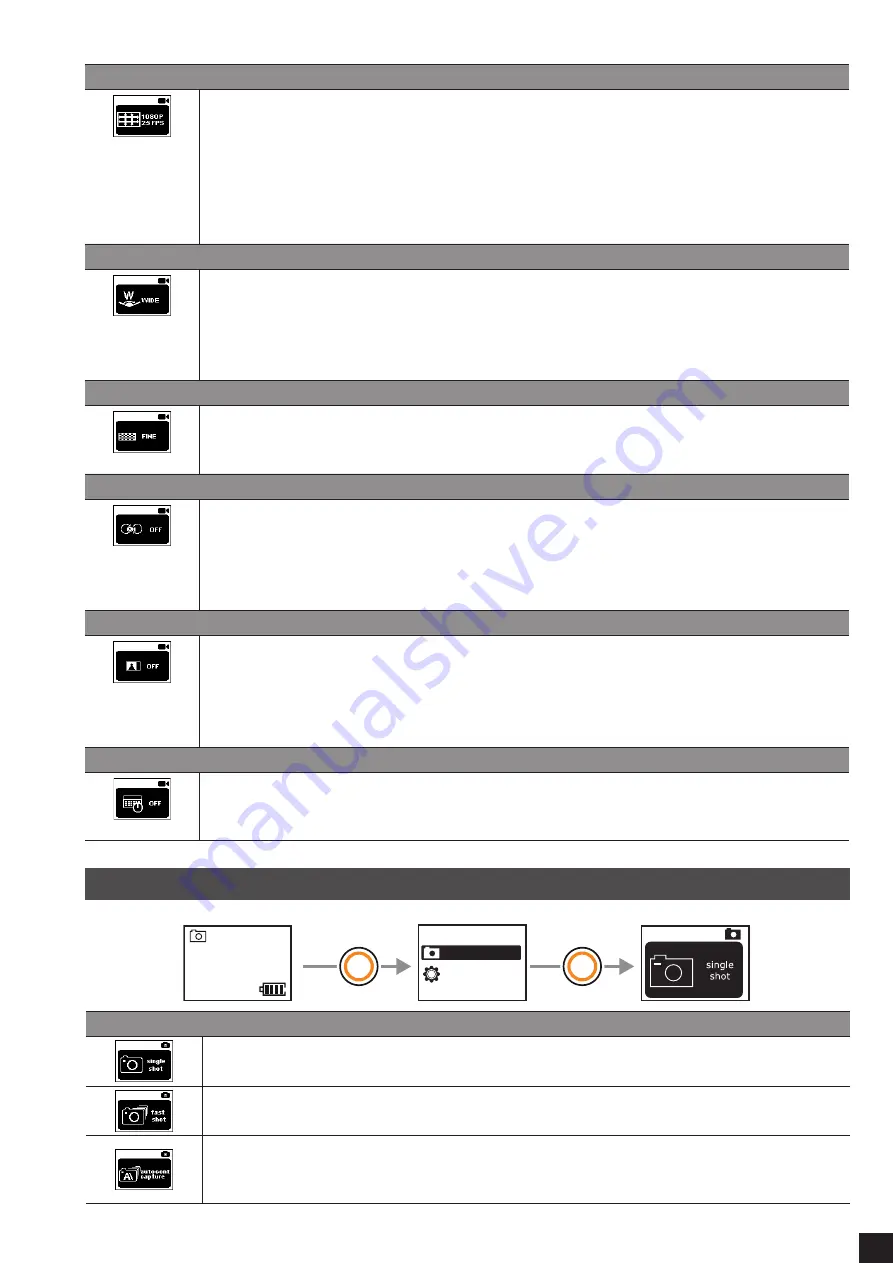
Video resolution

1920 x 1080, 60fps, 16:9  -  1920 x 1080, 48fps, 16:9  -  1920 x 1080, 30fps, 16:9 

1920 x 1080, 24fps, 16:9  -  1280 x 960, 60fps, 4:3  -  1280 x 960, 48fps, 4:3 

1280 x 720, 120fps, 16:9  -  1280 x 720, 60fps, 16:9 


IMPORTANT: the number of frames per second (fps) can change depending on 

the TV standard selected. The information given here is for an NTSC standard. 

E.g. if the PAL standard is selected, 60fps will become 50fps.

Camera angle

Gives a choice of camera angle from 4 options: wide, medium, narrow, small.


Important, some camera angle options may be unavailable depending on the 

video resolution settings. 

1080p, wide = 134°  -  1080p, medium = 122°  -  1080p, narrow = 101°


1080p, small = 83°  -  960p, wide = 145°  -  720p, wide = 150°

Video bitrate

Choose high or normal video bitrate. 

A high video bitrate will give better colour definition but will use more memory 

space.

Continuous recording

Activer/Désactiver l'enregistrement en boucle. 

Lorsque la carte mémoire est pleine, la caméra ecrase le fichier le plus ancien 

pour continuer d'enregistrer. 

ATTENTION : fonction indisponible avec les mode d'enregistrement "audio 

uniquement", "Time-lapse vidéo"

Self-righting image

Enable/Disable continuous recording. 

When the memory card is full, the camera overwrites the oldest file in order to 

continue recording. 

IMPORTANT: this function is not available with the “audio only’ and “time-lapse 

video” recording modes

Insertion of the date

Enable/Disable insertion of the date into the video. 

IMPORTANT: this function is not available with the “1280 x 720, 120fps” 

resolution mode

PHOTO SETTINGS

Press and 

hold

Press 

once

Mode photo

100-0088

1888

8M

M

Photo mode

Single shot mode

"Burst mode. 

Options possible: 3/s, 5/s, 8/s"

"Time-lapse photo capture (generates one file in .JPG format per photo).


Takes a photo at regular intervals. 

Interval options: 0,5s / 1s / 2s / 3s / 5s / 10s / 20s / 30s"

Summary of Contents for G-Eye 2 Ultimate

Page 1: ...S 7 ACTIVATING THE WI FI 7 ADJUSTING THE BRIGHTNESS 8 G SENSOR ACCELEROMETER FUNCTION 8 CAMERA SETTINGS 9 ACCESSING THE SETTINS MENU 9 VIDEO SETTINGS 9 PHOTO SETTINGS 10 GENERAL SETTINGS 11 DEFAULT SE...

Page 2: ...2...

Page 3: ...ng stop button Wi Fi status indicator light Recording indicator light Battery charge indicator Video Audio recording button MicroSD card slot Mini USB port Micro HDMI port Microphone Red light power c...

Page 4: ...ode 2 1080P 50 Video resolution 16M 12M 8M Shooting resolution 3 100 0088 Number of saved files 00 00 01 Recording time 4 2H30 Remaining recording time 1888 Remaining number of photos 5 M N S Angle of...

Page 5: ...is unlocked Push the battery into its housing and relock the safety latch Do not force the battery into its housing as this could damage the camera and render it unusable CHARGING THE BATTERY 4h 12 6...

Page 6: ...by mode Press any button to wake it back up NOTE When the camera is in its waterproof case it is also possible to put it in hibernation mode by pressing the PHOTO and STOP buttons simultaneously for 5...

Page 7: ...DEO 00 00 00 2 Stop 1 Start 2 Stop 2H30 1080P 50 00 18 22 2H30 1080P 50 100 0088 1888 8M 1 Start TAKING PHOTOS 100 0088 2H30 1080P 30 100 0088 1888 8M 100 0089 1887 8M ACTIVATING THE WI FI 100 0087 2H...

Page 8: ...To set up your remote control follow the procedure described in its instruction manual ADJUSTING THE BRIGHTNESS Your camera automatically adjusts the ISO sensitivity based on the amount of ambient lig...

Page 9: ...TINGS Video mode 00 00 00 2H30 1080P 50 M Press and hold Press once Video recording mode Standard video recording video and audio Audio recording only Video recording only Time lapse video recording g...

Page 10: ...use more memory space Continuous recording Activer D sactiver l enregistrement en boucle Lorsque la carte m moire est pleine la cam ra ecrase le fichier le plus ancien pour continuer d enregistrer AT...

Page 11: ...possible OFF 50 100 LED indicator Enable Disable camera status indicators Options possible OFF 2 4 Display on the G Eye 2 LCD accessory Enable Disable display of contextual information on the screen...

Page 12: ...B drive DISPLAYING PHOTOS VIDEOS ON A TV HDTV Using an HDMI micro HDMI cable and the G Eye 2 LCD accessory these two products are sold separately you can display your photo and video content on your t...

Page 13: ...and when you begin your activity condensation could appear on the inside of the case This phenomenon could also happen due to the temperature of the camera itself To solve this problem you can insert...

Page 14: ...the implicit warranty of fair marketable quality and or fitness for purpose Under no circumstances will GEONAUTE be held liable for any damage whether direct or indirect general or specific caused by...

Page 15: ...td 2 IMPORTADO PARA BRASIL POR IGUASPORT LtdaCNPJ 02 314 041 0022 02 141031 84 3 3 408 379 04 2471 3612 TURKSPORT Spor Ur nleri Sanayi ve Ticaret Ltd tiOsmaniye Mahallesi oban e me Ko uyoluBulvar No 3...

Reviews: