


English
3
Chapter 2: Getting Started
2.1 Connect TVGo A11
TVGo A11 supports cold boot and remote boot functions for
PCI bus 2.1 and above.
In order to have the PC Bios setting take effect (ref to 2.2 PC
bios setting),
for first time installation, please make sure
the PC system’s power cord is not connected to the
power jack even when the PC’s power is in shutdown
state. Turn on the power only after the TVGo A11 has
been firmly and securely plugged into the PCI slot.
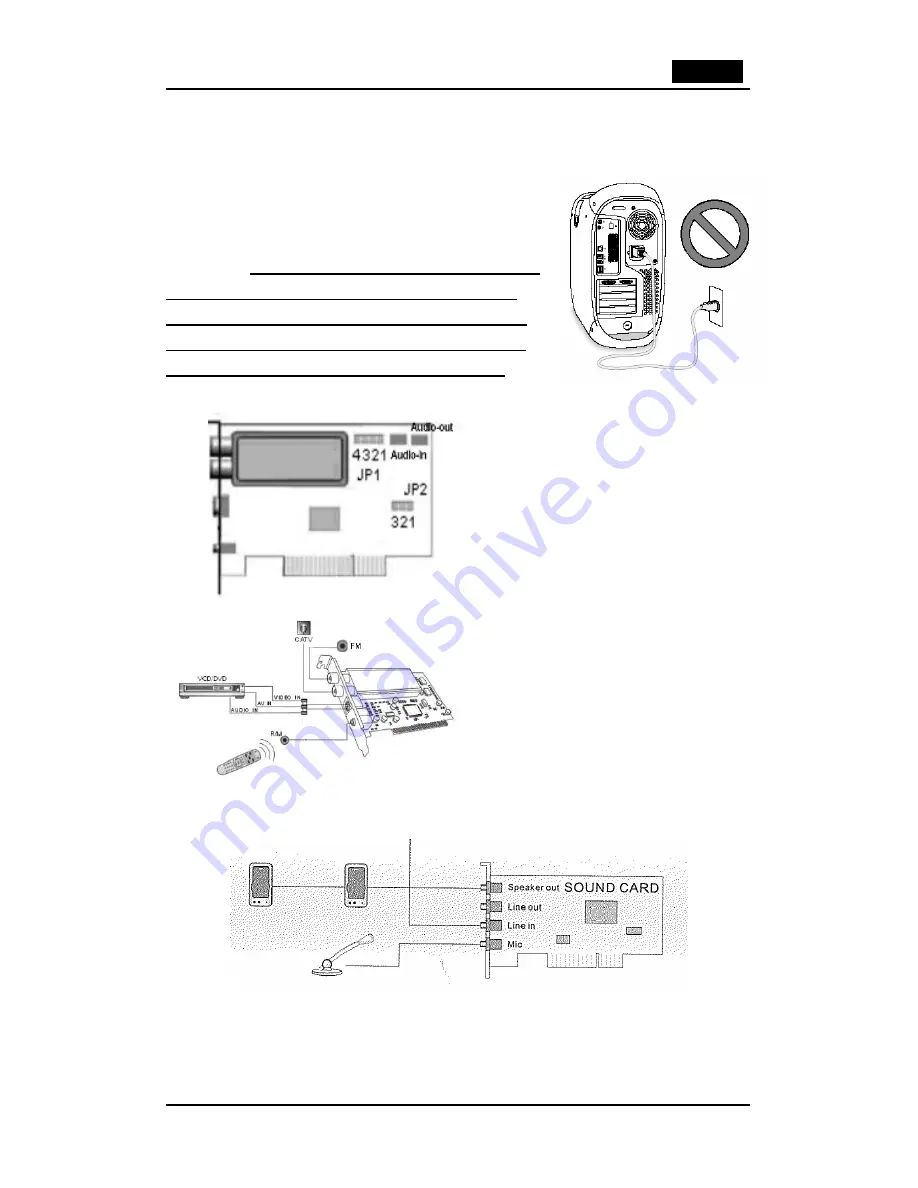
Refer to below wire connection diagram for correct connection:
1.
Make sure the JP2 pin 2-3 is closed.
(Factory default). (It is auto boot
enable configuration, if you want to
disable the auto boot function, please
change to pin 1-2 close to disable the
auto boot function). Internal audio
connect pin (TV card to sound card).
2.
Connect the SVHS output device to
“S-VIDEO IN”.
3.
Connect the DVD Player or Video
Recorder’s video output to “VIDEO IN”.
4.
Connect the FM cable to “FM”.
5.
Connect the video tape recorder’s
audio output to the “AUDIO IN”.
Caution
: Please take special care on the Remote sensor cable, don’t plug in or remove the
sensor cable while the PC system is in Power on state. Otherwise, it may cause TVGo A11
hardware failure.
2.2 PC BIOS Setting
Power on the computer and system will start POST (Power On Self Test) process. When the